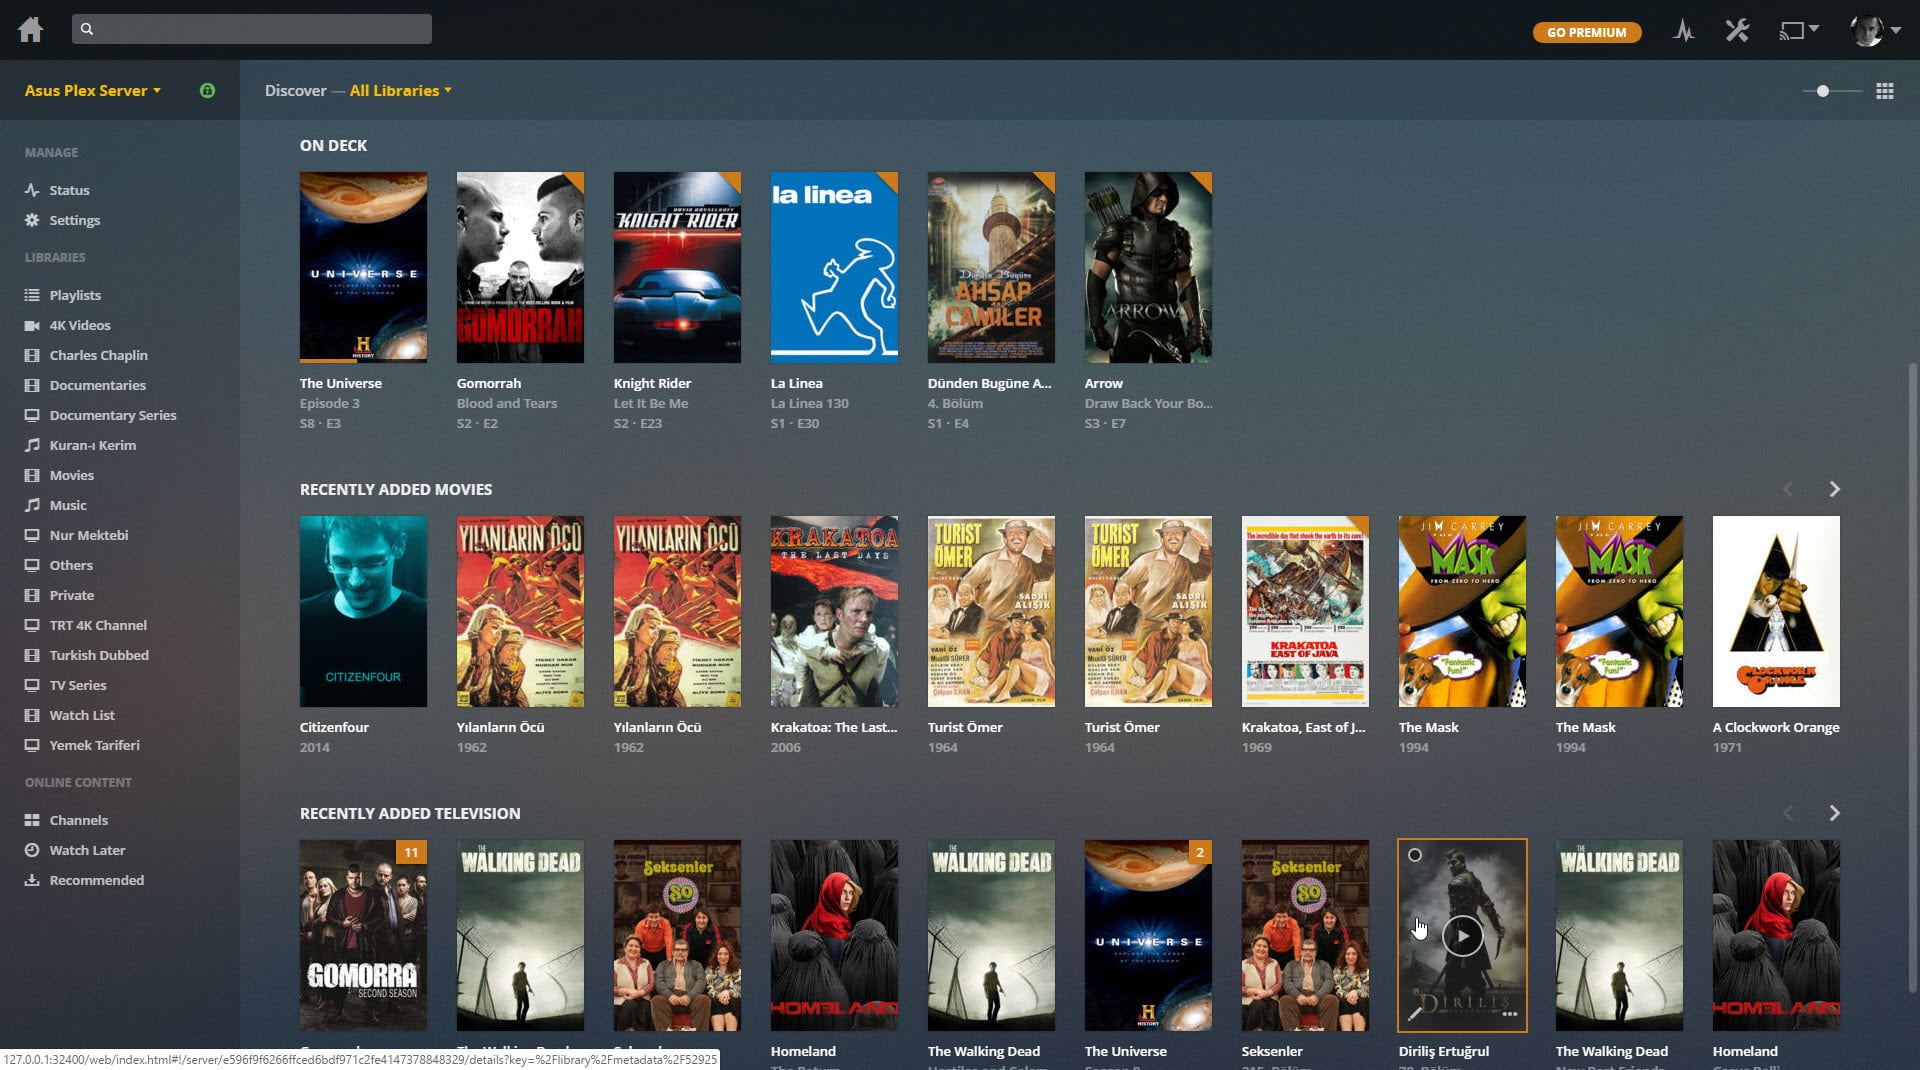
Today we bring you tricks to get the most out of Plex. With the arrival of Netflix, HBO etc. for our televisions and computers, options such as Plex or XBCM have taken a back seat. However, these multimedia centers have enormous potential if you take good advantage of all the functions they offer.
Best ways to use Plex: Tricks for a better streaming experience
Unlike video on demand services, at Plex we choose what content is available. So, after installing and configuring it correctly on our computer, it is time to get the most out of it and learn all its ins and outs. Here are a few tricks to watch out for.
To configure Plex you will need to have a computer that acts as a server with the native application. It is where the folders with the content will be, and it will have to be always on. And then you just have to install the client application on the devices where you want to use it.
1. Name files correctly so Plex understands you
Plex usually understands and organizes any series or movie you add to it in the source folder on its own. That is his grace, that he organizes it well to show you with the appropriate labels. However, it may not understand a file that does not have enough data in its name, and therefore it may not show it in the library. To correct it, follow these tips when adding files to the source folder:
- Movies: “Title (Year)”
- Series: “Title sXXeYY” (XX is the number of the season and YY the episode)
- Music: “Artist – Album / Track – Title” (Plex also listens to the metadata of MP3 files, so it may not correctly identify a song because this metadata is wrong.)
In general, Plex does not usually have problems detecting files, but if you happen to try to name the specific file that it does not recognize in this way.
2. Take advantage of online content
Plex doesn’t just rely on your local files, it also has different online content channels that you can access. Some, like Tidal for music, are paid, but there is also a news section with information channels or the so-called Web Shows, which are like YouTube channels and offer you other types of content to enjoy online.
All this appears in the Online content section that you will see in the left column of the web client or in the bottom bar of the mobile application. There is also a Podcast section to be able to enjoy the content.
3. Hide Plex from the DLNA server
This can be a bit strange, since one of the main and most important functions of Plex is to be able to play its content on your TV via DLNA without the need for applications. However, if you want to focus the use of Plex on the official apps and you don’t want it to be seen on all the TVs connected to your home via DLNA, there are some settings where you can disable it.
- Open Plex on your computer
- Click on the Settings button
- In the left column, click on DLNA in the Settings section
- Now, disable the Enable DLNA server option
- Use a third-party client with extra features
Plex has official clients for almost all platforms and operating systems, but if you don’t agree with the features it offers or want something more powerful, you can use a third-party client that is compatible with Plex. You have, for example, Kodi, a platform where you can log in with Plex to have a fusion of the functionalities of both.
5. Connect to your friends’ server
Plex allows us not only to view and play our content library but also that of our friends. To do this, you must add another Plex user as a friend and that they agree to share their libraries with you. Remember to edit your libraries to decide which ones you have access to.
- Open Plex on your computer
- In the upper right, click on your username and then on Users
- In the left column go to Family and friends, and in that section click on Sharing
- In Sharing, click on Invite a friend
- Enter your username or email
- Once you accept your invitation you will see its content

6. If something is wrong in TVDB, please change it yourself
TVDB is one of the sources that Plex chooses to add metadata and information to your movies and series. TVDB is a public database, like Wikipedia. This means that anyone can modify its content.
If you see that certain information is not correct in your movies or series (for example the broadcast date of an episode is not correct) you can modify it yourself. Register in TVDB.com and modify the information, although new users cannot, you must wait a week after creating the account.
7. Automate the content that reaches your server
With Plex we automate a large part of our entertainment, since we simply have to take care of supplying content to the Plex source folder. However, we can further automate the process by making content easier to reach the source folders.
The best thing is that you choose the Plex content folder in the apps you download content from so that they are downloaded there directly. On Mac, you can add smart folders that change the name of files when adding them. You can also use third-party applications that automate processes such as Hygeia for Windows or Hazel for macOS.
8. Enable verbose logging if you have problems
The detailed log provides information on problems you may have with your setup or playback in Plex. Normally it is not recommended to have it activated. However, if you can’t possibly fix a problem in Plex and tech support asks for the logs, you should turn on the detailed logs as well.
- Open Plex on your computer
- Click on the Settings button
- In the left column, click General
- Check the Enable verbose logging of Plex Media Server check box
9. The basic agents that you must install
Agents are in charge of ensuring that your movies and series have the appropriate information, as well as adding subtitles and other information. By default, Plex has some of them activated and others deactivated, so you can make decisions like, for example, activate OpenSubtitles.org to get subtitles, as well as others like fanart.tv or the aforementioned TVDB.com.
To do this, in the client go to Settings, and in the left column click Agents. There you can browse all that are available for movies, series, artists, albums and photos. Among the agents you will see a Local Media Assets that is used to implement your own agents.
10. Set the appearance and position of the subtitles
And since we are talking about subtitles, in the configuration of the Plex desktop client you have a whole section dedicated to how you want the subtitles to look. You can change the color, size and position. You can even disable the embedded ones to prevent them from causing the server to suffer when processing the video.
- Open Plex on your computer
- Click on the Settings button
- In the left column, click on the Player option
- Now, in the Audio and subtitles section, make the settings you want
11. Manage authorized devices
With so many possibilities when using Plex, especially since it can be used almost anywhere, you may want to control which devices your account is being accessed from to see if there are any intruders. If you delete a computer that acts as a server in the list, you will lose synchronizations and shared resources, and if you delete a device that acts as a client, you will have to log in again from it.
- Open Plex on your computer
- Click on the Settings button
- In the left column, click on Authorized Devices
- Click on the X of the device you want to delete
12. Configure the playback quality of your videos
Fluency or resolution? If you are going to watch multimedia content using your home network, this is a question that you end up asking yourself. Plex allows you to set a default streaming quality for your videos, so you can adjust it to avoid stuttering videos with higher resolution.
- Open Plex on your computer
- Click on the Settings button
- In the left column, click Quality
- Open the Video quality menu, and choose the one you want to use
- There is an option for videos below that resolution to be played in their original quality
- Disney and Netflix may take over theaters
- How to use TikTok Stitch to create videos?
- How to make Instagram live broadcast effects?
13. Purchase Plex Pass to have all the features

Plex Pass is Plex’s premium option, with which we can enjoy a series of exclusive features. Its price is $4.99 if you hire it for a month, $39.99 if you choose to have it for a year and $119.99 if you choose the life plan. Among other things it offers:
- Trailers and interviews of the movies you have
- Offline downloads of content on mobile devices
- Automatic upload of phone photos to Plex
- Synchronization with your mobiles
- Plex Home to add members to the family with different permissions and restrictions
- All official apps for free
14. Hide not downloaded content on your mobile
The good thing about if you end up buying the premium or the mobile application is that you will have features such as downloading the content you want to watch it offline. But if you have too much content online and you want to focus on what is downloaded, the mobile app also allows you to hide everything that you have not downloaded.
You simply have to open the left side menu by clicking on your profile image or sliding your finger, and once inside, activate the Only downloaded content button. In the Plex index, all the noise of online channels and other content will stop coming out to focus on what you have downloaded.
15. A cloud to store your mobile photos
One of the unexpected functions of Plex is that it can replace services like Google Photos, becoming a cloud to which you can upload the photos and videos you take with your mobile. The bad news is that you will need to have a Plex Pass subscription in order to use this feature.
You simply have to open the left side menu by clicking on your profile image or sliding your finger, and once inside activate the button to Activate uploading of photos and videos. If you do not have a Plex Pass, you will go to a screen where you are told that you need to hire it. By the way, the Plex app also allows you to see the local content of the mobile and send it by Chromecast.
16. Build your own Netflix or Spotify with Plex
If you have contracted the premium plan of the application, then you already have everything you need to be able to create your own streaming platform thanks to the mobile applications and total synchronization. In Xataka Basics we have already explained how to make your own Netflix and your own Spotify with this application.
To give you an idea, as a summary, you will only need to download the server application on the PC that is the server, choose the folders of all the music or multimedia content that you want to synchronize and install the app on your mobile official with your payment plan to access all media playback options.

17. Your mobile as a remote control
And if you are going to create your Netflix, do not think that you will need a special remote control to use it, since with the mobile app you can turn your device into one. You just have to open the side menu and click on the Remote option.
18. Don’t forget about virtual reality
This is also a feature for which you will need Plex Premium, but you will surely take advantage of it if you are a pioneer of virtual reality. Plex has applications for Daydream View, Samsung Gear VR and Oculus Go, offering you various experiences when consuming your content in virtual reality.
The most curious is to be able to talk with your friends while you are watching something in Plex with virtual reality, something like if you went to the movies with them and could talk quietly. You can also interact with the decorative elements around you and enjoy all the 360-degree videos you want to get the most out of it.
19. Send content to the Chromecast
And to finish turning Plex into a perfect tool for the multimedia content of your home, it also allows you to send content to the Chromecast or device compatible with Google Cast. To do this, you just have to click on the Google Cast button that you will see in the upper right corner, right next to the Settings button.
- How to mirror an Android smartphone screen to PC?
- How to find a song on TikTok?
- How to delete, hide or disable a Youtube channel?
20. Configure automatic maintenance and backups
Plex allows you to program, in the application for the PC that acts as a server, maintenance tasks such as reviewing and updating your libraries, optimizing databases, making backup copies and much more. It is in some settings where you can choose specifically what tasks you want to perform, when you want them to start and when they finish.
- Open Plex on your computer
- Click on the Settings button
- In the left column, click on Scheduled tasks
- Choose a start time, an end time and select the tasks you want to perform
21. Take advantage of keyboard shortcuts
Like other service applications, Plex on the web platform has a series of keyboard shortcuts to save some time when navigating the interface. These are the main ones:
- ? : Open keyboard shortcuts
- Esc : Close mode or menu
- G, then S : Go to Settings
- G, and then A : Go to Activity
- G, and then D : Navigate to Control Panel
- G, and then U : Go to Users
- / : Filter search
- Q : Open player
- W : Toggle seen / unseen
- E : Edit metadata
- I : Get Info
- Shift + S : Save Changes
- ****: Switch to full screen
- ↓ : Volume down
- ↑ : Increase volume
- **, or ← **: Search Backward (10 seconds)
- **. o → **: Advance (30 seconds)
- [or Alt + ← : Go back (10 minutes)
- ] or Alt + → : Advance (10 minutes)
- Shift + ← : Jump to the previous item
- Shift + → : Go to the next article
- X : Close player


