If you are wondering ‘how to change contact photo on iPhone’, you are not alone.
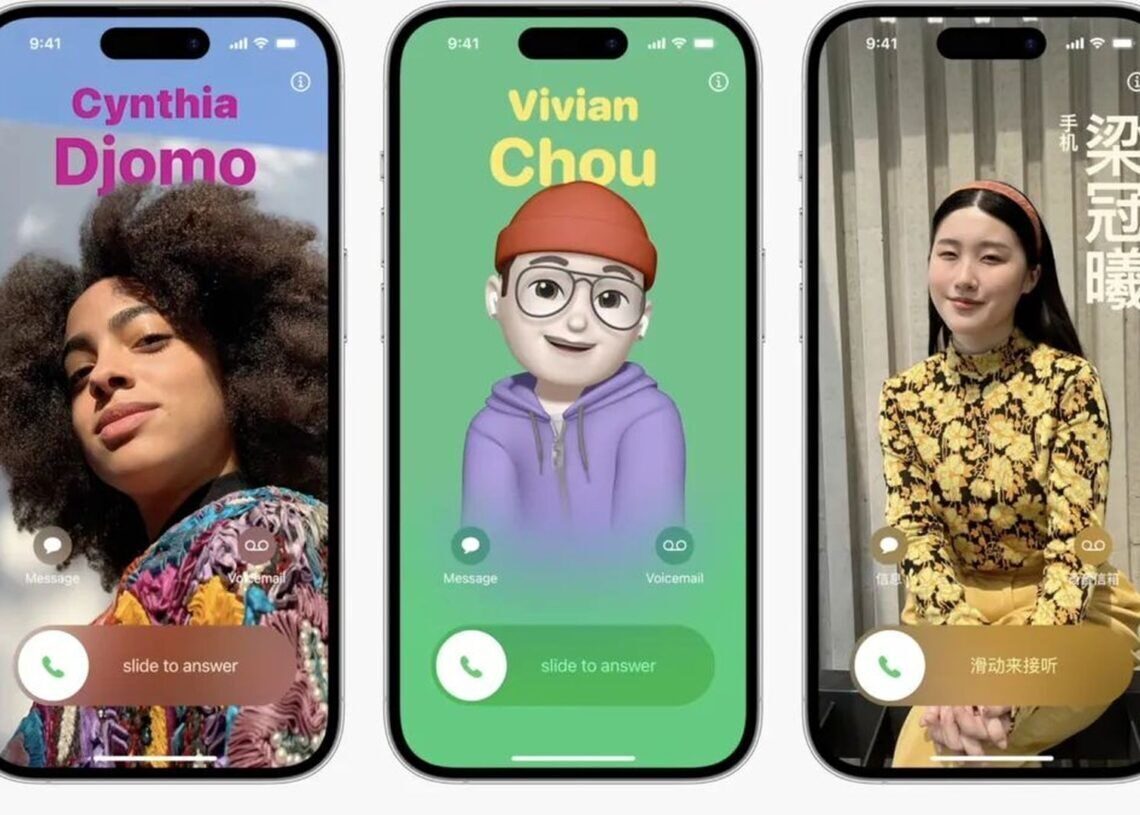
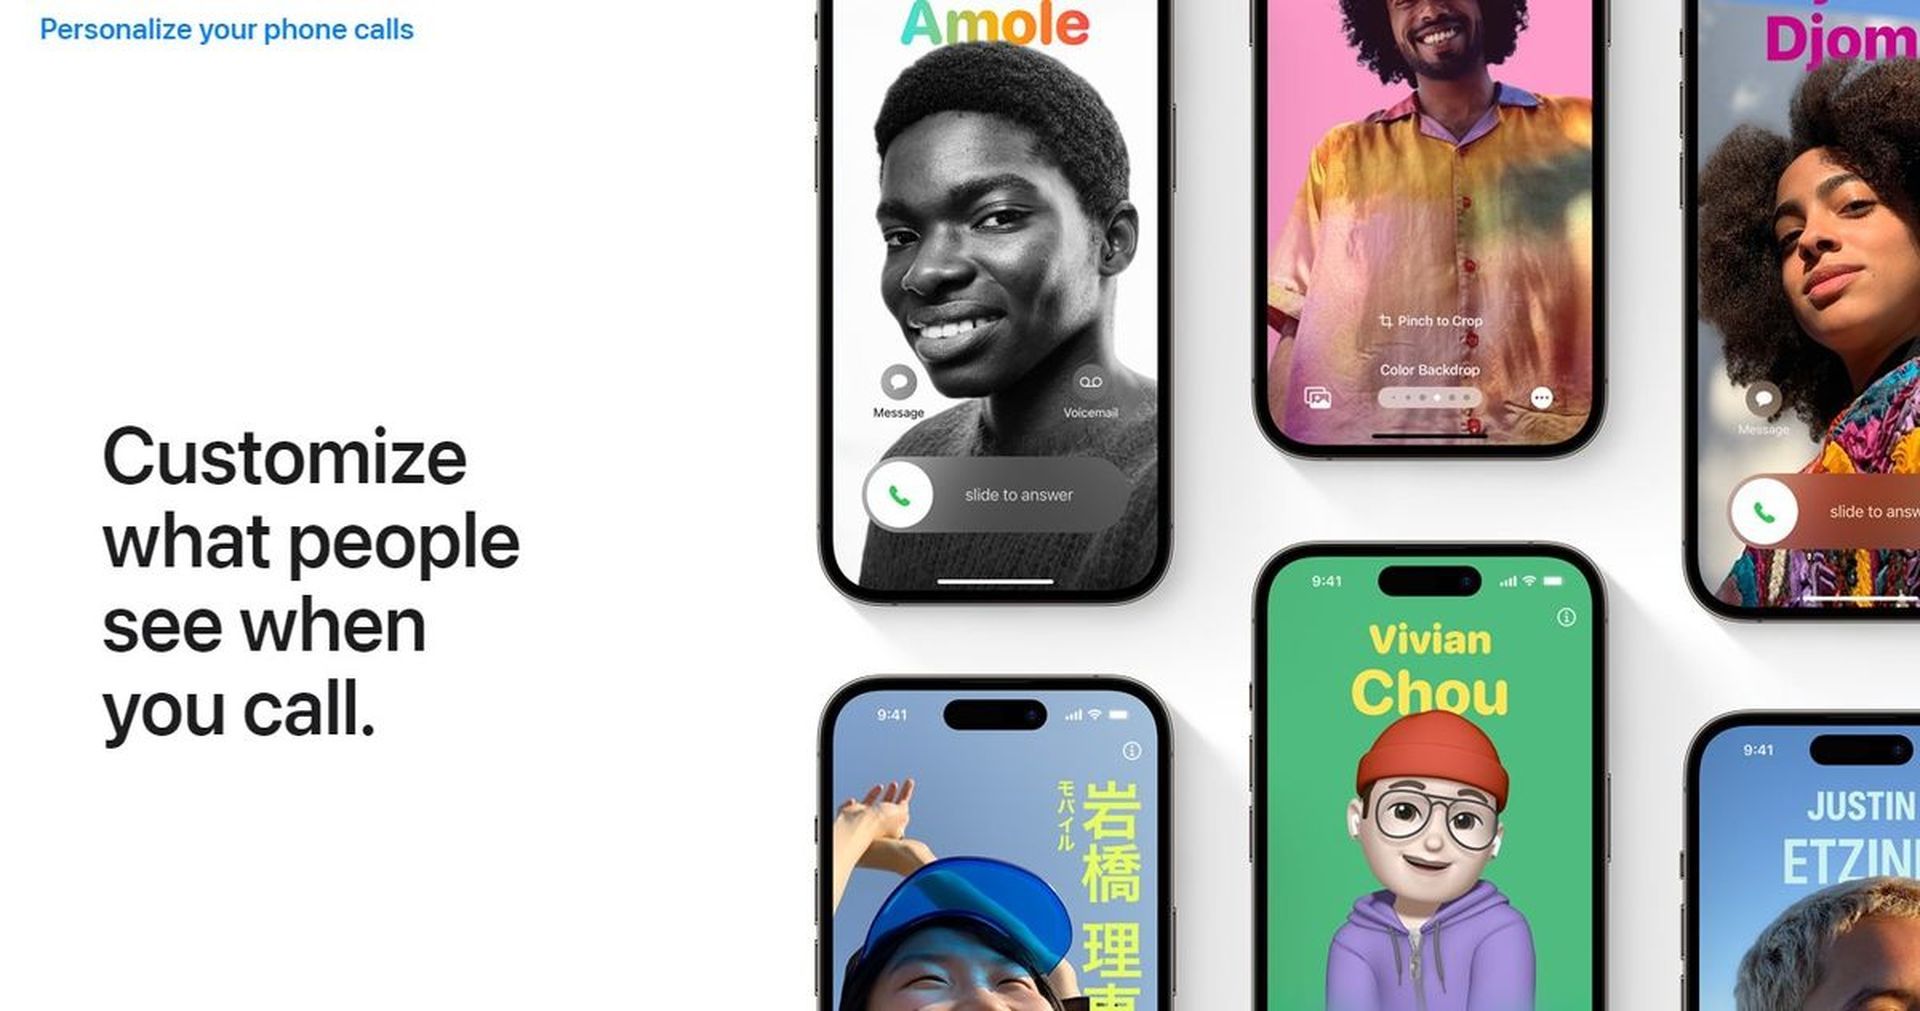
The highly anticipated iOS 17 was one of many new products and future software iterations unveiled at Apple’s WWDC 2023. Setting your Contact Photo and Poster, which is your personalized way of greeting someone on an iPhone when you call, is one of the most notable features of iOS 17.
With the option to control how you appear on someone’s screen, this new feature attempts to make calling more customized and user-friendly. So if you’re thrilled to check out this new feature on your iPhone and greet your friends and family in a personalized way whenever you contact them, then here’s how you can establish your Contact Photo and Poster on your iPhone.


iOS 17’s Contact Photo and Poster lets you modify how you look on someone’s iPhone when you call. You may choose your name font, memoji, and personal photo. This makes your pre-call welcome more imaginative and individualized. You may customize your contact poster with a photo, color, typeface, memoji, and more. Let’s take a look at ‘how to change contact photo on iPhone.’
How to change contact photo on iPhone?
Prior to adding your Contact Photo and Poster, you must first establish your own personal contact or My card on your iPhone. To set up and utilize the same on your iPhone, follow the instructions listed below:
- Make your own contact information (My card).
- Create and set your Contact Photo and Poster.
Let’s take a more in-depth look at each of these processes.
Make your own contact information (My Card)
To guide you through the procedure, below you will find some stages that you should follow:
- Tap the Add symbol in the upper right corner of the Contacts app once it is open on your iPhone.
- Give your My Card a preferred name and any other information you want to choose.
- After finishing, tap + add phone.
- Add your phone number now, along with any appropriate area code.
Add any other information you think your My Card needs. The following information can be added to personalize your My Card:
- Pronouns
- Ringtone
- Text Tone
- URL
- Address
- Date
- Birthday
- Related name
- Social Profile
- Instant messaging profile
- Notes
- Lists
Tap Done in the upper right corner after you’re through establishing your contact.
- Now open the Settings app and select Contacts from the list of options.
- Click My info.
- To make the contact we just made your My card, tap it now and choose it.
That’s all, then! The following step may now be used to configure a unique ContactPhoto and Poster on your iPhone.
Create and set your Contact Photo and Poster
On your iPhone, you may create and set your contact photo and poster for your My card. Before utilizing the steps below to build your Contact Photo and Poster, you can use the step above to create a My card if you haven’t already. Let’s get going:
- On your iPhone, launch the Contacts app, then hit the My Card on the top.
- Then choose Contact Photo & Poster.
- Input the first name you want to be seen when calling someone by tapping the First name and typing it.
- Set your last name similarly.
- When finished, select Edit from the top menu.
- Your Contact Photo & Poster now comes in three pre-set options. To choose one of the presets, swipe.
- Tap Customize at the bottom of a preset if you want to change it.
- Tap the plus symbol in the bottom right corner to start a new one.
- You may alternatively slide all the way to the right and select Create New from the list of options.
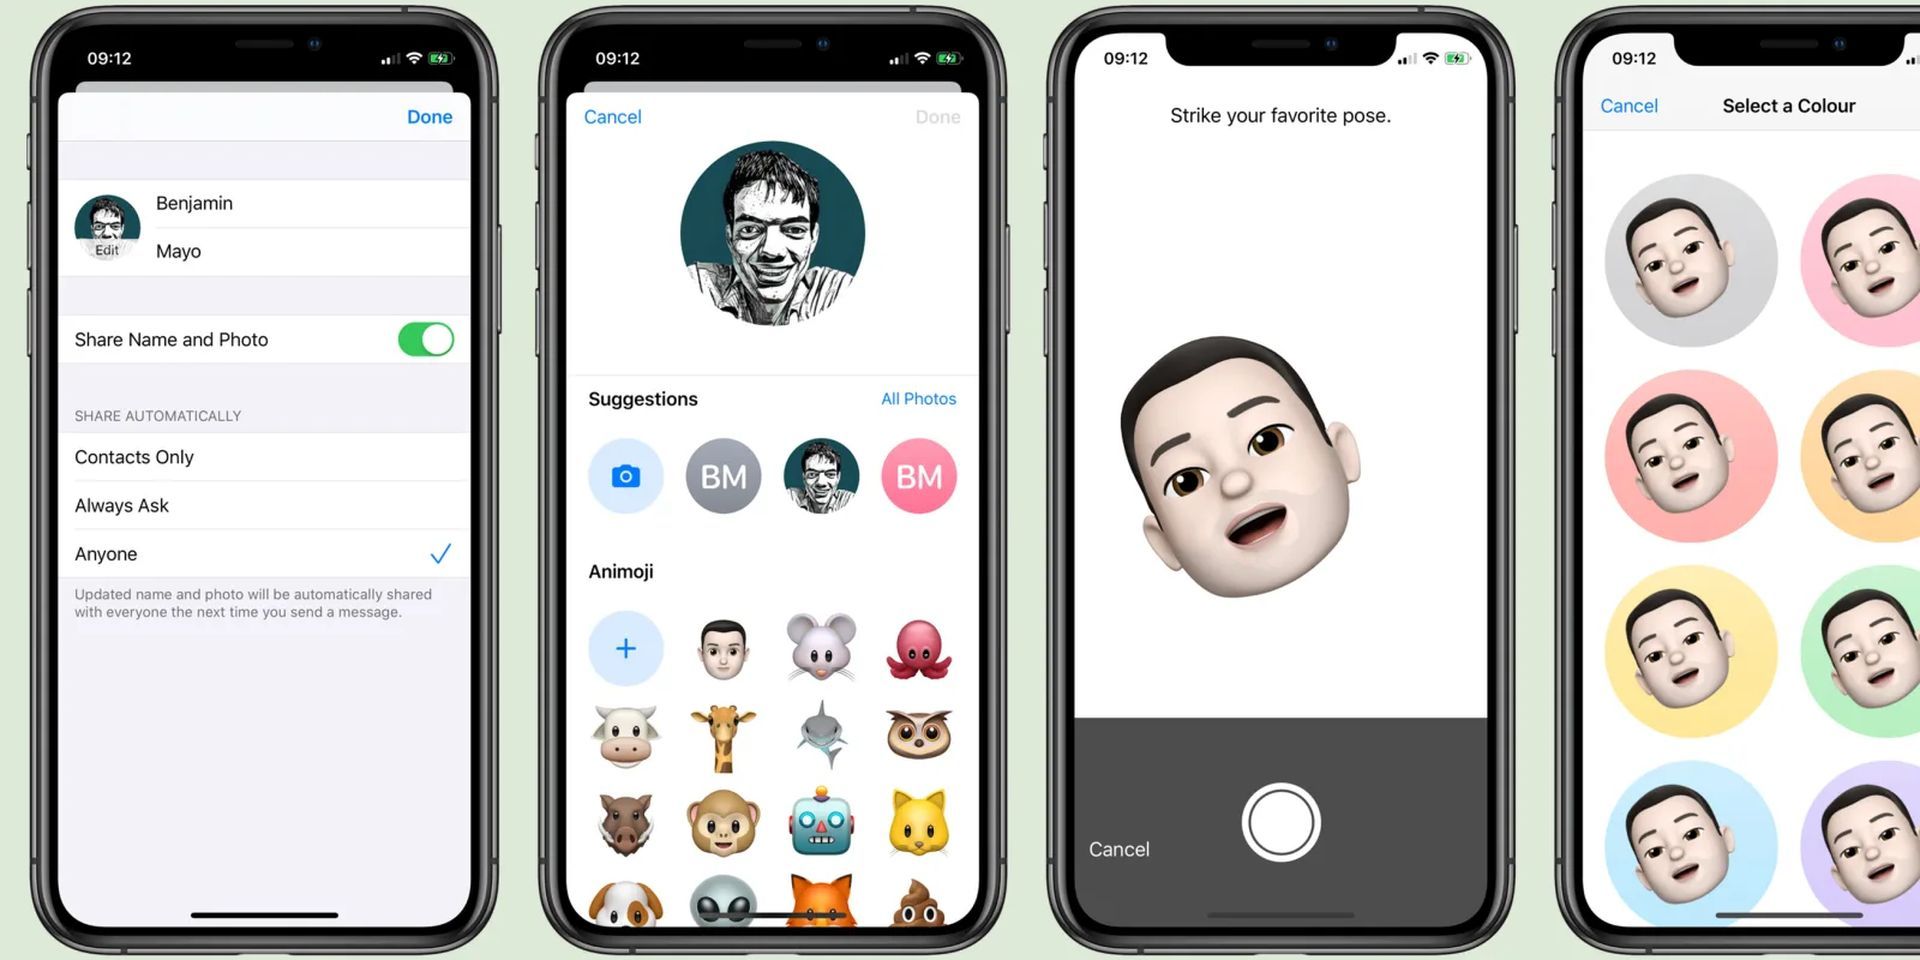
Select the kind of poster you want to make for yourself by tapping. One of the following alternatives is available:
Camera: With this, you may take a real-time photo and designate it as your contact poster.
Photos: You may utilize an existing photo from your photo collection with your contact poster by selecting it from this option.
Memoji: This option will allow you to use a Memoji as your Contact Poster.
Monogram: With this option, you can utilize your name’s initials in a single color on a Contact Poster that you may personalize to suit your tastes.
How to build a Contact Poster from your Camera?
These steps should be followed to create your contact poster with a live photo:
- Tap on “Camera” at the bottom to commence the procedure.
- If necessary, crop your image, then choose your preferred lens from the selections.
- When you’re prepared, click or press the shutter symbol to take the picture.
- If you’re pleased with the captured image, press “Use Photo“.
- Tap “Retake” to take the picture once more if you want to redo it.
- The image has now been included in your ContactPoster. To edit your name, tap on it at the top.
- From the available options at the top, tap and choose your preferred font.
- Use the slider to modify the font weight for your name.
- Swipe through the options at the bottom and press to pick your favourite color for your name.
- You may tap the Color wheel to choose a specific color if you’d like.
- Use the slider at the bottom to change the color’s brilliance after selecting it.
- Tap the X symbol after you’re done configuring.
- To zoom in or out of your picture, use the pinch motion.
- Tap “Done” once you have finished customizing your Contact Poster.
- In this way, you may use the camera to take a live snapshot that you can use as your contact poster.
This is all you need to know about ‘how to change contact photo on iPhone’.
Click here to read our latest article about iOS 17: The ultimate guide to the latest iPhone update.


