Today we are going to show you how to show internet speed on Windows 10 taskbar. You probably download a lot more on your computer than you think. Your productivity throughout the day depends on maintaining a fast and steady download speed. A slow download speed can cause serious problems when you’re trying to stream a movie on Netflix or even just surfing the web.
Monitoring your download and upload speeds in Windows is a great way to make sure your ISP provides a stable Internet connection without random slowdowns. We are so dependent on the Internet that when our download speeds drop below their standard point, our entire computer feels sluggish.
How to show internet speed on Windows 10 taskbar?
We are going to use Net Speed Monitor and we have to be honest, it’s a bit outdated. Still, it’s a great tool that works on Windows 10 even though it was technically designed for Windows XP, Windows Vista, and Windows 7.


You’ll need to run the setup in compatibility mode for it to work. Speaking of which, here are the steps to download and install this application:

- Click on the following link to download Net Speed Monitor for free.
- Select Download Now. Select x86 (32-bit) or x64 (64-bit). If you are not sure, simply right-click on the This PC application on your Windows 10 computer and the information will be displayed.
- When you try to open the downloaded file, an error will appear. This is because this is an older software tool for older operating systems. In any case, find the installation file and right-click on it.
- Select Properties and go to the Compatibility section.
- Select Run this program in compatibility mode for an older version of Windows.
- Confirm with OK.
- Start the configuration file once again. You should start the configuration normally this time. Follow the instructions on the screen until the configuration is complete.
- When the configuration is complete, you will not yet see the download speed in the taskbar.
How to enable Net Speed Monitor in Windows 10?
You must enable Net Speed Monitor in your taskbar now. Follow these steps:
- Right-click on the Windows 10 taskbar.
- Choose Toolbars from the drop-down menu (the first option at the top).
- Click Net Speed Monitor to enable it.
- You will be taken to a welcome screen for Net Speed Monitor. Select your preferred language and click Save to confirm. You do not need to mess with the other options, as they are all configured.
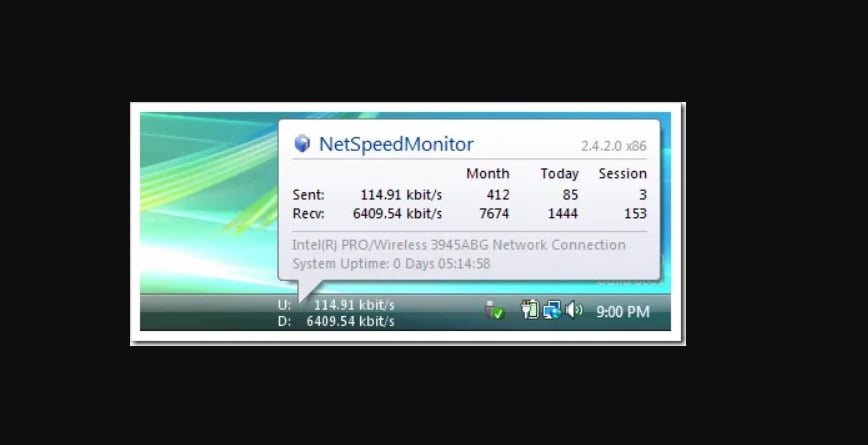
When you are done, you will be able to see your current download and upload speeds in the taskbar. The download is marked as D and upload as U. The values shown are in Kbit/s.
Net Speed Monitor tips
For most people, the kilobit display is confusing. But you can easily change the unit to megabits (Mbit/s). Here’s how:
- Right-click Net Speed Monitor on your taskbar.
- Click on Settings
- Open the drop-down menu adjacent to Bitrate and choose Mbit/s.
- Confirm the change with Apply.
In addition, you can also use MB/sec if you wish.
Finally, you can even use Net Speed Monitor to track your data usage. You just need to right-click Net Speed Monitor in the taskbar and select Data Traffic. This can be helpful for Internet users who have limited data plans.


