Today we are going to show you how to password protect a folder in Windows 10 without third-party software. Nowadays it looks like there is no way to lock files with a password without using programs, but this is not the reality. Keep reading to find a native solution.
How to password protect a folder in Windows 10 without third-party software?
First place the files you want to password protect in a folder. Then create a plain text document on the Desktop. Inside the text document copy and paste the following text line:
cls
@ECHO OFF
title Folder Private
if EXIST “HTG Locker” goto UNLOCK
if NOT EXIST Private goto MDLOCKER
:CONFIRM
echo Are you sure you want to lock the folder(Y/N)
set/p “cho=>”
if %cho%==Y goto LOCK
if %cho%==y goto LOCK
if %cho%==n goto END
if %cho%==N goto END
echo Invalid choice.
goto CONFIRM
:LOCK
ren Private “HTG Locker”
attrib +h +s “HTG Locker”
echo Folder locked
goto End
:UNLOCK
echo Enter password to unlock folder
set/p “pass=>”
if NOT %pass%== PASSWORD_GOES_HERE goto FAIL
attrib -h -s “HTG Locker”
ren “HTG Locker” Private
echo Folder Unlocked successfully
goto End
:FAIL
echo Invalid password
goto end
:MDLOCKER
md Private
echo Private created successfully
goto End
:End

The next thing we will have to do is to replace the PASSWORD_GOES_HERE with the password we want to use to protect the files.
The last step will be just to save the file through the Save As option that we can find in the File menu. In the pop-up window that will appear, we will select the All files option to save the document with an extension other than the RTF extension. In the Name field we will enter the following text:
- LOCKER.bat
If everything went well, the document will be saved as an executable file instead of as a plain text document. Now we will only have to execute the file in question by double-clicking on LOCKER.bat. It will automatically generate a folder with the name Private.
Inside this folder, we store the folder we have previously used to gather all the files we want to hide. We can also transfer the files to the folder directly without going through a secondary folder.
Then we will run the LOCKER.bat file again. We will be shown a black window that will ask us if we want to lock the contents of the folder with a password.

To accept the operation, type the letter Y and press Enter. Finally, the Private folder will disappear from the Desktop. If we want to access the contents of the folder we will have to execute the file LOCKER.bat and write the password that we have configured in the original document.
It should be noted that this method is easily bypassed in Windows 10. In fact, it is enough to edit the LOCKER.bat file with Windows Notepad to know the password. It is advisable to save the file in question in a folder far away from the Desktop.
How to password protect a folder in Windows 10 using WinRAR?
If the security of the previous method is not enough or if you want to opt for third-party programs, WinRAR is the best option. The good thing about WinRAR is that once the trial period is over we can continue using the program normally.

- After downloading and installing the program, select the file or folder you want to protect with a password and right-click on the item in question. Then click on the Add to archive… option.
- Now we will only have to select the compression format (RAR, RAR4 or ZIP) and check the option Lock the file. Finally, click on the Set password button to set a password.
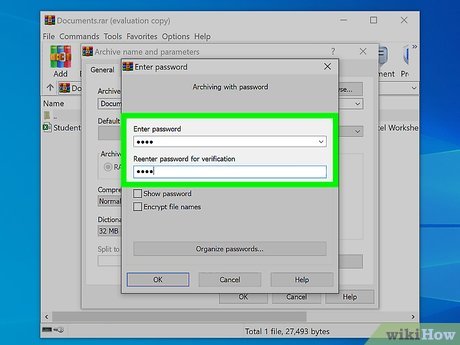
- In the Enter password pop-up window, check the Encrypt filenames option to enhance the security of the archive. The last step is to click OK to save the archive in RAR, ZIP or RAR4 format with a password.
You can combine this method with the previous one. This way your file will be protected with two different passwords if you wish. This way you’ve learned how to password protect a folder in Windows 10 with and without third-party software. Why don’t you try it out now?


