In this article we will tell you how to make a full backup of your data on iOS and Android. Backing up all your files is one of the first steps to take, if not the first when you will restore your phone from the factory or change your device. It may seem silly, but over time, we accumulate photos, videos, WhatsApp conversations, and documents that we can lose forever if we do not put them safely in case of an accident. Or carelessness.
So, let’s see how to make a full backup on Android and iOS. In the case of Android, we also suggest you take a look at this tutorial in which we explain the process in more depth (online options, offline, with and without a computer, with and without root, etc). For today’s case, we will use the cloud on both iOS and Android, but on the iPhone, we will also use iTunes.
How to make a full backup on Android?
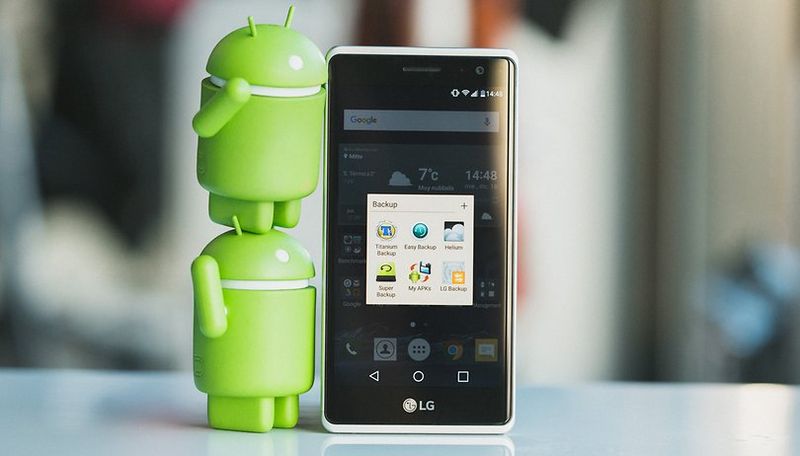
Android, like iOS, has its backup system based on Google Drive and your Google account. It probably sounds familiar to you because the first thing the mobile does when you turn it on for the first time is asking you if you want to activate it. If you did not do it at the time, do not worry, we will see how to activate it.

To make the backup on Android, the route to follow is the one you can see below. The good thing about it being a Google-dependent thing is that the process is the same on all Android phones, so you can’t get lost.
- Open the Settings app.
- Navigate to the “Google” section.
- Scroll down and locate the “Back up” option.
- If it’s disabled (which it will be if you unchecked the option in the initial settings as mentioned above), enable it.
- Make sure you are connected to the WiFi network and, preferably, plug in the charger.
- When you activate it, it will ask you which account you want to use. Click on the section and on the screen that appears click “Accept”. If you only have one Google account, it will be configured automatically, but you will have to choose one if you have several.
- Finally, click on “Create a backup” and wait for the process to finish.
The Google Drive backup includes everything: application data, call history, contacts, device settings, photos and video (via Google Photos), and SMS messages. The only thing not covered are files and documents you’ve downloaded, such as WhatsApp photos and videos, PDFs you’ve downloaded from the Internet, and so on. To make a dump of these files, take a look at this tutorial.
Everything will be uploaded to your Google account, so it will be safe in the cloud and ready to be restored on any mobile.
When you have it ready, everything will be safe in Google Drive and ready to be restored. And how to restore? Simple. When you reconfigure the mobile (because you format it or factory restore, for example), it will ask you to enter your Google account. When you do, it will tell you that it has found a backup and if you want to restore it. Accept and let the mobile do its job, as simple as that.
How to make a full backup on iOS?
iOS, Apple’s operating system, has two really powerful backup options: iCloud and iTunes. Their operation is extremely simple and secure since it saves absolutely everything you have on your mobile and allows you to recover it at any time.

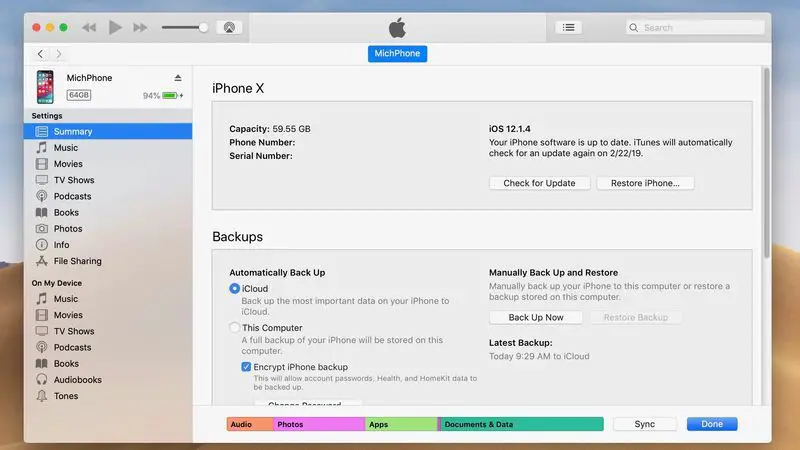
The fastest way is to use iTunes. To do this, you simply download the software from the Apple website, install it on your computer and log in with your Apple ID (which must be the same as the one you have set up on your iPhone). Once you have it installed and configured, follow the steps below:
- Connect the iPhone to the computer using the USB cable.
- If this is the first time you do this, a screen will appear on the iPhone asking if you want to trust the computer. Select “Yes”.
- You will see an icon in the shape of the cell phone appear in iTunes in the upper left corner. Click on it.
- Here you will be able to see all the information about your device. Go to “Summary”.
- In the “Backup” section, check the “This computer” box and click the blue “Back up now” button.
- If you wish, you can encrypt the backup with a password to give it an extra layer of security. You must remember this password because if you forget it, you will not be able to reinstall it.
When you press the button, iTunes will back up everything, absolutely everything on your iPhone, from photos and WhatsApp conversations to apps, photos, videos, and messages. Everything will be saved and safe in the backup. It will take more or less time depending on how many files you have. When you want to recover it, simply repeat the steps above and, where you chose “Back up now” before, select “Restore backup”.
With iCloud

iCloud is also an effective system for backing up, but it has a small big problem that it depends on the storage you have available. By default, Apple offers 5GB for free, which is enough to have one or two backups, but nothing more. iTunes, in that sense, is more reliable and gives fewer “headaches”. Still, as it never hurts to have alternatives, let’s see how it’s done.
- Connect the iPhone to a WiFi network, preferably to the 5 GHz band for better speed, and plug in the charger.
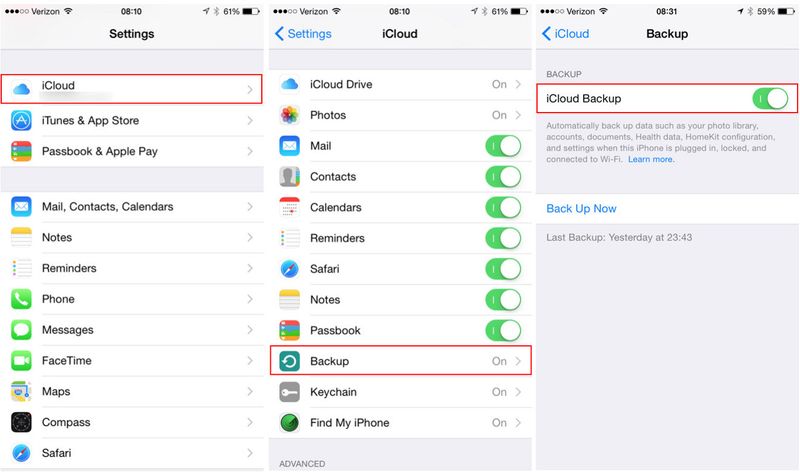
- Go to Settings, click on your name (the first box at the top), and select “iCloud”.
- Scroll down and, about halfway down, select “Copy to iCloud”.
- Check the box if it’s not checked and click on “Back up now”.
- Lock the screen and leave it until the process finishes.
It’s quite a slower process than with iTunes, but it has the advantage that you can do it from anywhere as long as you have a stable WiFi connection and have it loading. The iCloud backup includes data from apps, device settings, home screen and organization, messages, photos and videos, and purchase history from Apple services.
Although iTunes is faster, iCloud allows you to back up from anywhere via WiFi
By default, the iPhone is configured so that contacts, calendars, bookmarks, mails, notes, voice memos, photo sharing, iCloud photos, health data, and call history are saved in iCloud, so this data is not included in the backup we are doing right now. That doesn’t mean that they are not available, as they are saved periodically and automatically. In other words, they are safe.

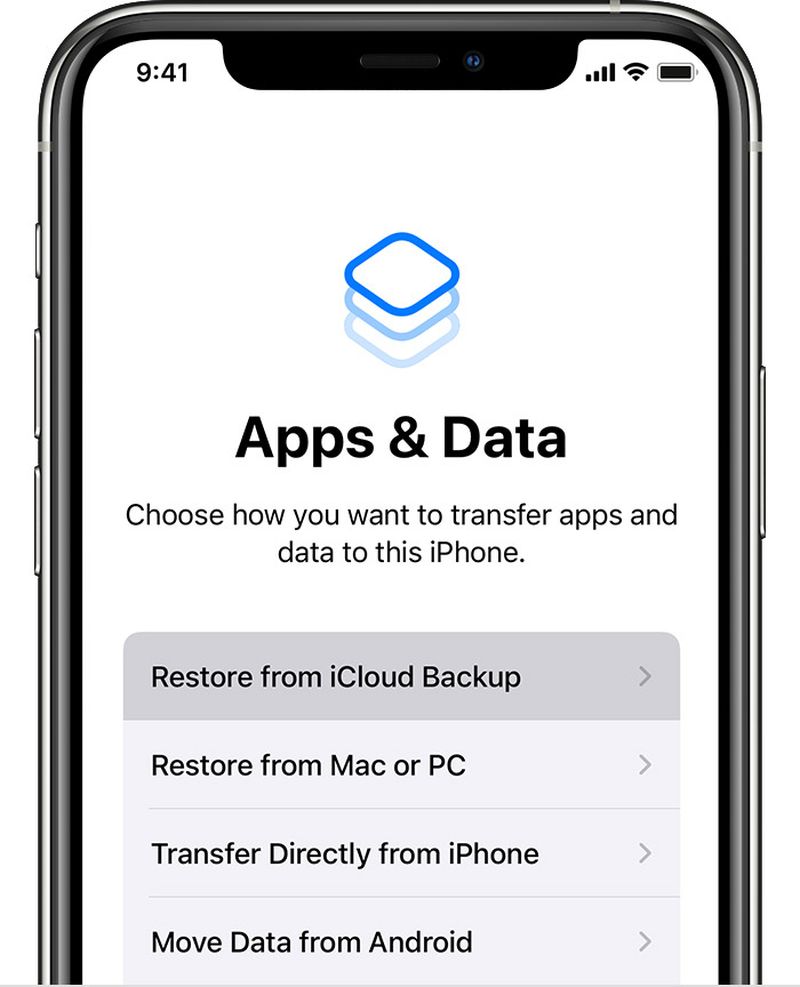
To restore the iCloud backup from the iPhone you will need to reset it, as this is the only way to access the initial setup process. When you do so, simply follow these steps:
- Turn on the device and proceed through the settings until you get to the “Apps & Data” section.
- Choose “Restore iCloud Backup.”
- Sign in with your Apple ID.
- Select the most recent backup.
- Wait for the process to finish (you can see it live thanks to the progress bar).
If you have a lot of photos and videos and iCloud space is running short (and you do not want to go through the checkout), you can take advantage of Google Photos, which is available for iOS for free. You simply download it, enter a Google account and let it backup everything. When you restore the iPhone, Google Photos will be downloaded automatically (as it is included in the iTunes and iCloud backup) and all your photos will be safe in the cloud.


