ComfyUI Stable Diffusion 3 is a remarkable advancement in AI-powered rendering. Quickly added to Stable Diffusion 3 ComfyUI is part of the platform and enables users to produce images with exceptional accuracy and authenticity.
ComfyUI has been a popular choice for users of previous versions of Stable Diffusion, and its seamless transition to Stable Diffusion 3 (SD3) ensures it remains at the forefront of the AI art scene. In this blog, we will explore the intricacies of ComfyUI Stable Diffusion 3, its features, and its integration into creative workflows.
An overview of ComfyUI Stable Diffusion 3
ComfyUI Stable Diffusion 3 builds on the foundation laid by its predecessors, offering users a powerful tool for generating images from text prompts. Stable Diffusion 3 (SD3) has been designed to deliver enhanced accuracy, better adherence to prompts, and superior visual aesthetics. This is made possible by a complex architecture that divides the processing of text and image data, producing outputs that are more detailed and nuanced. ComfyUI, known for its user-friendly interface and robust performance, has quickly adapted to integrate SD3, making it accessible for various creative applications.
One of the key features of ComfyUI Stable Diffusion 3 is its ability to handle complex prompts and produce visually stunning results. Users familiar with the platform will appreciate the seamless integration of SD3, which retains the familiar workflow while enhancing the quality and detail of generated images. The interface change introduced by ComfyUI also allows for a more intuitive and detailed visual production process, akin to working with blueprints in software like Unity or Unreal Engine.
Moreover, the transition from SDXL and Turbo models to Stable Diffusion 3 highlights the platform’s commitment to staying current with technological advancements. ComfyUI Stable Diffusion 3 not only improves the visual quality of generated images but also offers greater creative freedom compared to other AI models like DALL·E or Midjourney. This makes it a preferred choice for users looking to push the boundaries of AI-generated art.
Technical miracle The architecture of Stable Diffusion 3
The Multimodal Diffusion Converter (MMDiT) architecture, which orchestrates the processing and integration of text and image prompts, is the brain behind Stable Diffusion 3. In contrast to earlier iterations that utilized a single neural network weight set for both modalities, SD3 utilizes different weight sets for image and text processing. This particular treatment improves the model’s performance in comprehending and perceiving complex prompts greatly, yielding more accurate and coherent outcomes.
The MMDiT architecture consists of several key components that contribute to its superior performance. Text embedders, including two CLIP models and T5, convert text prompts into a format that the AI can process effectively. An enhanced autoencoding model serves as the image encoder, transforming images into a suitable form for manipulation and generation. The dual transformer approach, with distinct transformers for text and images, allows for direct interaction between the modalities, enhancing the coherence and fidelity of the generated images.
This sophisticated setup enables Stable Diffusion 3 to excel in areas where previous models struggled. The separate handling of text and image data ensures that the nuances of complex prompts are captured accurately, resulting in high-quality visual outputs that closely adhere to user instructions. This makes SD3 particularly effective for projects requiring detailed and precise image generation.

Seamless integration: Using Stable Diffusion 3 with ComfyUI
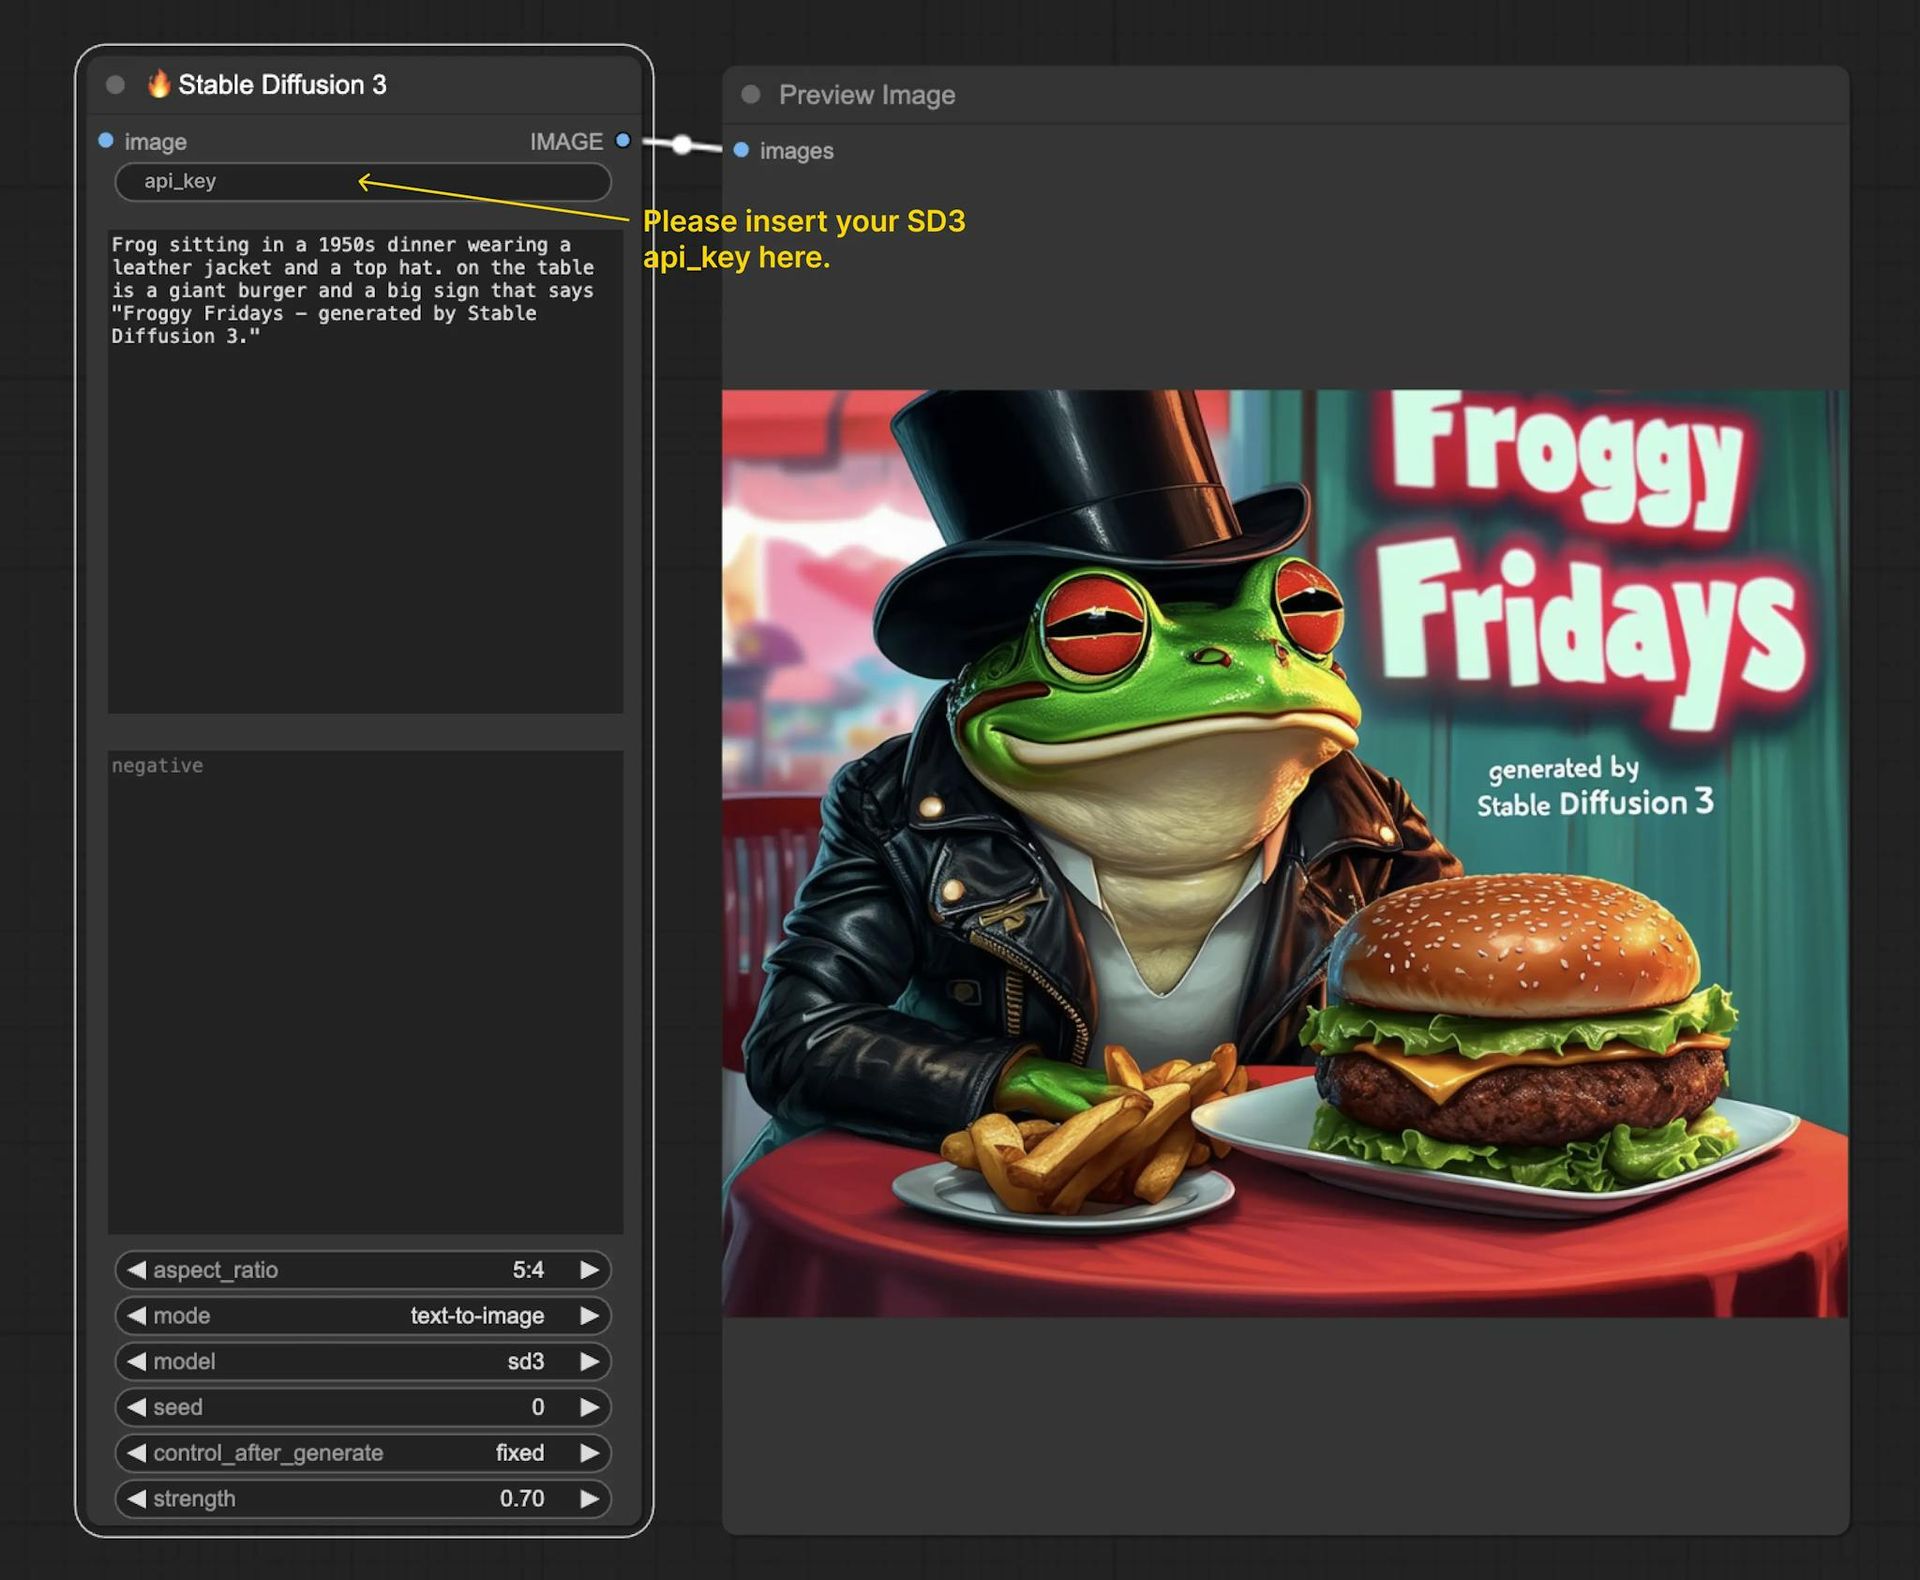
Stable Diffusion 3’s user-friendly design makes it easy to integrate with the ComfyUI workflow. The RunComfy Beta includes SD3 Node pre-installed, making it simple for customers to integrate it into their projects. The procedure is intended to be as frictionless as possible, reducing the need for manual installation and configuration, regardless of whether you are launching a brand-new project or incorporating SD3 into an already-established workflow.
To initiate operations, users must get an API token from the Stability AI Developer Platform. With the SD3 and SD3 Turbo versions accessible with this key, users can generate images in response to prompts. Features available on the platform include text-to-image and image-to-image production modes, customizable aspect ratios, and positive and negative prompts. Users can customize the image-generating process to suit their own needs with the use of these options.
Users must first receive an API token from the Stability AI Developer Platform to proceed. With this key, users can take photos in response to prompts and access the SD3 and SD3 Turbo versions. The platform includes capabilities including several modes for text-to-image and image-to-image production, as well as variable aspect ratios and positive and negative prompts. With these choices, customers can customize the image generation process to suit their requirements.
ComfyUI Stable Diffusion 3 is user-friendly and offers multiple installation ways to accommodate diverse hardware setups and operating systems. Whether using Windows, Linux, or macOS, users may verify that the platform is up and running properly by accessing detailed installation instructions on GitHub. Because of its accessibility, ComfyUI is a flexible tool that can be used by a variety of users, from amateurs to professional artists.

How to install ComfyUI: A step-by-step guide
ComfyUI’s integration with Stable Diffusion 3 (SD3) provides an accessible platform for users looking to explore AI-driven image generation. This section will guide you through the installation process, ensuring you can set up ComfyUI on your system seamlessly. The instructions cover different operating systems, including Windows, Linux, and macOS.
Preparing your system
Before you begin the installation, make sure your system meets the following requirements:
- Operating system: Windows, Linux, or macOS.
- Python: Version 3.8 or higher.
- CUDA: Required for GPU acceleration (if using an NVIDIA GPU).
- Git: For cloning the repository from GitHub.
Make sure to have the necessary drivers and software installed, especially if you plan to use GPU acceleration for faster processing.
Step-by-step installation on Windows
Install Python and Git:
- Download and install Python from the official website. During installation, ensure that you add Python to your PATH.
- Download and install Git from the official website.
Clone the ComfyUI repository:
- Open a command prompt and navigate to the directory where you want to install ComfyUI.
- Run the following command to clone the repository:
Create and activate a virtual environment:
- Run the following commands to create and activate a virtual environment:
venv\Scripts\activate
Install the required dependencies:
- Run the following command to install the necessary Python packages:
Set up CUDA (for GPU acceleration):
- If you have an NVIDIA GPU and want to use CUDA for acceleration, download and install the CUDA toolkit and cuDNN.
Run ComfyUI:
- Start the ComfyUI server by running:
- Open your web browser and navigate to `http://localhost:5000` to access the ComfyUI interface.
Step-by-step installation on Linux
Install Python and Git:
- Install Python and Git using your package manager. For example, on Ubuntu, run:
sudo apt install python3 python3-venv python3-pip git
Clone the ComfyUI repository:
- Open a terminal and navigate to the directory where you want to install ComfyUI.
- Run the following command to clone the repository:
Create and activate a virtual environment:
- Run the following commands to create and activate a virtual environment:
source venv/bin/activate
Install the required dependencies:
- Run the following command to install the necessary Python packages:
Set up CUDA (for GPU acceleration):
- – If you have an NVIDIA GPU and want to use CUDA for acceleration, install the CUDA toolkit and cuDNN following the instructions for your Linux distribution.
Run ComfyUI:
- Start the ComfyUI server by running:
- Open your web browser and navigate to `http://localhost:5000` to access the ComfyUI interface.
Step-by-step installation on macOS
Install Python and Git:
- Install Homebrew, a package manager for macOS.
- Use Homebrew to install Python and Git:
Clone the ComfyUI repository:
- Open a terminal and navigate to the directory where you want to install ComfyUI.
- Run the following command to clone the repository:
Create and activate a virtual environment:
- Run the following commands to create and activate a virtual environment:
source venv/bin/activate
Install the required dependencies:
- Run the following command to install the necessary Python packages:
Run ComfyU:
- Start the ComfyUI server by running:
- Open your web browser and navigate to `http://localhost:5000` to access the ComfyUI interface.
By following these steps, you can successfully install ComfyUI on your system and begin exploring the capabilities of Stable Diffusion 3. This setup allows you to leverage the advanced features of SD3, producing high-quality, AI-generated images with ease. Whether you are a seasoned professional or a newcomer to AI art, ComfyUI Stable Diffusion 3 provides a robust and user-friendly platform to bring your creative visions to life.

Beyond the basics: Advanced features of ComfyUI Stable Diffusion 3
A notable feature is the ability to use “blueprints” for visual production. This approach allows users to create detailed visuals by breaking down images into smaller components, such as limbs in a character design. Users can then make specific edits to these components, resulting in more realistic and creative images.
Another important feature is the support for a variety of aspect ratios and modes, providing greater flexibility in image creation. Users can choose from a wide range of aspect ratios to suit project requirements, and the platform supports both text-to-image and image-to-image modes. This versatility ensures that ComfyUI Stable Diffusion 3 can be used for a variety of creative applications, from simple illustrations to complex scenes.
The platform also includes options for ensuring consistency across generated images, such as “seed” settings and “strength parameters”. These features allow users to fine-tune the image generation process, achieving consistent results across multiple iterations. This level of control is particularly useful for projects that require uniformity and precision, such as creating a series of related images or maintaining a specific visual style.
ComfyUI Stable Diffusion 3, which gives users better accuracy, more creative freedom, and better visual quality, is a major step forward in AI-driven rendering. Its integration into the ComfyUI platform makes it accessible for a variety of creative applications, ensuring a seamless and user-friendly experience. Whether you are an experienced artist or a beginner to AI-generated art, ComfyUI stable diffusion 3 provides the tools and features needed to bring your creative visions to life.
Featured image credit: RunComfyUI


