Microsoft’s Copilot Pro subscription just got even better with the introduction of Copilot GPT Builder. That’s right—you can now create your own AI models without any coding know-how, like ChatGPT’s GPT Builder!
When Microsoft announced Copilot Pro earlier this year, the promise of creating custom GPTs was a highlight. Now, after a period of eager anticipation, the feature is finally here.
What is Copilot GPT Builder?
Microsoft Copilot Studio is a platform that allows users to create AI-powered copilots capable of handling various tasks. According to Microsoft, here are some common ways Copilot Studio copilots are utilized:
- COVID-19 info: Get updates on COVID-19 rates and rules.
- Sales help: Ask questions and get support when buying stuff.
- Store details: Find out store hours and locations.
- Employee stuff: Get info on health benefits, vacations, and more.
- General questions: Ask about company policies or other common things.
These copilots can answer common questions, address complex issues through conversations, and engage with customers and employees across different channels like websites, mobile apps, Facebook, Microsoft Teams, and more.
Michael Schechter, a Microsoft vice President, hinted at the rollout on social media. However, access to Copilot GPT Builder is being phased in slowly, which means not everyone will get it right away.
Copilot Pro users… it’s a good night to see if you have GPT Builder 😇
— Michael Schechter (@mikeschechter) March 9, 2024
However, if you are one of the selected Copilot users, here is how to use Copilot GPT Builder.
How to use Copilot GPT Builder?
Using Copilot GPT Builder is simple and straightforward. Here’s a step-by-step guide:
- Access Copilot Studio: Navigate to Copilot Studio.
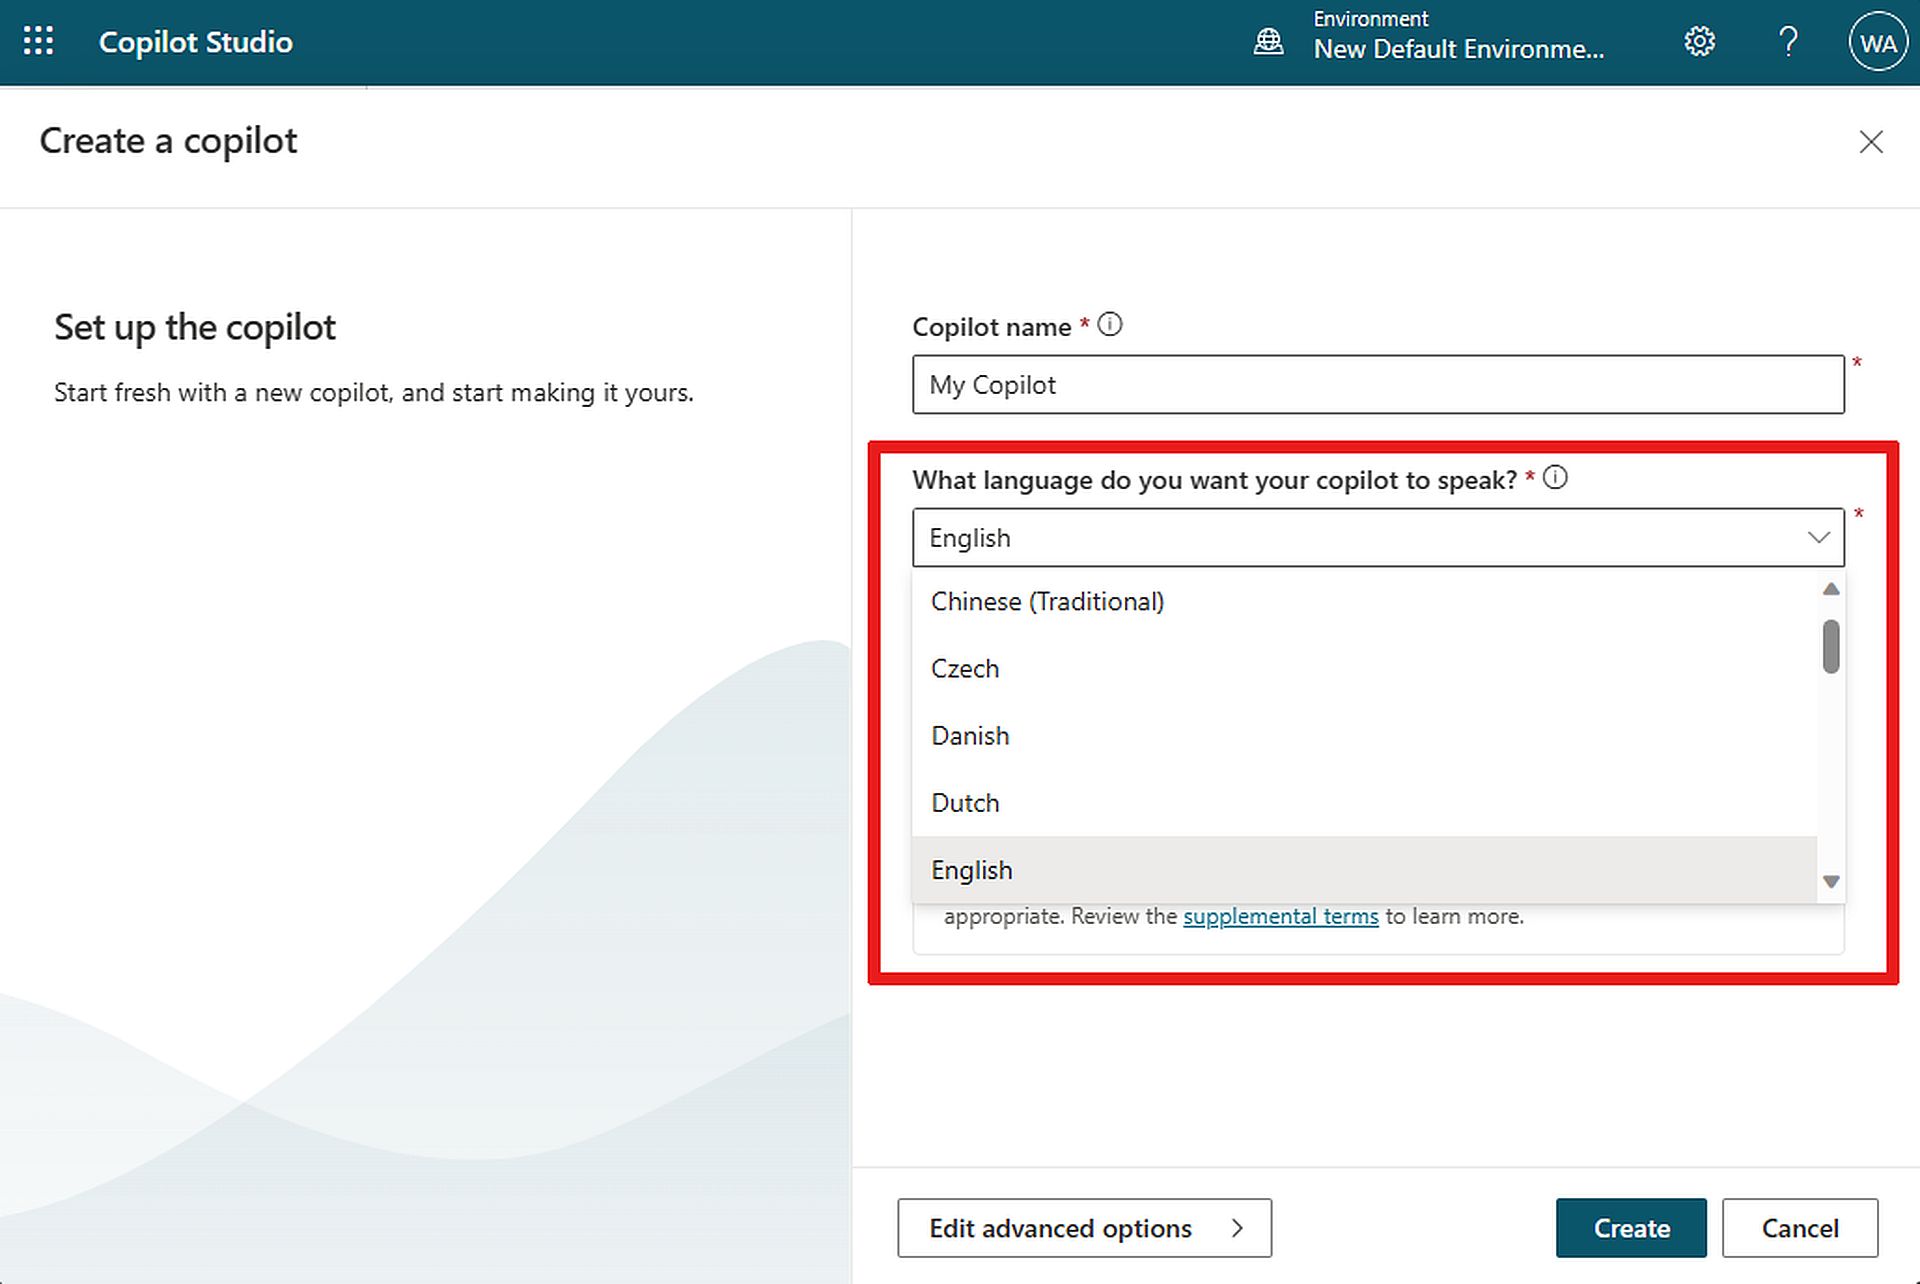
- Create a new Copilot: Click on “+ New copilot” on the Copilots page, or go to the Home tab and select “+ Create a copilot.”

- Name your Copilot: Give your Copilot a name that reflects its purpose or function.
- Select the language: Choose the language in which you want your Copilot to communicate. Copilot GPT Builder supports various languages, so pick the one that suits your needs.
- Complete the setup: Follow the prompts to complete the setup process. This may involve specifying additional details about your Copilot’s functionality and preferences.
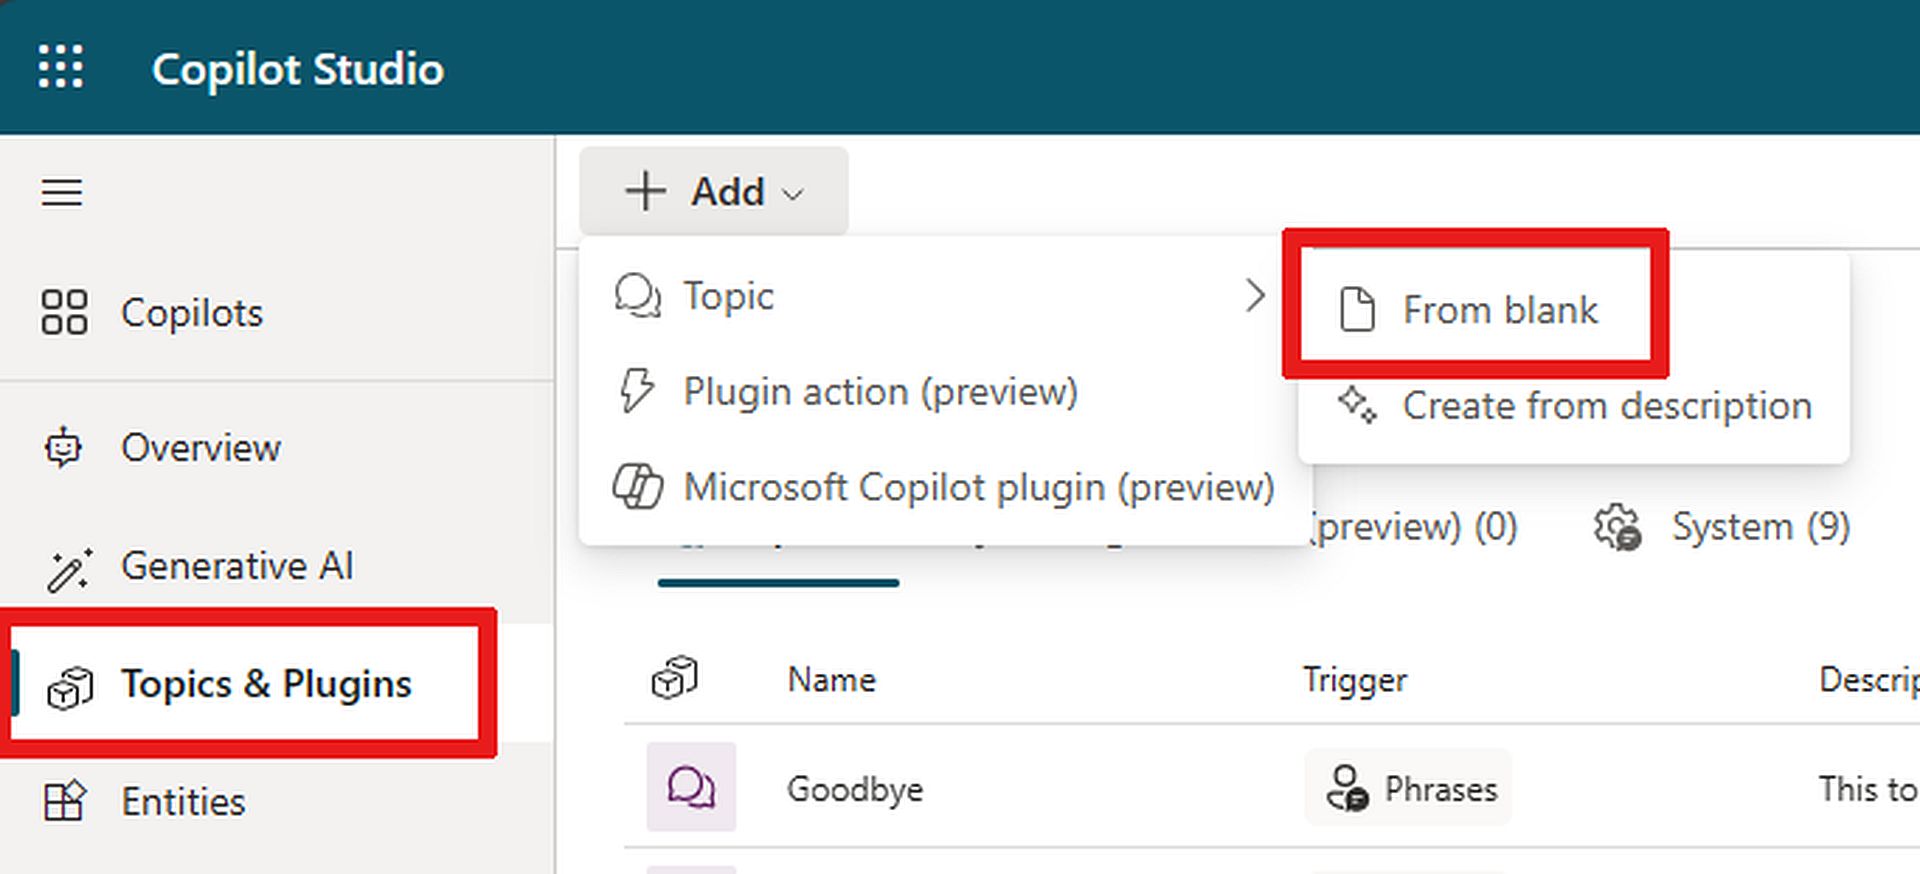
- Customize Your Copilot: Once your Copilot is created, you can customize its responses, behaviors, and interactions to align with your specific requirements. This might include training it on specific datasets, defining conversation flows, or configuring integration with other tools and platforms. To start creating a new topic from scratch, go to the Topics & Plugins page and select “+ Add,” then choose “Topic” and “From blank.” For more detailed information, click here.
- Test your Copilot: Before deploying your Copilot for real-world use, it’s essential to test it to ensure that it functions as intended thoroughly. Test tools within Copilot Studio are used to simulate different scenarios and interactions. For more detailed information, click here.
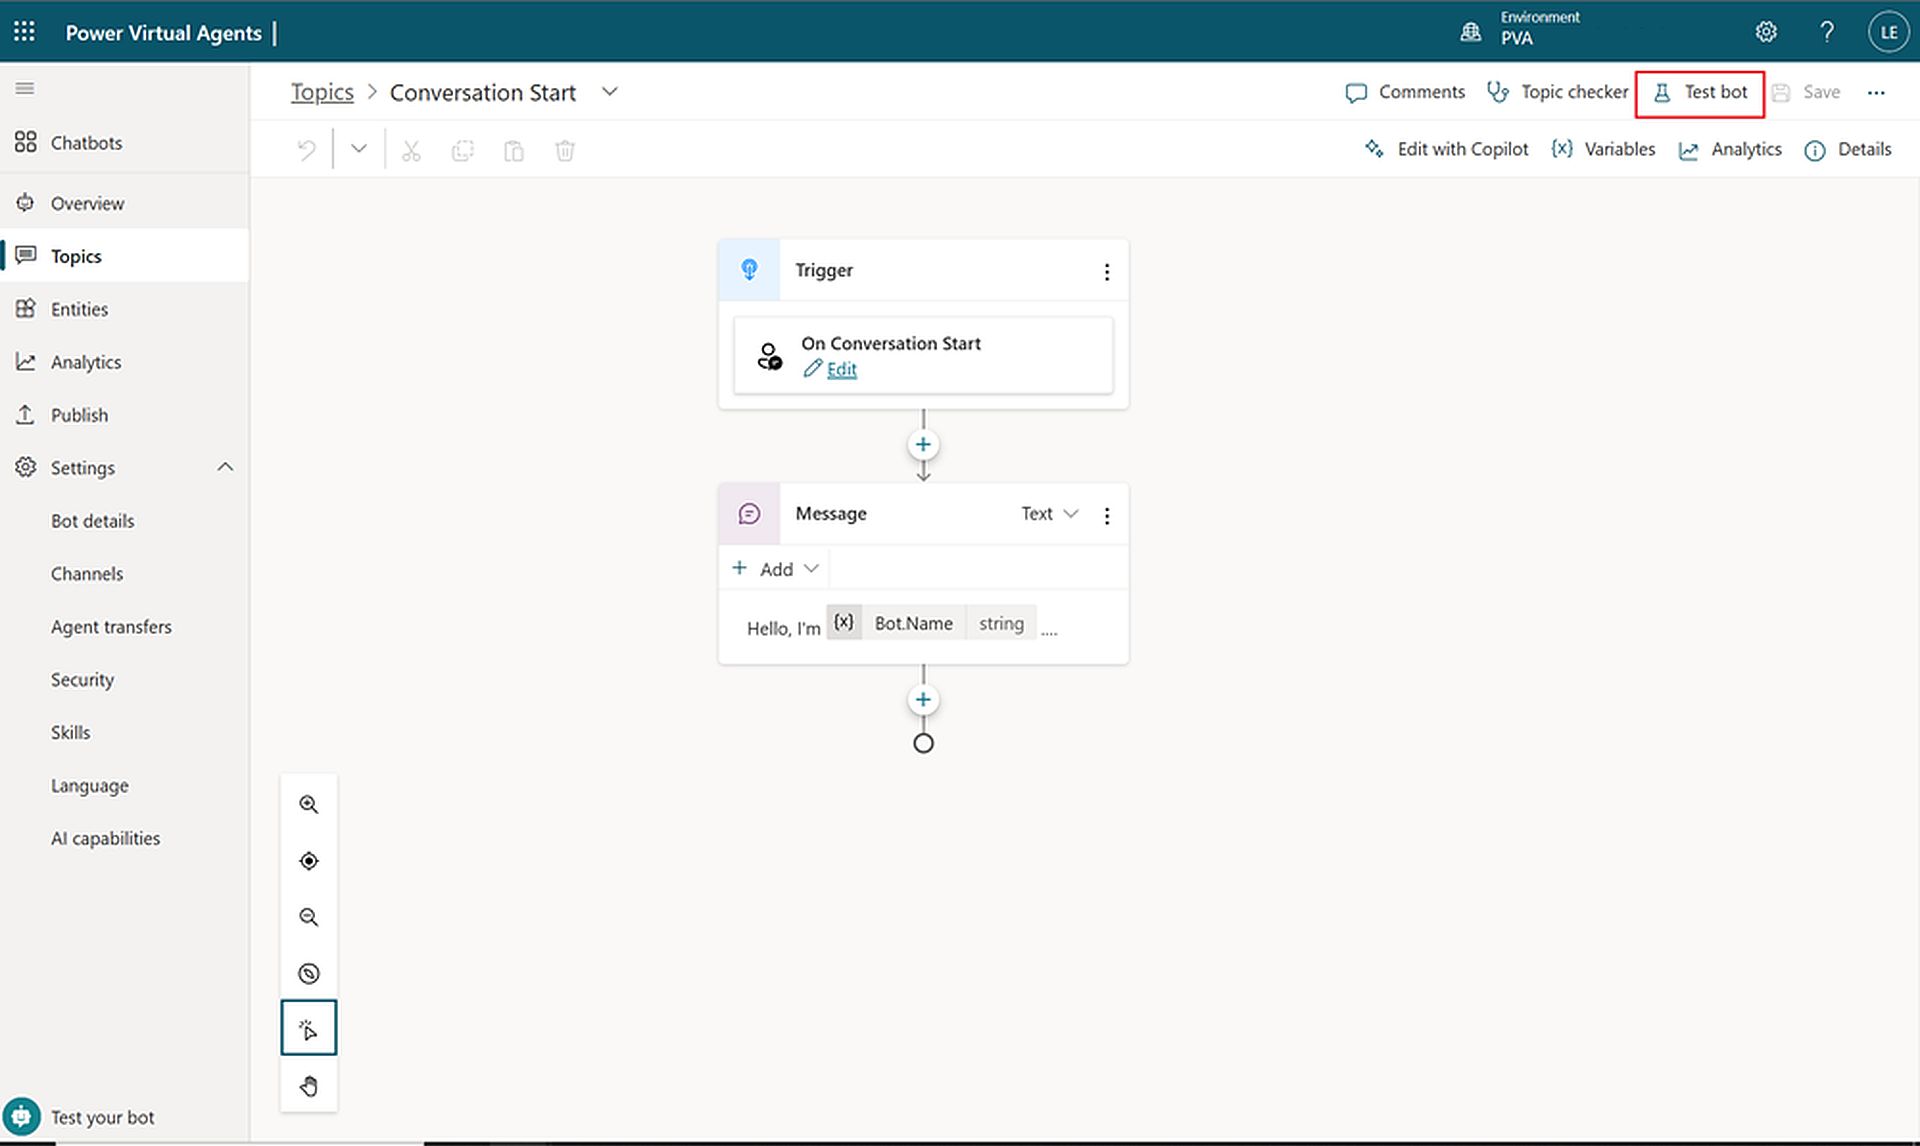
- Deploy your Copilot: Once you’re satisfied with your Copilot’s performance, you can deploy it to your desired channels and platforms, such as websites, mobile apps, or messaging platforms like Microsoft Teams.
- Monitor and iterate: Keep an eye on your Copilot’s performance and gather feedback from users. Use this information to make improvements and updates over time, ensuring that your Copilot continues to meet the evolving needs of your audience.
By following these steps, you can effectively use Copilot GPT Builder to create powerful AI models tailored to your specific requirements.
Featured image credit: Microsoft

