We are going to explain how to create labels in Word. Microsoft’s text editor is a very versatile tool, a blank page on which you can do many things that go beyond writing texts. And one of them is, precisely, being able to design these labels.
How to create labels in Word?
The first thing you need to do is open a blank document in Word. Once you are inside, you have to click on the Mailings section at the top of the program’s toolbar. It is possible that in other versions, the name of the section may be different.
Then, you have to click on the Create option. When you do so, a menu will appear where you can click on the Labels option. It is possible that in other versions of Word, the labels option is separate or in another place, but in the latest versions, this should be the way.
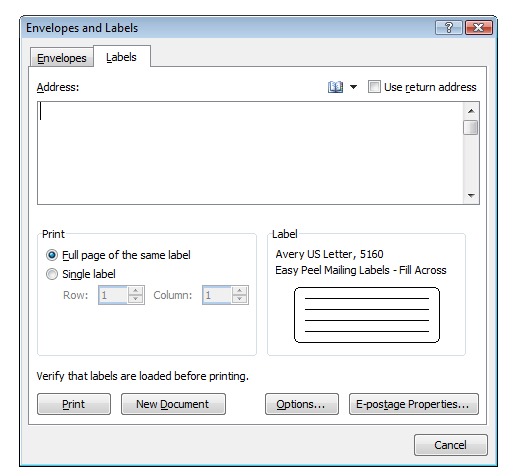
The Labels page will open. Here, you should know that the labels are designed for printing and pasting on envelopes for addressing, although it is a flexible system to be used for other things.

If you click on the Options button, you will go to the page where you can configure the labels. Here, for example, under Product number, you can set how many labels per page you want to have. Also, under the Label brand, you can set the label page model that you are going to put in the printer, so Word will adapt to the specific sizes of those pages.
Once the label is written, click on the New Document button to open a Word page with the contents of your label. It may seem odd that the page opens separately instead of using the same page you start the process on. However, this is useful if you are writing a letter in Word and want to set up the labels separately, which is what the function is designed for, although you can use it for other things.
Finally, you should know that once you have generated the page of labels, you will be able to edit the text in them. This way you’ve learned how to create labels in Word, why don’t you try it out?


