In this article, we are going to be covering how to fix Content Installation Failed Epic Games, so you can continue playing your favorite games without issues.
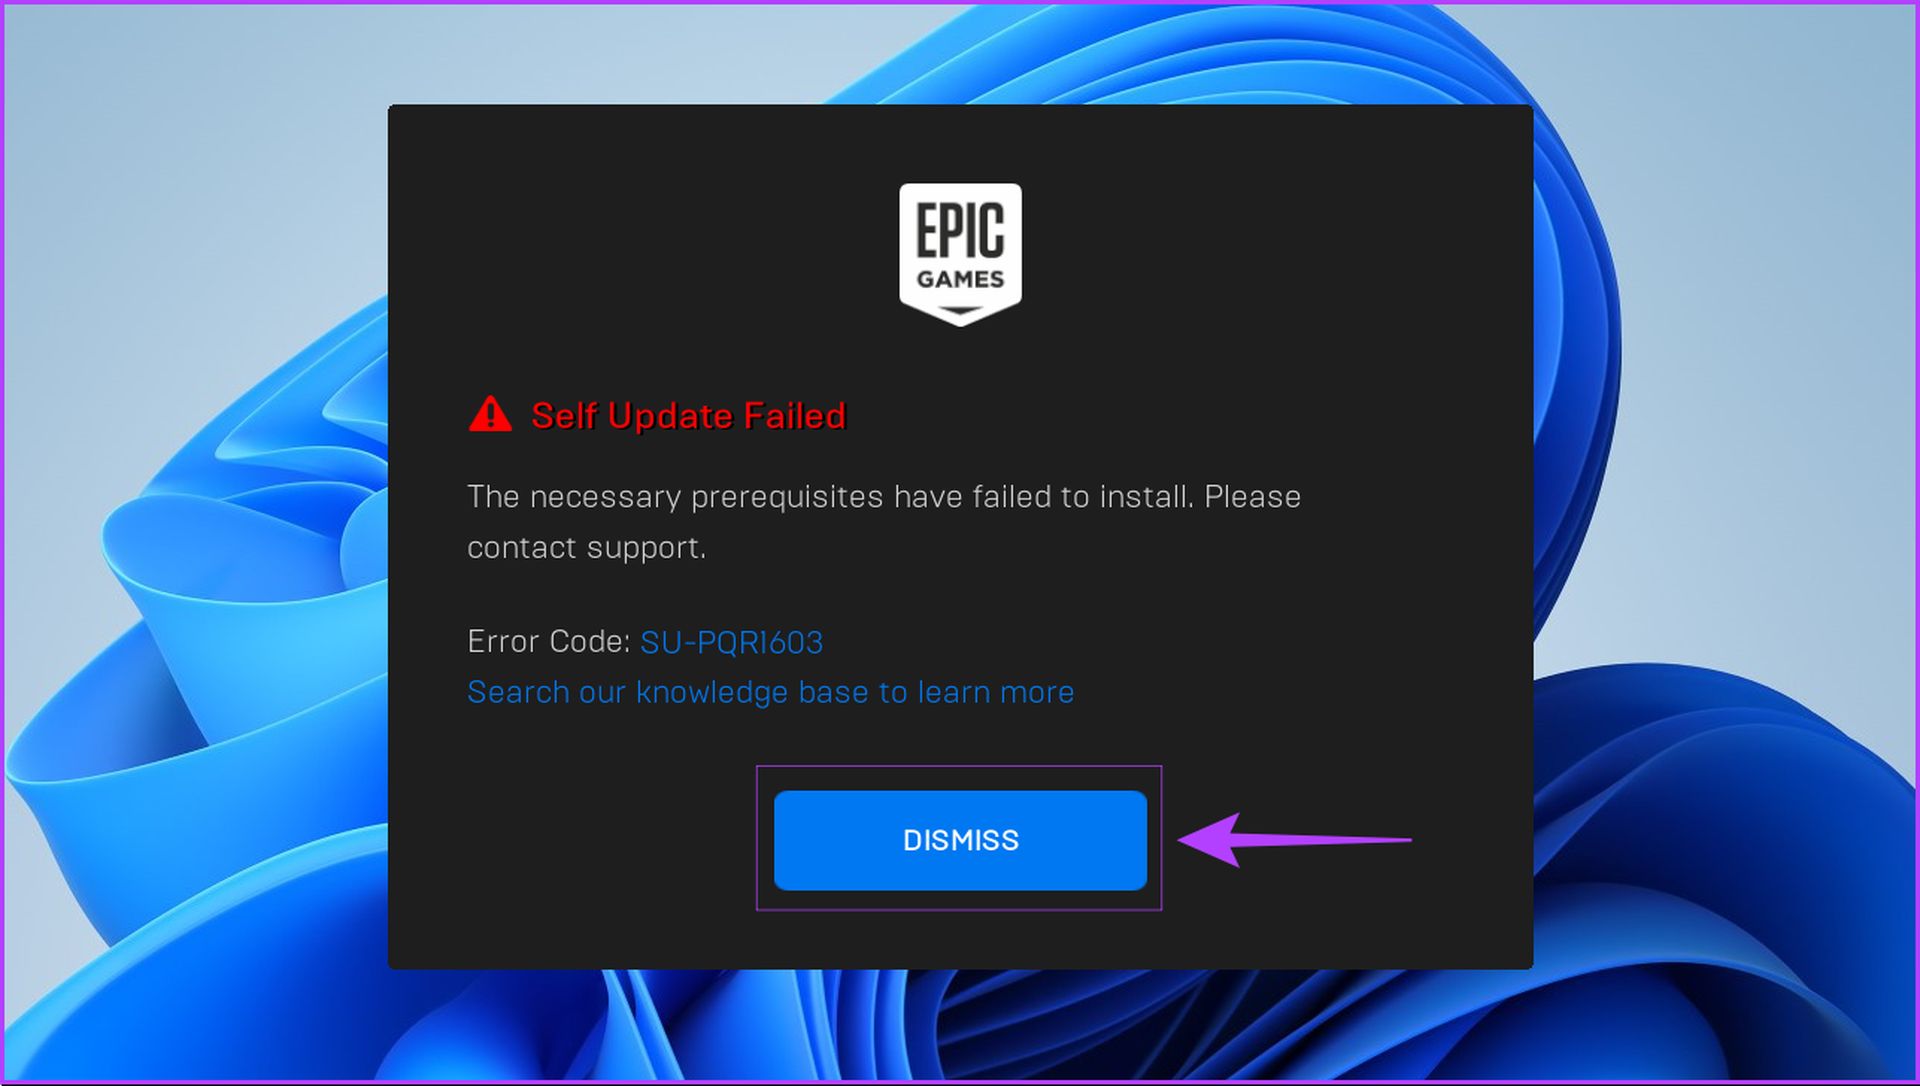
Epic Games Launcher is the go-to location for digital games after Steam, and you can grab several for free. You may buy or claim free games after making an account and downloading them to your PC. However, while attempting to install games via the Epic Games Launcher, some users receive the ‘Necessary prerequisites failed to install’ message.
How to fix Content Installation Failed Epic Games?
The message expressly mentions the necessity for various files and libraries to be pre-installed in order for the game to operate on your Windows PC. Do you frequently encounter the same error? The solutions to the ‘required prerequisites have failed to install’ issue when installing the Epic Games Launcher on Windows are as follows.
Run the Epic Games Launcher as administrator
Running the Epic Games Launcher as an administrator is one of the simplest ways to resolve the self-update failed problem. On your Windows PC, follow these steps to start the Epic Games Launcher as an administrator:
- To close the current instance of Epic Games Launcher, click the Dismiss button.
- Click Start, enter ‘Epic Games Launcher’ in the search field, and then select ‘Run as Administrator’ from the options given below the search result.
- When prompted by a User Account Control (UAC) dialog, select Yes.
Alternatively, imagine you wish to run any program with administrator rights as rapidly as possible. In such instance, hold down the Shift key while clicking on the application or file you wish to open. When you run the Epic Games Launcher as an administrator, it will immediately restart the self-update and update verification processes in order to install the application on your PC. If you continue to receive the Self Update Failed message, continue reading to learn about further solutions to this vexing problem.

Confirm you have read/write access to the installation folder
If running the Epic Games Launcher with elevated rights does not resolve the issue, make sure you have read and write access to the installation folder where the Epic Games Launcher is placed. You may check if you have read/write access to the Epic Games Launcher’s default installation folder by doing the following:
- Using the File Explorer, navigate to C: Program Files (x86) and look for the Epic Games folder.
- Select Properties from the right-click menu of the Epic Games folder.
- Inside the Epic Games Properties window, navigate to the Security tab, scroll down to the ‘Group or user names’ area, and click on Users.
- In the permissions for users area, make sure that both read and write permissions have a checkbox next to them and are enabled. If none or only one option is selected, you must click the Edit button to update the permissions.
- Scroll down to the ‘Group or user names’ area, click on Users, grant both read and write rights by left-clicking on the little square boxes beneath allow, and then click Apply.
Reinstall the Microsoft Visual C++ Redistributables
The Epic Games Launcher, being a third-party program, necessitates the installation of some particular files on your Windows PC. The Epic Games Launcher checks for specific Visual C++ files and libraries to ensure that most games work on most Windows versions. Although it is doubtful that you do not already have them, some of these Visual C++ redistributables can be downloaded and installed on your Windows PC.

However, if there are no files or if they are obsolete, it is a good idea to download and install these files on your Windows 11 PC. These files will install the Microsoft C and C++ libraries, which are used by a number of older games and programs. Make sure you get the x64 version of these files for your Windows 11 PC before you begin. Get the ARM64 version of the files if you have an ARM-based device that runs Windows. Additionally, you will need administrator access to install these files.

For supported downloads, go to Microsoft’s Visual C++ Redistributable website. Then, download the following Redistributable packages:
- Visual Studio (2015 to 2022)
- Visual Studio 2013
- Visual Studio 2012
- Visual Studio 2010 SP1

Modify Epic Games Launcher’s parameters
One method suggested by Epic Games is to change the settings for launching the Epic Games Launcher. This may allow the launcher to bypass the self-update checkup routine that occurs when you install and open the Epic Games Launcher for the first time. Here’s how to simply change the target settings of Epic Games Launcher on your Windows 11 PC:
- Go to the start menu, type Epic Games Launcher into the search bar, and then select the Open File Location option.
- Select Properties from the context menu when you right-click on the Epic Games Launcher shortcut.
- Add the following text to the end of the section next to the Target option in the Epic Games Launcher Properties window and click Apply.
-SkipBuildPatchPrereq
- Continue by clicking the Continue button and then Yes on the User Account Control window that displays.

However, you should be aware that this method may have an impact on Epic Game Launcher’s capacity to update itself in the future. As a result, we propose that you utilize it as a temporary solution and undo it later if feasible. To reverse this solution, repeat the steps above, but instead of adding, remove the -SkipBuildPatchPrereq text that you inserted at the end of the Target field in step 3.

We hope that you enjoyed this article on how to fix Content Installation Failed Epic Games. If you did, we are sure that you will also enjoy reading our other articles, such as Epic Games Launcher sign in failed: How to fix it, or Epic Games Store free games of 2022.

