Today we are going to show you how to rotoscope an isolated subject in Photoshop. If you don’t know what is rotoscoping, you will learn everything in detail below.
What is rotoscoping?
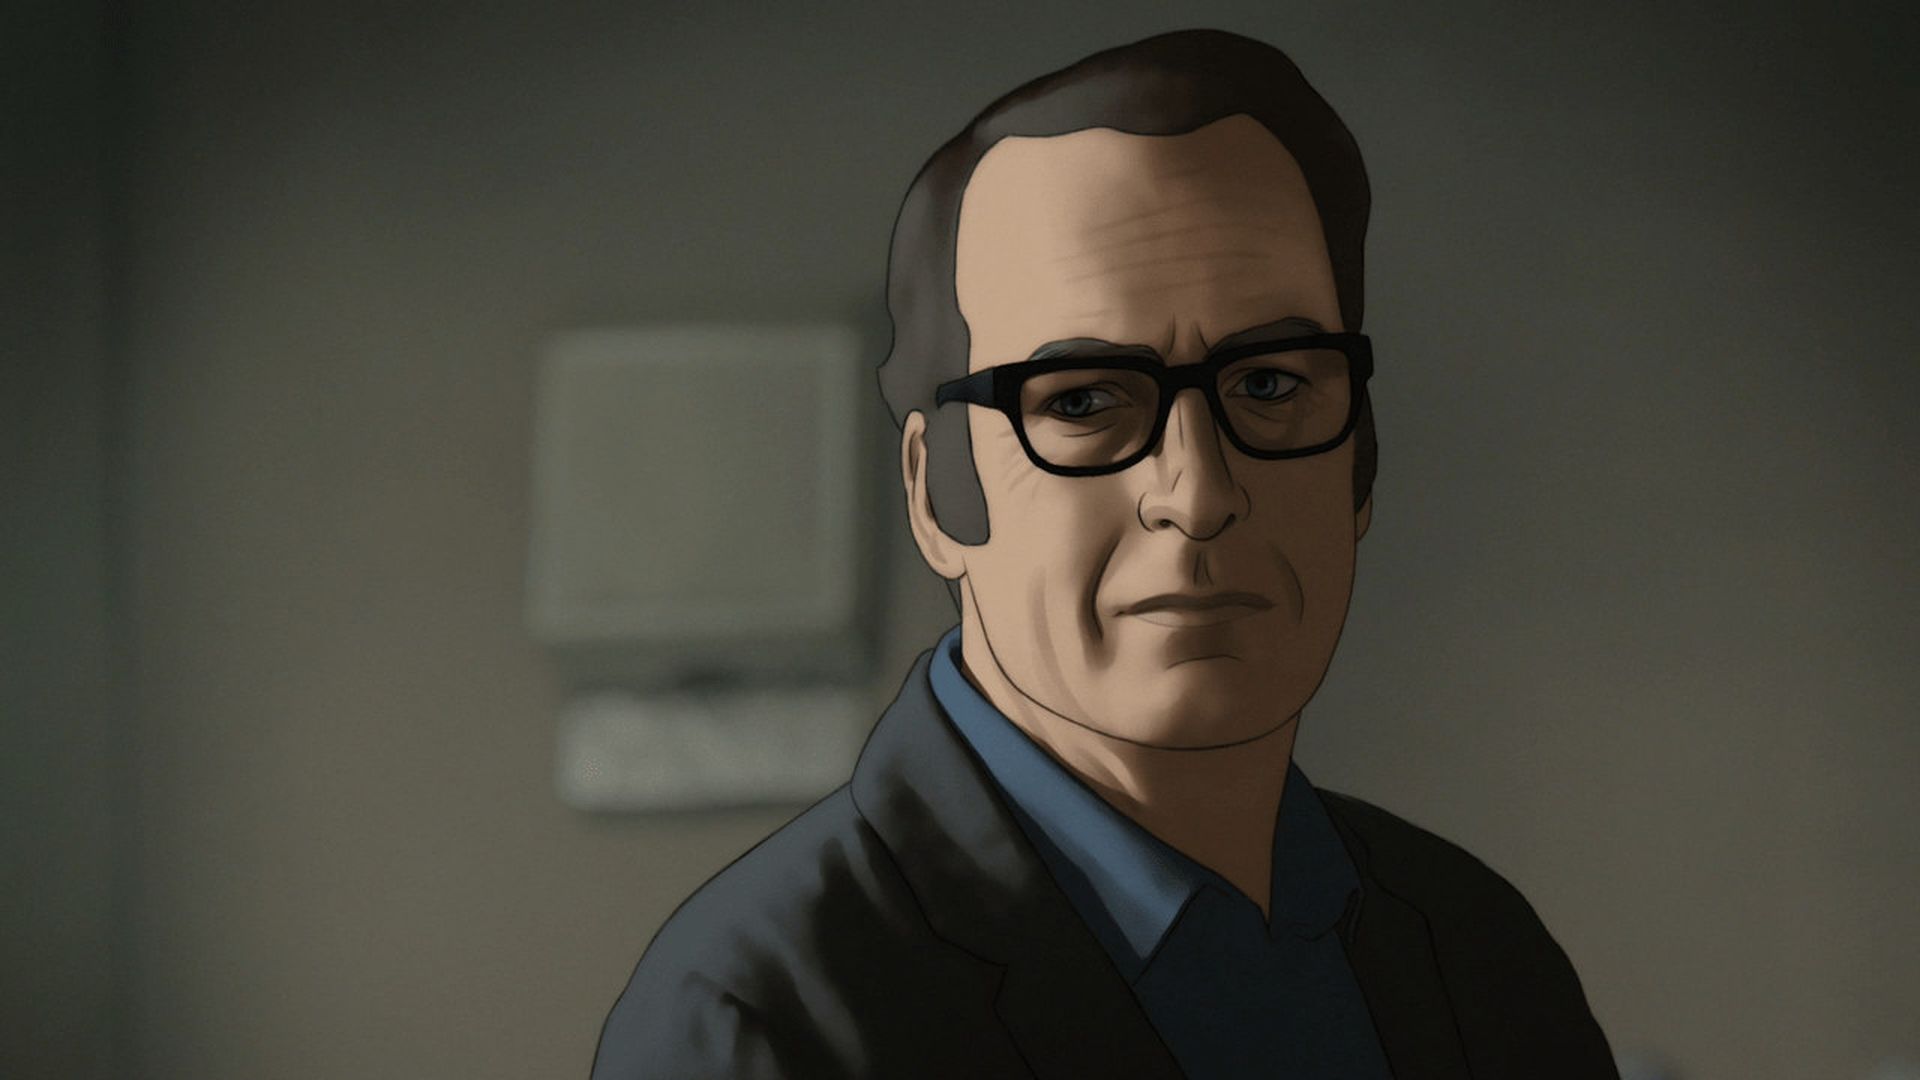
“Rotoscoping” is the technique of animating film frames one by one using live-action, and it’s used in a wide range of media, including television commercials and movies, notably “A Scanner Darkly,” which features Keanu Reeves.
We’re not going to make a full animated sequence in this tutorial, but we will learn how to rotoscope an isolated subject in Photoshop, which is really simple. Instead of applying the effect to the entire photo, which we could do if we wanted, we’ll just apply it to the main subject while leaving everything else in the photo untouched so that it appears as though we’re mixing reality with a painting.
By the way, if you want to learn how to add or remove rotoscope filter on TikTok, we have a detailed guide for you. There’s also a third party solution, check out the Best TikTok rotoscope filter remover.
How to rotoscope an isolated subject in Photoshop?
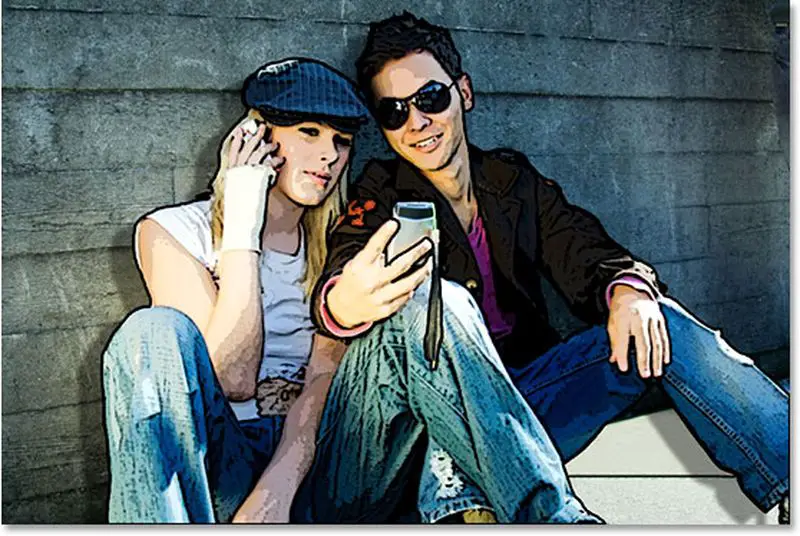
We are going to edit this photo:

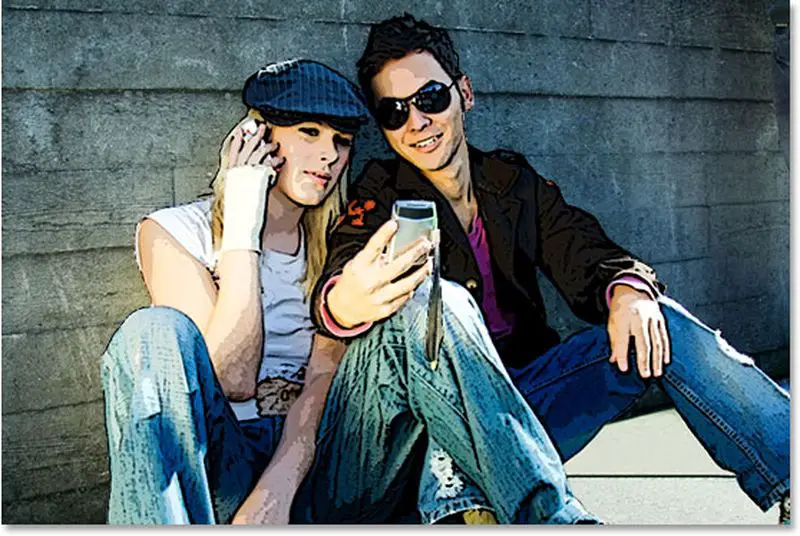
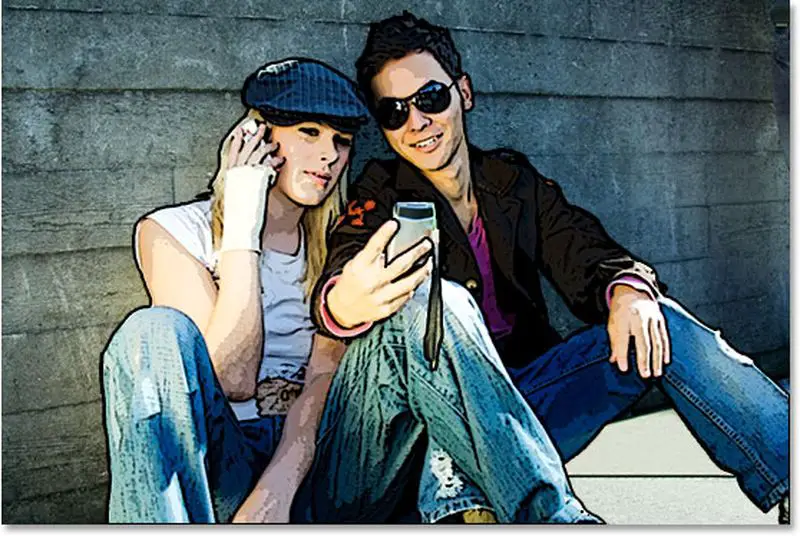
This is what it looks like in the end. We will add a rotoscope animation to the main subject while we will leave all other objects unedited:

Step 1: Isolate a subject
Since we’ll only be using the effect on the main subject of the photo, we’ll need to isolate it from the rest of the image. In order to rotoscope an isolated subject in Photoshop, follow these steps:
To apply the Photoshop effect to just two people on the sidewalk, we’ll need to select them. To choose your subject, you may use any selection tool that feels natural to you. We’ll utilize the Pen Tool, but the Lasso tool would also do the trick.
Select your main subject now:
 Keep an eye on the portion of the image that we haven’t selected.
Step 2: Copy your selection to a new layer
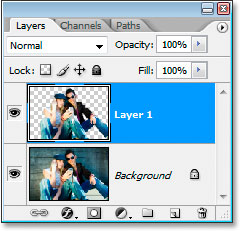
Select the main subject using the keyboard shortcut to copy (Ctrl+J [Windows] / Command+J [Mac]) to a new layer above the Background layer. You won’t see anything happen in your document window, but if you look in your Layers palette, you’ll notice that your selection has been copied to a new layer named “Layer 1” by Photoshop automatically:
 Step 3: Add the Poster Edges filter to your new layer
If you want to rotoscope an isolated subject now you need to Select “Layer 1” from the Layers palette, go to the Filter menu at the top of the screen, choose Artistic, and then Poster Edges. On the right side (circled in red), you’ll see Photoshop’s Filter Gallery set revamped to include “Poster Edges” as a filter option:
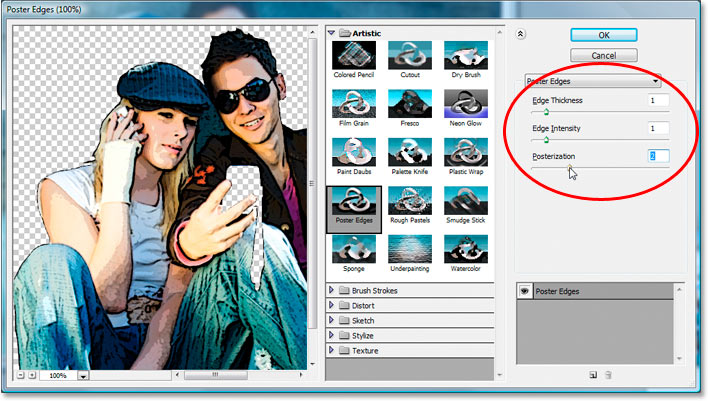 To avoid having your layers inadvertently disabled, keep an eye on the huge preview area on the left as you change the Poster Edges settings. We’ve set Edge Thickness and Edge Intensity to 1 and Posterization to 2 for our example image. These settings are ideal for this image, but feel free to play around with them to see if other options work better for your photo.
The goal is to transform the subject into something that resembles a painting rather than a photograph. The option you are going to choose here is the third one called “Posterization.” Lower the values and see if it works for your photo.
Close the Filter Gallery by clicking OK when you’re satisfied with the results. Here’s what our picture looked like after being filtered:
Step 4: Now add a Black Stroke around the isolated subject
We’ll boost the impact a little by adding a black line around the main subject. Select “Layer 1” from the drop-down menu at the top of the Layers palette, then select “Layer Styles” from the pop-up menu:
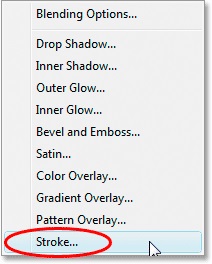
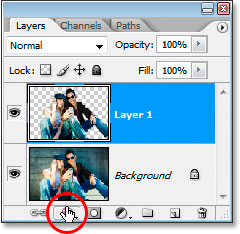 Choose Stroke from the bottom of the list of Layer Styles that appears.
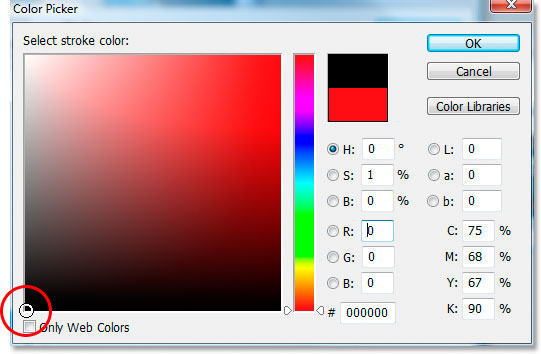
 The default color of the stroke is always red. We want our stroke to be black, therefore adjust it with the color switch next to the word “Color.”
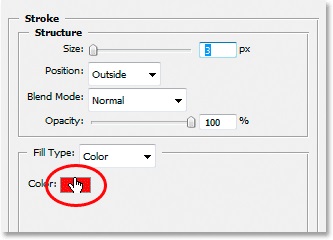 The Color Picker in Photoshop will display. To choose black, click in the bottom left corner of the large square area on the left. The values for the “R,” “G,” and “B” options on the right will all read “0” if you’ve selected pure black:
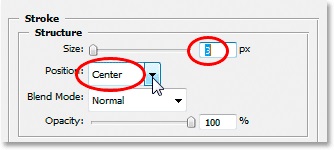
 Selecting a color for the fill and outline of your image is actually quite simple. All you have to do now is choose a hue from the Color Picker dialog box that opens up when you click OK in the Color Picker. Then, under Layer Style, change the stroke Size at the top to somewhere between 2 and 4 pixels, depending on the size of your picture. We’ve kept it at 3 pixels because it’s been working well for us so far. Then select “Center” from the list down-pointing arrow by clicking on it, then press OK to finish editing:
 The picture should now appear something like this after completing the black line around your subject:
Don’t go away yet from the Layer Style dialog box. We still need to add one more effect.
Step 5: Add a Drop Shadow effect
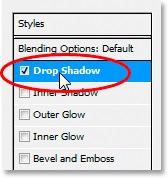
This is an essential part if you want to rotoscope an isolated subject in Photoshop. Click on Drop Shadow which is located on the left of the Layer Style dialog box:
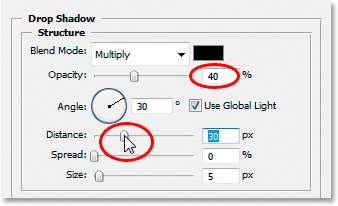
 The Drop Shadow options will appear in the middle column of the Layer Style dialog box. To make the drop shadow less dark and strong, start by lowering its opacity to around 40%. Then, drag the Shadow Distance slider to the right. Keep an eye on your image to see how far your shadow extends out from your subject while dragging the slider. We’ve increased my shadow distance to 30 pixels. Depending on the size of your photo, you may wish to adjust it higher.:
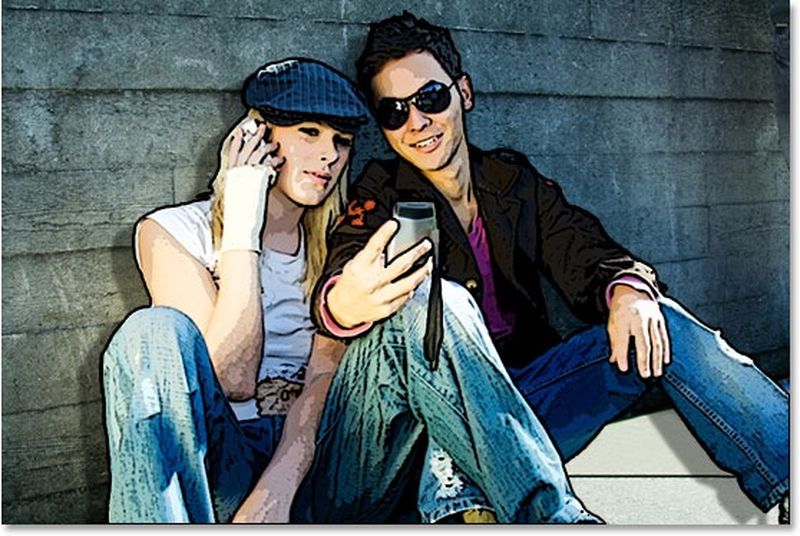
 This is how it looks after the drop shadow effect:
Step 6: Clean unwanted shadows
This is the final part you need to follow in order to rotoscope an isolated subject in Photoshop. Aside from some parts, the image looks superb. If you recall at the start of the lesson, we mentioned that there was something in his hand, and because we simply wanted the rotoscope painting effect to be applied to the two people in the picture, we made sure whatever he was holding wasn’t included in our initial selection so it wouldn’t be harmed. The drop shadow we just added extends over the top of it as well as a strap dangling beneath it, and things don’t appear proper. That needs to be addressed.
To remove the drop shadow, we’ll utilize the Eraser tool. However, before we can use it on a layer style, we need to transform the layer style into a normal layer. We’ll go up to the Layer menu at the top of the screen and choose Layer Style, then Create Layers:
 To convert layer styles into normal layers, go to Layer > Layer Style > Create Layers.
We can see that both the stroke and the drop shadow have been placed on separate layers in our Layers palette, with the stroke appearing above “Layer 1” and the drop shadow appearing below it. To select the Drop Shadow layer, click on it:
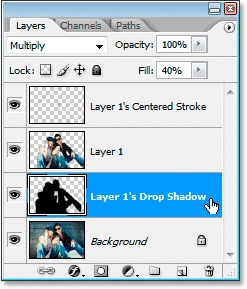 Both the Stroke and the Drop Shadow have been converted into normal layers.
Then, from the Tools palette, we’ll take our Eraser tool:
 We could also quickly select the letter E by pressing it. Following that, we may use the Eraser tool to remove the drop shadow from our image. All we have to do now is click and drag our mouse over the places where we want to remove the drop shadow, which in this case is over the object the guy is holding, including the strap dangling from it:
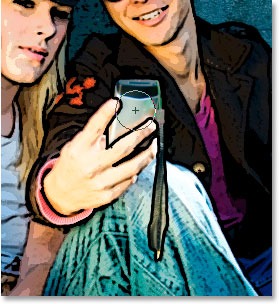 Use the Eraser tool to remove the drop shadow from any unwanted areas.
This way you’ve learned how to rotoscope an isolated subject in Photoshop. This is how it looks in the end:
