If you don’t know how to add a lens flare effect in Adobe Premiere Pro, we are here to help. Lens flare may be a fantastic element to a video, especially if you want to emphasize a landscape or environmental shot. It can also be an attractive effect or transition for music videos.
What is a lens flare effect?
It’s an effect that you may achieve using the camera; nevertheless, it is considerably easier to add it during video editing to obtain the desired impact. Thanks to Adobe Premiere Pro CC it is really easy to add lens flare effect to a video. Even most beginner users can add such effect following our guide. Let’s review how to
How to add a lens flare effect in Adobe Premiere Pro?
First select a video to add a lens flare effect. Then follow these steps:
- Launch Adobe Premiere Pro CC.
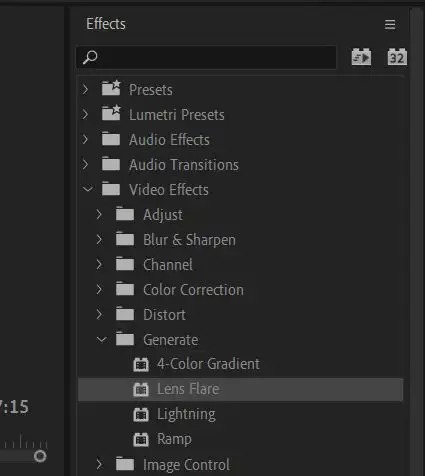
- Open the Effects panel.
- Choose “Video Effects”
- Go into “Generate”
- Select “Lens Flare.”
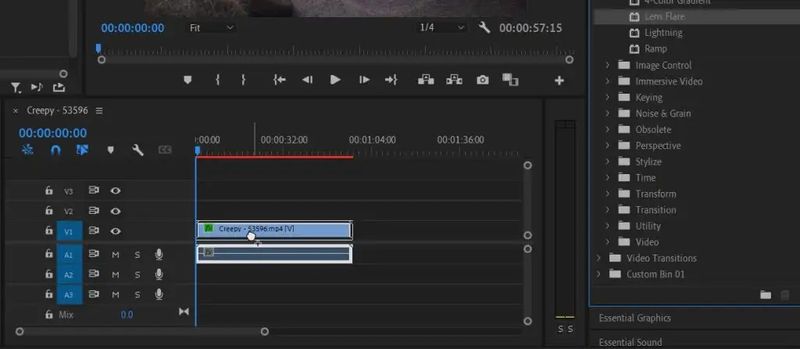
You may now use the Lens Flare effect on your selected clip by clicking and dragging over it.

After you’ve applied it, it’ll appear to be a non-moving optical flare image, and you’ll want to make some alterations to make it seem natural.
How to edit lens flare effect?
In the Effect Controls panel, look for a setting called Lens Flare. There will be many options for you to change in order for it to match your video under Lens Flare. You may preview the modifications in the movie playback area by selecting a range of frames and then changing them.

- The Flare Center option is a good place to start. You may adjust the lens flare’s position with this choice. It may be adjusted up and down, or left and right.
- You may adjust the intensity of the main point of light to create a dim or bright light with Flare Brightness. To match your video’s lighting levels, you may modify this.
- Use the Lens Type option to simulate the lens flare effect produced by various types of lenses. If one of them looks better to you, you may alter this setting.
- If you use the Blend With Original option, the lens flare is blended into the clip, which changes its opacity and blending mode if you want a subtle effect.
Knowing about these alternatives will be useful when we begin animating the lens flare. Because a static lens flare is the result of real movement on the camera and an external light source, you don’t see one very often in a video. Continue reading to learn how to create a natural-looking animation of the lens flare effect.
How to animate lens flare effect?
Follow these steps to animate your lens flare light effect:
- Place the flare’s center first by selecting the Flare Center option, then pointing your lens flare toward the “light source” it emanates from. For example, a street lamp or the sun. After you’ve put it in place, make sure your timeline cursor is at the part of the video where you want the flare to begin and then click on Flare Center to create a keyframe. Set your Flare Brightness to maximum brightness and a keyframe will be included.

- Now, move your timeline cursor to the moment in the video when you want the lens flare to end. This will be when the light source has been lost of sight. If you don’t have access to a real light source, emulate one by using the camera’s speed and placing your cursor at where the light should be if there was one.
- To do this, choose the Flare Center option again and adjust the lens flare’s position relative to the light source’s movement. You might also try lowering the Flare Brightness as the camera swings and the light source gets further away. If your light source goes off-screen or is no longer visible, reduce the Flare Brightness all the way.

When any object passes in front of your light, reduce the Flare Brightness and then increase it again after it has gone. You can try Adobe Premiere for free by going into this link. Plus, we have prepared a guide showing how to make an animated GIF with Adobe Photoshop.


