You can learn how to get Discord bot token with this article.
What is a Discord bot token?
A Discord Bot Token is a short phrase (represented as a jumble of letters and numbers) that acts as a “key” to controlling a Discord Bot. Tokens are used inside bot code to send commands back and forth to the API, which in turn controls bot actions. Never share your Discord Bot Token with anyone.
Creating and/or Viewing a Discord Token isn’t hard — but if you’ve never done it before, it can take a little while to figure out where to go.
Generating your token step-by-step
Here are the exact steps you’ll need to take.
1. Go to the Discord Developer Portal
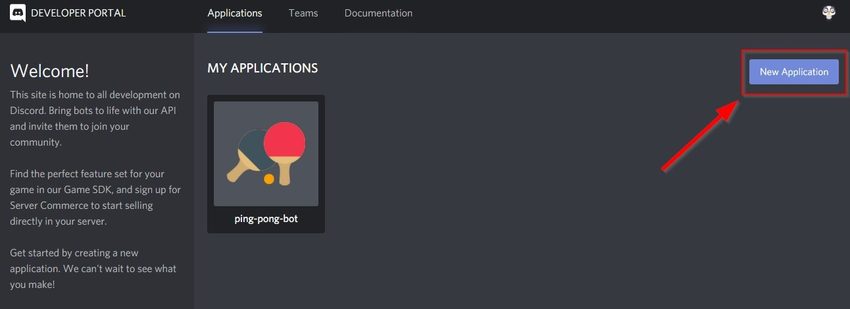
Your first step is to browse over to the Discord Developer Portal: https://discordapp.com/developers/applications/
This portal shows all of your applications and bots.
If you already have a bot created, click it in the list. If you don’t have any discord bots, click the “New Application” button.
2. Name
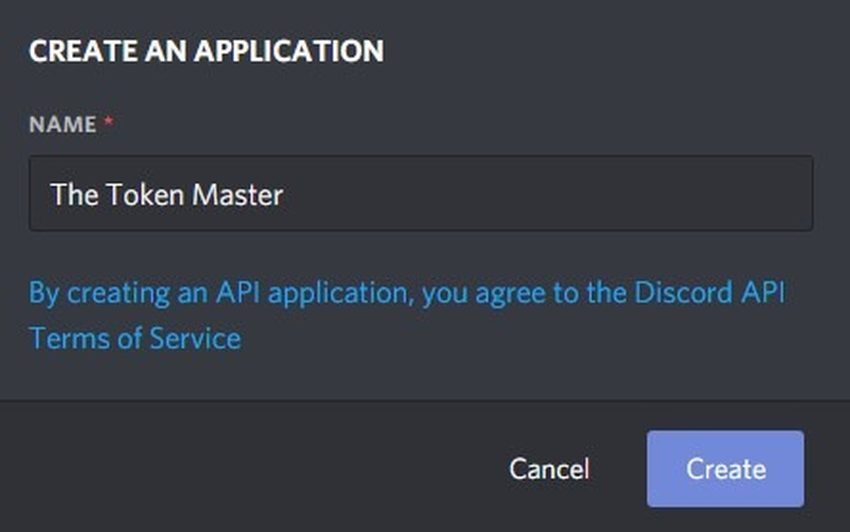
Here you will be asked to give your bot a name.
You are making a Discord Bot, or you need your token for a Discord Bot. If this is true, then consider what your bot should be named and type it in here.
3. Icon and Description
You’ve just created your very first Discord bot! The only thing left is to give it a descriptive name and an icon…
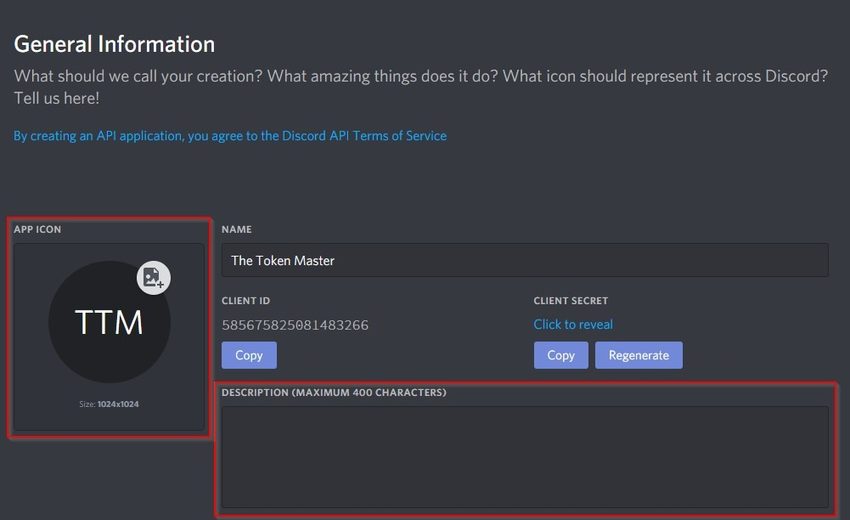
The best size for your bot’s icon is 1024×1024 pixels. You can get away with smaller icons, but not much. My personal icon size is 512×512.
IconFinder has a huge collection of amazing icons.
They have a library of free icons: https://www.iconfinder.com/free_icons
Next, I uploaded that icon into Discord and clicked the green “Save Changes” button.
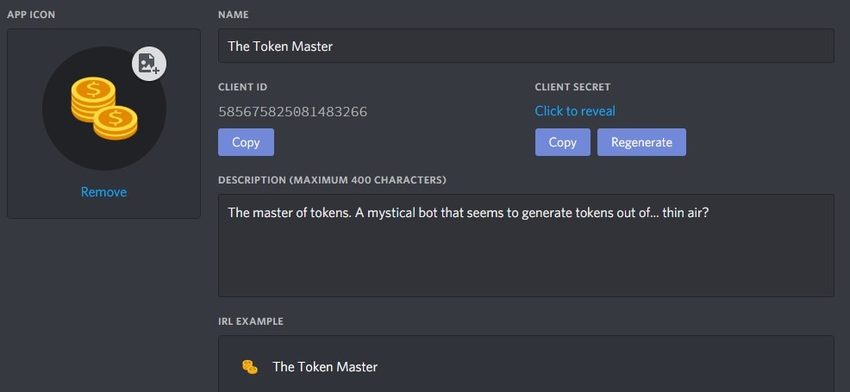
4. Retrieve your token
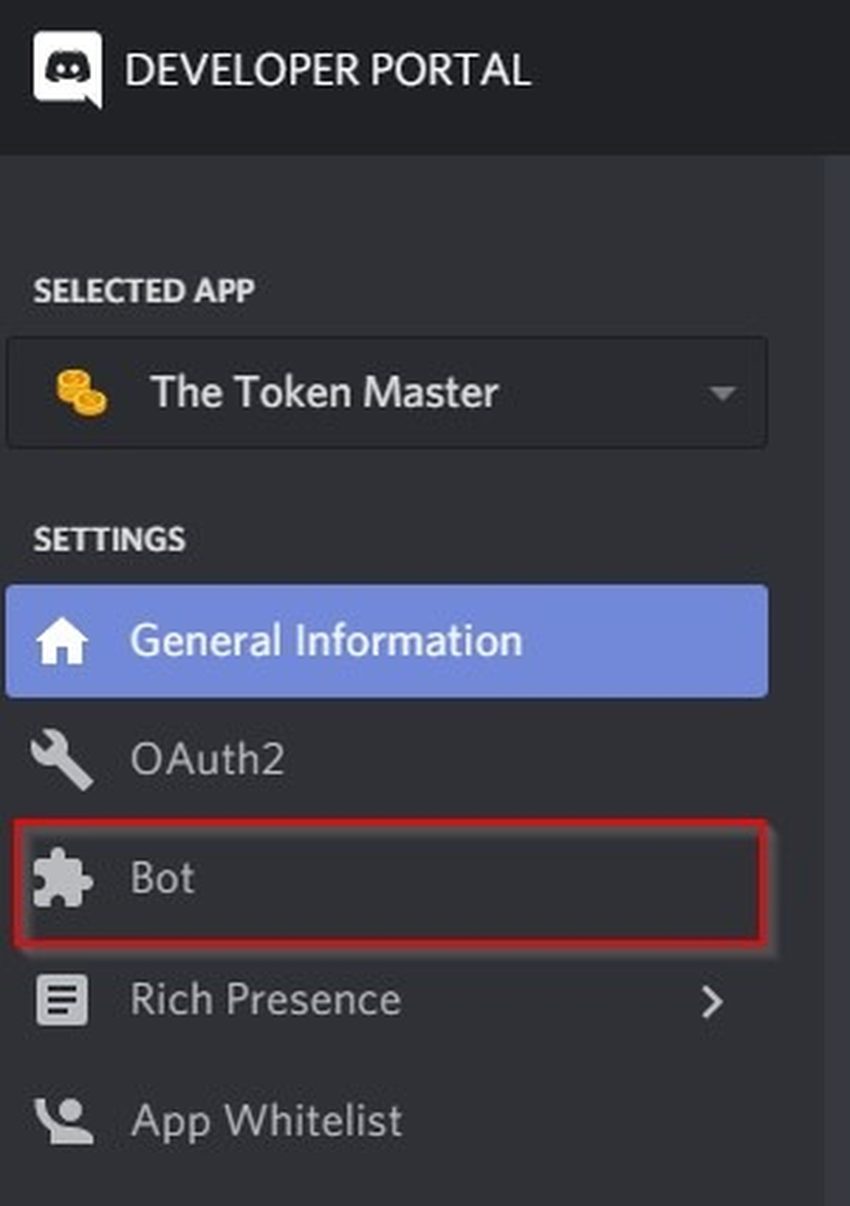
You must go over the menu on the left side of the screen and click on “Bot”, which is the icon that looks like a little puzzle piece.
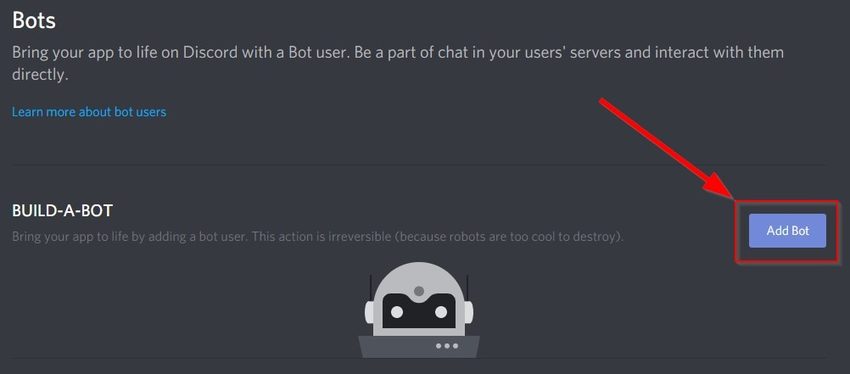
Click the blue “Add Bot” button
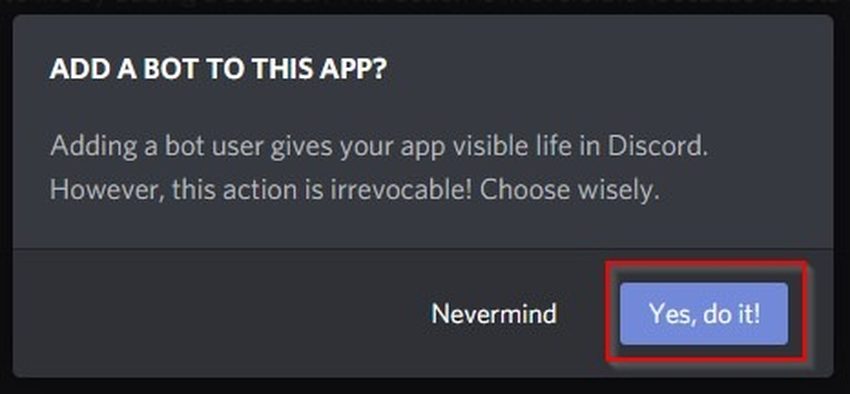
Click the “Yes, do it!” button.
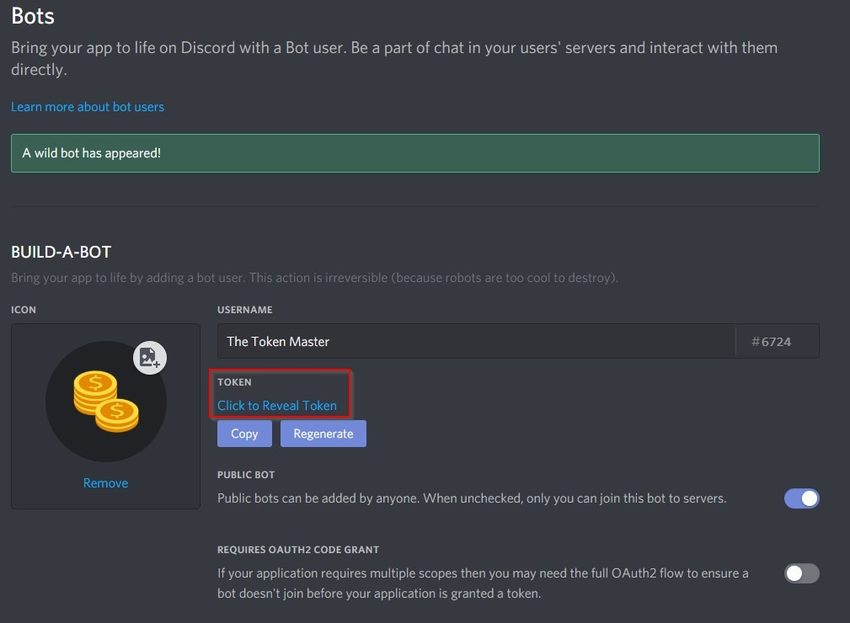
You’ll see a green message, “A wild bot has appeared!
Click “Click to Reveal Token”
5. Add your bot to a Discord server
In order to add your bot to your Discord Server, you’ll need to go back to the “OAuth2” tab.
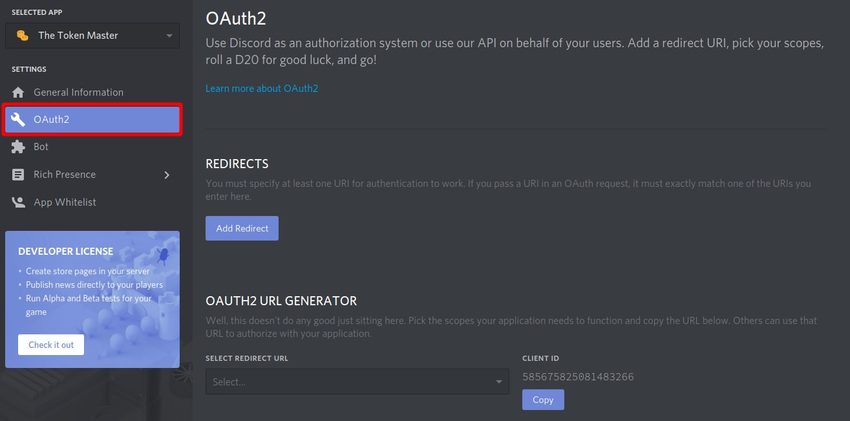
Once there, click the Generate URL button. A URL should appear below the “Bot Scopes” section. Copy and paste this URL into a browser window.
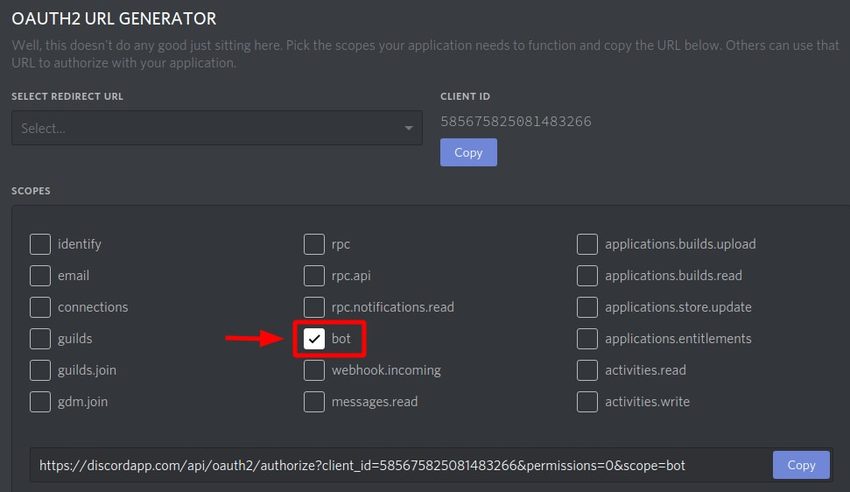
You’ll see that a URL popped up as soon as you clicked “bot.” This is your URL for adding your bot to a server.
Scroll down to the “Bot Permissions” section. This is where you choose what permissions to give your bot and what it can and cannot do.
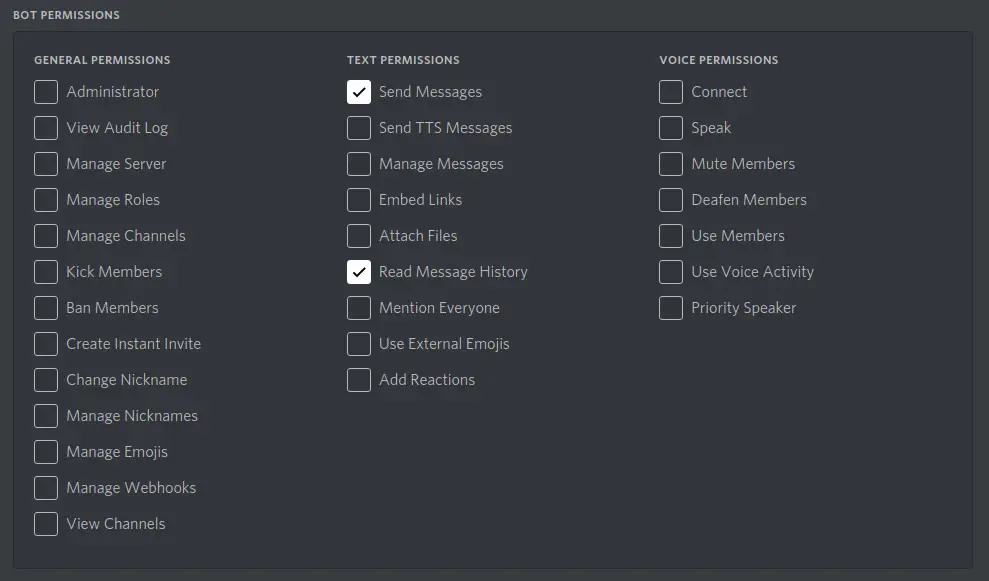
If you want to build a Bot that’s going to be handling all the routine stuff you need it to do, you’ll want to select the Permissions that are most similar to what it’ll be doing day-to-day.
Don’t forget to scroll up and look at the URL generated when you hit the “Allow” button

Copy the link from the original post by clicking the blue “Copy” button on the right side. This is the URL you’ll navigate to in order to add your bot to a server.
Click that URL to go to the server where you want to add your bot. Then, review the server settings to ensure they give your bot the permissions it needs to access the products, and continue to the next step.
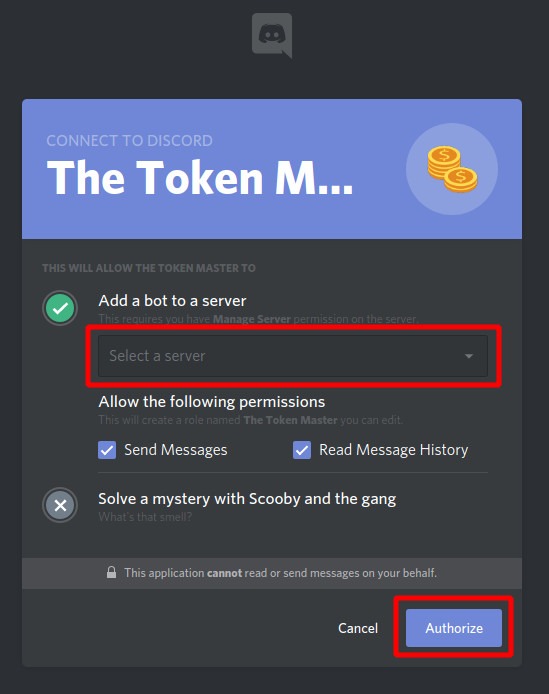
Success! Your bot has been authorized, and you should now be able to see it in the list of participants on your server!

