ZIP is an essential file format in Windows 11. It compresses data and makes files smaller, which helps speed up file transfers and saves disk space. Using ZIP compression to combine multiple files is a smart idea for storage, but it’s not always easy to get things to unzip correctly.
How to make a zip file in Windows 11?
Now, using File Explorer, locate the file (or files) that you’d like to compress or combine into a ZIP file. You can do this on your desktop or any folder on your computer. Before compressing, know that if you zip folders, their internal folder structure will be preserved when they get unzipped later.
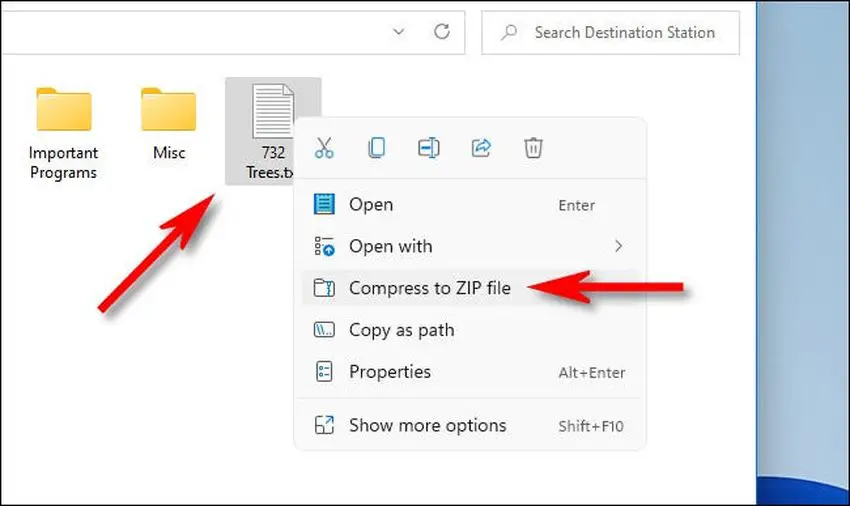
To zip a group of files or folders, you’ll first need to select them. Drag your mouse cursor over the group with your selection rectangle. If it’s a single file, right-click it. In the menu that appears, select “Compress to ZIP file.

As soon as you press Enter you’ll see that your ZIP file has been created and saved to your hard drive. Just type in a new file name or leave the default name in place. When you’re ready, press Enter.

So that’s it! There’s nothing else to it. Just make a ZIP file, copy or share it like any other kind of file.
How to extract a zip file in Windows 11?
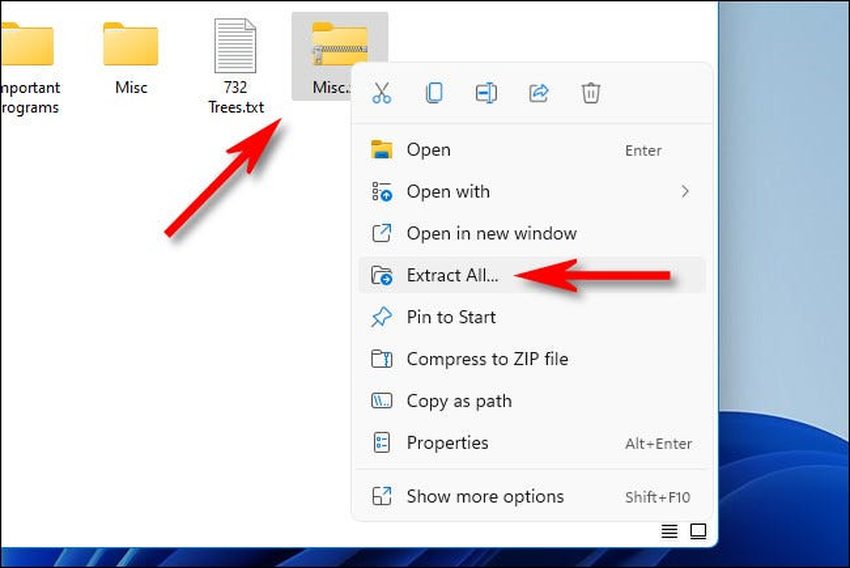
Extracting (unzipping) ZIP files is as easy as zipping them. First, locate the ZIP file that you’d like to unzip in File Explorer. Then, right-click the file and select “Extract All” in the menu.

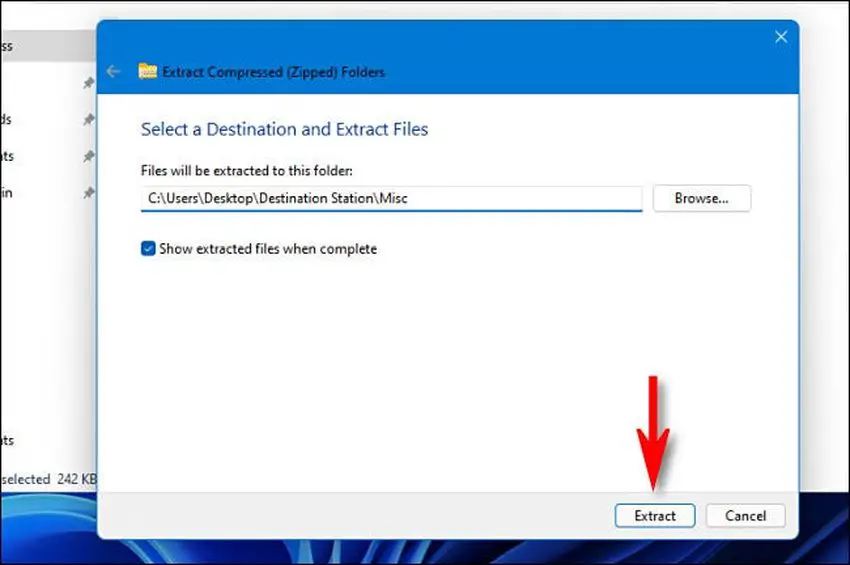
In the “Extract Compressed (Zipped) Folders” window, select the drive or folder that contains the zip archive. You can also extract the contents of a directory by selecting the entire directory. When you’re done, click “OK.
By checking the box beside “Show extracted files when complete,” you’ll make sure that you can get an easy peek at the extracted files after the process finishes. When you’re done with those options, click “Extract.

To extract the files, open the Zip file, select “Extract all” from the context menu, and choose the location where you want the files to be saved.


