The Windows 11 upgrade situation is to turn into a headache. Microsoft is likely to try to scare you away from installing the free upgrade, which is offered a day early today, depending on when your PC was built, the components you picked, and how it was set up. Millions of people will be informed that their systems are incompatible, and Microsoft has the option to postpone security upgrades if you install them on older computers.
However, based on our research, Windows 11 appears to be largely a refresh of Windows 10 with a fresh coat of paint, and it’s likely that your Windows 10 computer will function normally. Is this something we recommend? Not necessarily, but this article might assist you in determining whether or not your PC is ready for the trip.
Here’s a basic checklist of what you’ll likely need, and how you might satisfy each requirement.
- Basic system requirements: 1GHz dual-core CPU, 4GB RAM, 64GB storage, UEFI motherboard, TPM 2.0, DX12 graphics, 720p display
- UEFI must be enabled
- TPM must be enabled
- Secure Boot must be enabled
- Processor must be on Microsoft’s approved list if you want an in-place upgrade
- 64GB of free space if you want to dual-boot Windows 11
You should be fine if you pass. Simply wait for the official Windows Update to arrive and you’ll be set.
If not, you should turn on your TPM and Secure Boot setting right away.
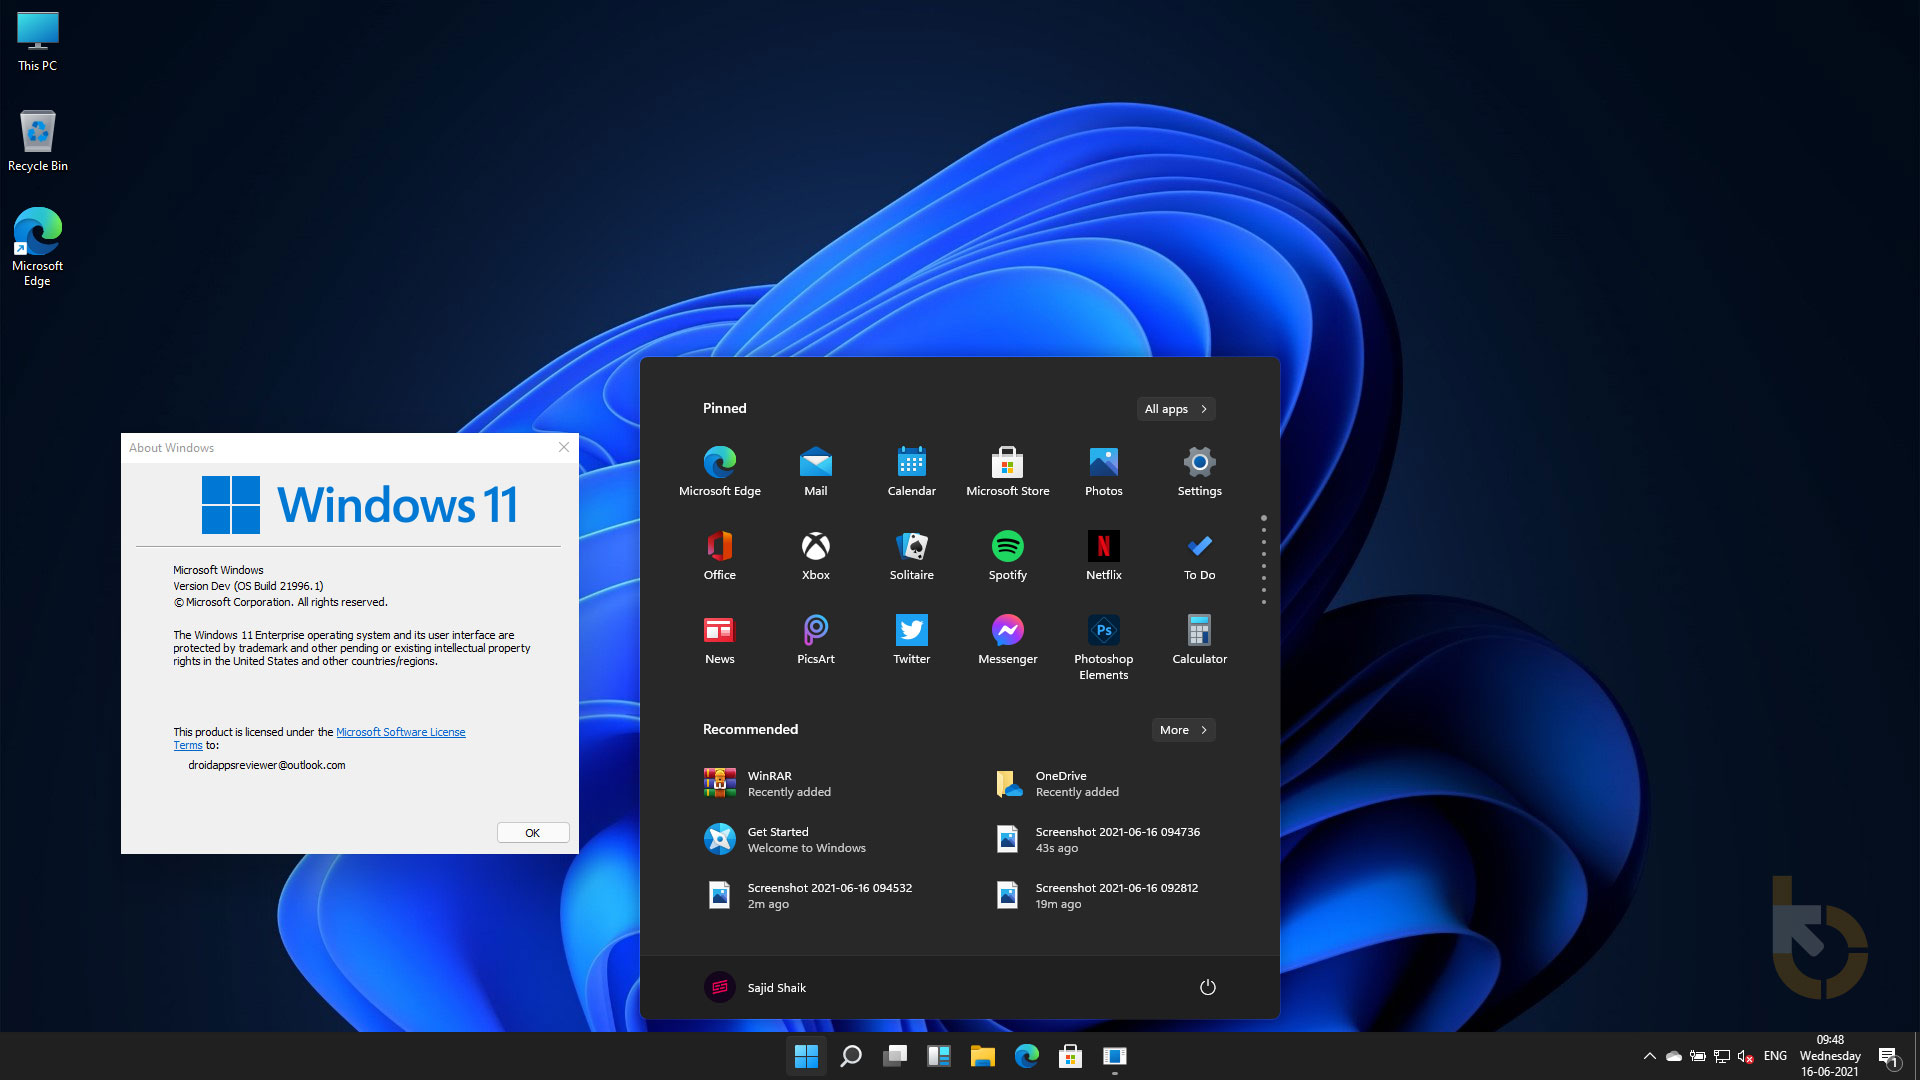
How to turn o TPM?
You should already have a Trusted Platform Module (TPM) on your PC, either built into your desktop or laptop motherboard or CPU.
It’s possible that Windows may detect your TPM, and you can quickly check by running the PC Health Check tool or hitting Win + R, entering tpm.msc into the window that appears, and pressing enter to see what type of TPM is there and whether it’s “ready for use.”
If it isn’t, don’t give up yet! It could be disabled in your BIOS and you’ll need to look for it.
How do I get to my BIOS from Windows?
Then, reboot your PC and use the Del or F2 keys (or maybe F1 or F10) according to your motherboard’s maker. When you restart, most likely the correct one will show on-screen.
If you’re still having trouble after following those steps, try Advanced Startup instead: On the Start menu, type UEFI and select Change advanced startup options before restarting. Once you see the semi-secret startup menu, hit Troubleshoot, then Advanced options, then UEFI Firmware Settings, and finally hit Restart.
The TPM option is referred to by a number of different names inside the BIOS. If you don’t see an obvious place to check, Microsoft suggests looking for a sub-menu called “Advanced,” “Security,” or “Trusted Computing.”
Oh, and if your BIOS requires it, you may need to use the arrow keys on your keyboard to move things around, as well as possibly the PG UP / PG Down buttons to switch things on and off.
Got it? Great! But don’t leave the BIOS just yet.
If you only have a TPM 1.2 module, not TPM 2.0, you still aren’t out of luck: Microsoft will let you modify a registry key in Windows to allow upgrades “if you acknowledge and understand the risks.” If so, hit Start, type regedit, search for “HKEY_LOCAL_MACHINE\SYSTEM\Setup\MoSetup” find the AllowUpgradesWithUnsupportedTPMOrCPU key, and set its value to 1.
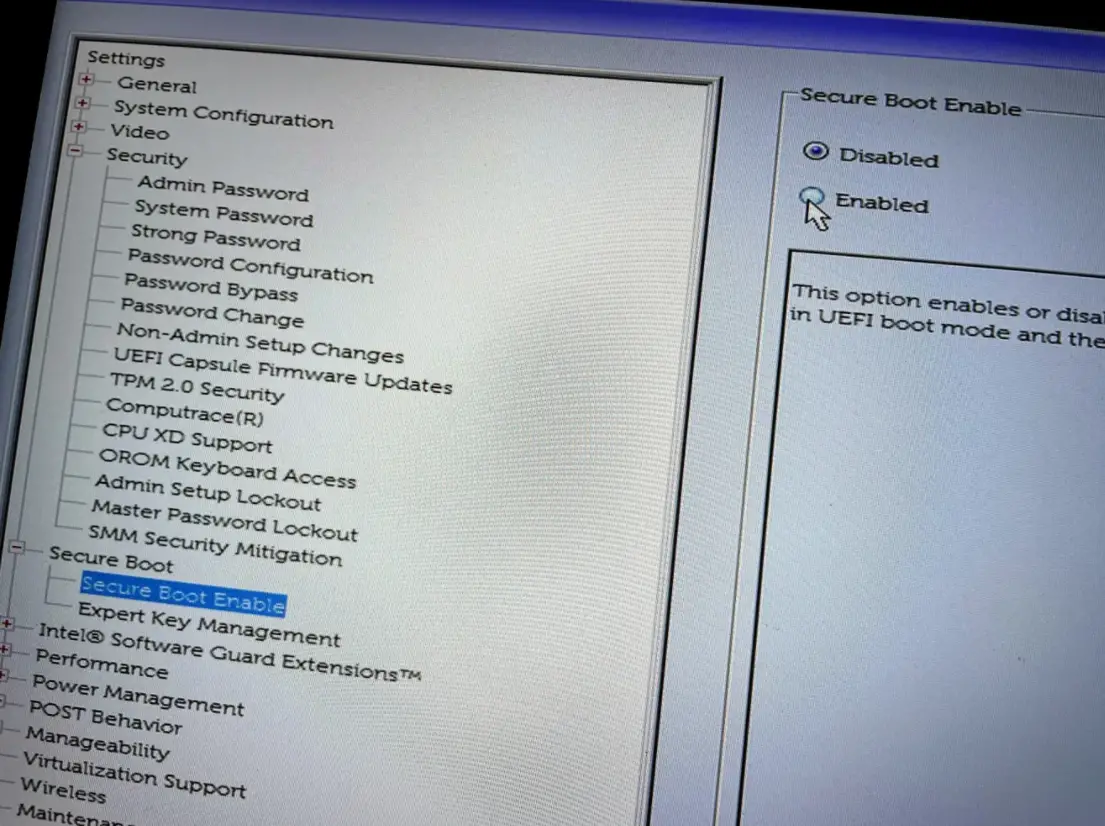
How to turn on Secure Boot?
In the BIOS, look for a sub-menu labeled Secure Boot. It might be hidden in a “Security,” “Boot,” or “Authentication” menu.
Flick it to “Enabled,” if it isn’t already.
There are a few different methods for determining whether or not Secure Boot is already active on Windows: The System Information app, which is included on Windows 10 by default, may be used to view Secure Boot status and your current BIOS mode without the need for additional software. In addition to Microsoft’s PC Health Check tool, you can start Start and enter System Information to see a variety of information, including Secure Boot status and firmware version.
If your PC is fairly old, it most likely has a UEFI BIOS, but you may not be using it presently. If your PC has a legacy BIOS that uses MBR-partitioned drives rather than the current GPT (GUID Partition Table) standard required by Windows for UEFI, you’ll need to convert it.
Microsoft does have an MBR to GPT conversion tool, but messing with partition tables fundamentally puts the data on your drive at risk.
If you don’t care about your data, a clean install of Windows 11 is as good as it gets. If you DO care about that data, why not consider dual-booting with Windows 11 instead? In addition, if your CPU is too old, then those could be your only simple options.
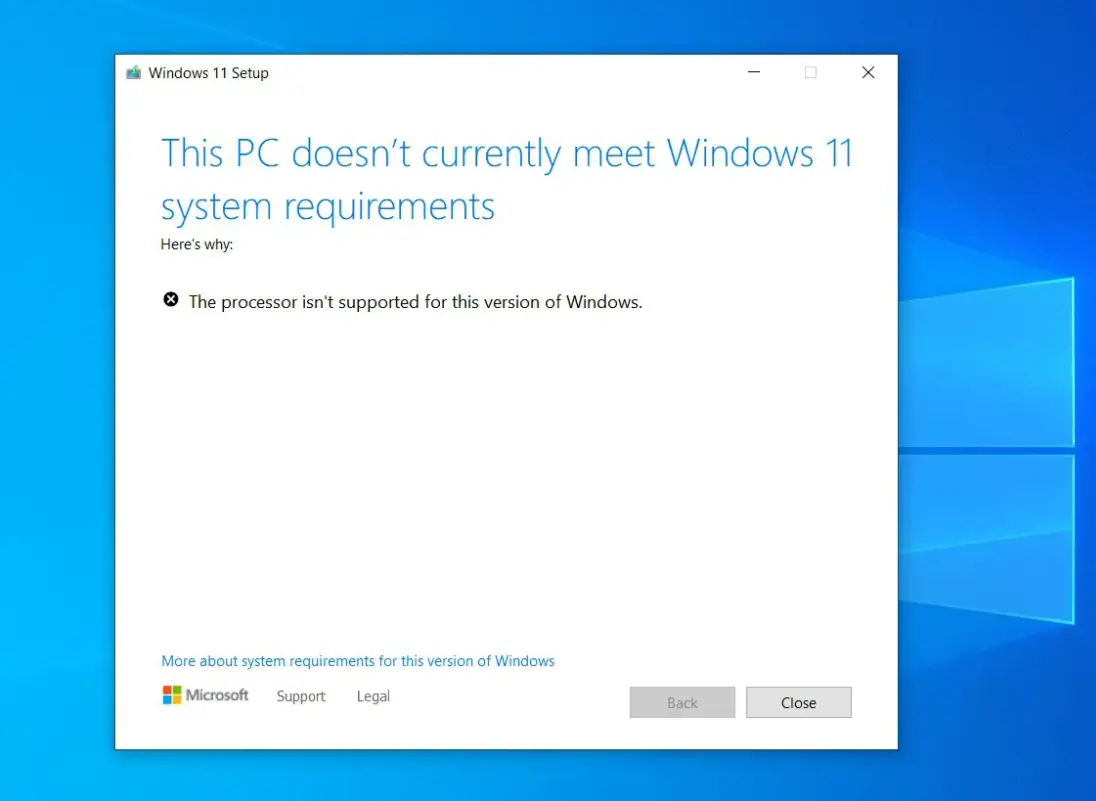
Processor support problem
There are always hacky ways to get around Microsoft’s restrictions, which is a mix of old and new ISOs. The company is generally not allowing PCs with older CPUs to install Windows 11 over their existing Windows 10 operating system and keep existing settings and files.
That means you’ll generally need to create a new drive partition or overwrite an existing one, and it makes dual-boot particularly enticing.
You can find Microsoft’s official lists of supported processors at these links:
- Supported Intel CPUs for Windows 11
- Supported AMD CPUs for Windows 11
- Supported Qualcomm SoCs for Windows 11
Generally, Intel 8th Gen or newer CPUs are supported, as are AMD Ryzen 2000 and newer.
How to dual boot Windows 11 or clean install the OS?
Whether you’re starting from scratch or merely dipping a toe into the water with a dual-boot, the procedure is usually about the same:
- You’ll need to free up some space.
- Download the Windows 11 ISO or tool.
- Burn to a bootable drive.
- Use it to install Windows.
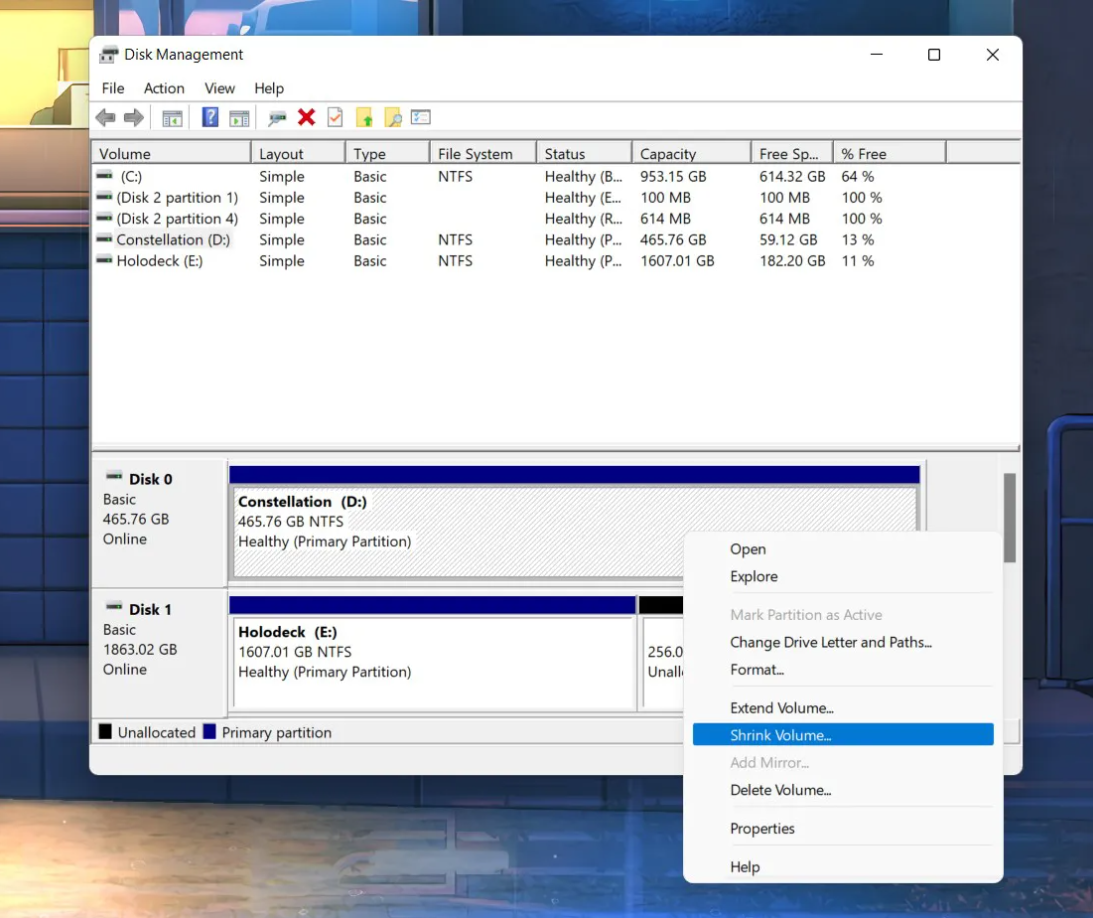
A second drive isn’t required for a dual-boot. You may reduce the size of your existing partition with Microsoft’s Disk Management tool in a few simple steps.
- Hit Start.
- Begin typing in “Create and format hard disk partitions”.
- Hit enter to launch it.
- After that, right-click the drive and select Shrink Volume. Check to see whether there’s enough room on your hard drive before shrinking it. You’ll want to reduce it by at least 65,536MB (64GB) so there’s enough space for Windows 11.
- To install the ISO, all you need is a USB external hard drive and some burning software.
If everything goes as planned, you’ll restart your computer with the USB key inserted to begin the procedure. If your system doesn’t automatically load, you may have to manually select your external drive by pressing F12 while the system is booting up.
Now, be careful to select the right location for Windows 11 installation. Before deciding where to install your new hard drive, consider powering down and unplugging any extra drives on your desktop.
It’s not difficult to move between operating systems after you’ve set up a dual-boot.
- Hit the Windows key to pull up the Start menu.
- type UEFI and pick Change advanced startup options.
- select Restart now.
- Once you boot back into the advanced startup menu, pick Use another operating system and it’ll present you with your choice of OS.

