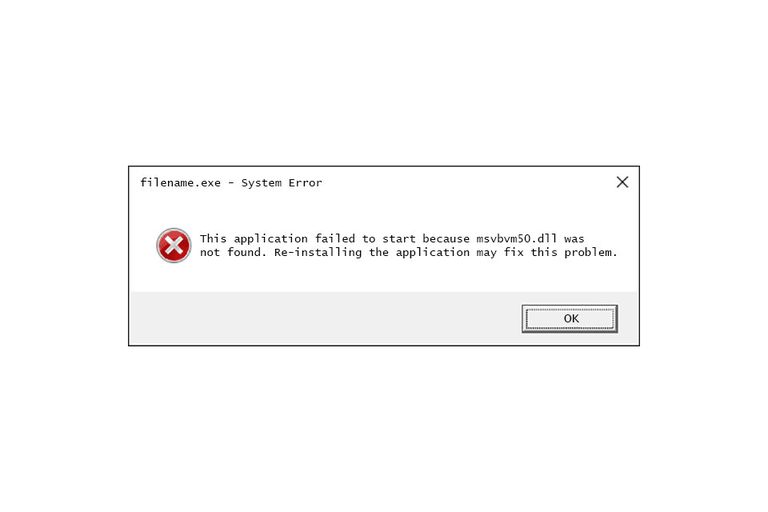
One of the most common errors in Windows 10, 7, and 8 is related to the msvbvm50.dll library and today we are going to show you how to fix these errors. As described by many users, the error in question appears when trying to run a certain application or game.
As it happens with most DLL libraries, the dependency of certain programs is linked to Visual Studio C++, a library developed by Microsoft. Therefore, the most immediate solution is to reinstall this library.
How to fix msvbvm50.dll error on Windows 10, 7 and 8?
Since there are different versions of the library, the first thing to do is to know the architecture of your computer in order to download the correct version. In this case, the process is as simple as right-clicking on the Windows icon in the Start menu. Then, we will click on System.
Now the system will show us the architecture of the computer, which can be 32 or 64 bits. The last step is to download the compatible version from the Microsoft website: x86 for 32-bit computers and x64 for 64-bit computers. Once downloaded, the installation process is similar to that of other programs.
Another alternative solution to the previous method is to download the library manually and install it in the corresponding directory.
Once we have downloaded the file, we will go to the following path to paste the file in the root of the folder: Local Disk C:/Windows/System32

If our computer has a 32 bits architecture, we will have to paste the file again in the following route: Local disk C:/Windows/SysWOW64
If the error persists, it is most likely due to the fact that the program we are trying to run does not detect the library correctly. To force the detection of the msvbvm50.dll file, we will have to paste it in the directory of choice of the program in question. Accessing this path is as simple as right-clicking on the application icon on the Desktop; then click on Open the file location.
Finally, we will paste the file into the root of the folder.
Then we will have to resort to the CMD, also known as Windows command prompt. For it, we will write the name of the program in the Windows search menu, then right-click on the program to execute it with administration permissions.
Once we are inside, we will type the following command:
sfc /scannow
Now a series of processes will be executed to repair the system errors, including the missing DLL files. The process may take a few minutes, depending on the read and write speed of the hard disk. And that’s it. There should be no problems if you’ve carefully followed all the steps. The process will be followed the same on Windows 10, 8 and 7.


