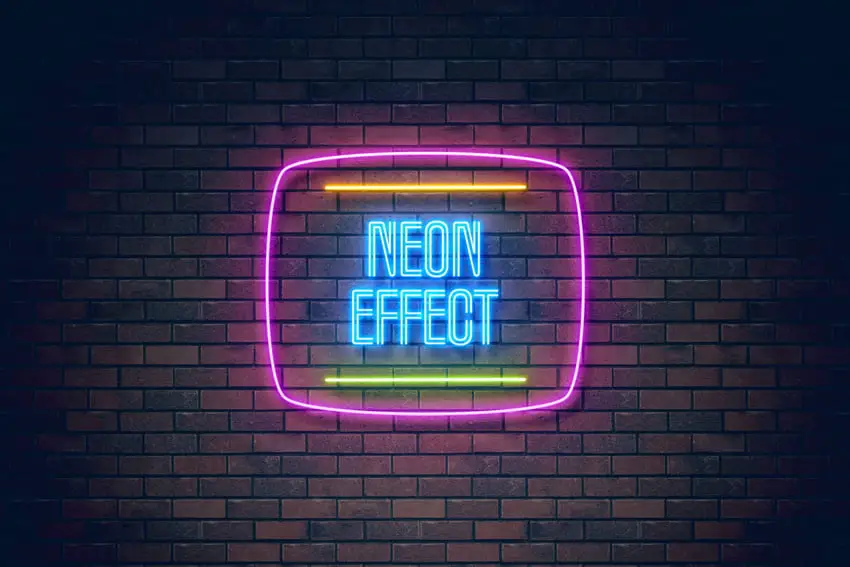
In this simple and quick tutorial we are going to teach you how to make a neon light effect in Photoshop so that you can use it giving a different touch to your photographs. Just 10 steps and you can have very interesting results in just a few minutes.
How to make neon light effect in Photoshop: follow these steps

Step 1. Choose backround and treat the image
For this example we have decided to make the effect on a photograph of a brick wall. We open our image and the first thing we have done in this case is to darken it a bit so that later we get a light and shadow effect when creating our neons. To do this, we create a new Adjustment or fill layer and choose Curves. Once there, we will adjust the curves in the graph that appears to us until we achieve the desired effect. Everything will depend on the photo we have chosen and the retouching you need.
Step 2. Generate glow
Our neon lights will be located in the center of the image. Therefore, we are going to create a light effect in the center for when we place our neons and thus give us a more realistic air. To do this we create a new layer, go to the Color Picker in our tool panel on our left side. We select the white color. After this action, we go to the Brush tool and select a hard brush with Opacity and Flow at 100%. For this occasion, the size chosen for the brush is 300 pixels (but it will always depend on each image and the effect we need).
Once we have the white spot made with the brush we move to blur it. For this we go to the top menu and click on Filters> Blur> Gaussian blur and choose a blur radius of 100 pixels. Once this is done, we lower the opacity of this layer to 65% to qualify the result.
Step 3. Select typography and write text
With this we already have the background image ready. From now on we will create our neons. We will simulate a label with the word NEON, for this we will create a new horizontal Text layer that we will find in our tool panel on the left. We choose a font and write the text. As we had previously selected the color white, the text appears in this color.
Step 4. Layer style (outer glow)
This is the fourth step to make a neon light effect. Once the word is written, we double click on the text layer and the Layer Style window appears. We select Outer Glow that we find in the lower left of this new window.
Once selected, we check that we have several options. We left the Blend Mode to Normal and adjust the opacity to our liking. In our case we choose a fuchsia color for the glow and thus simulate neon light. We also adjust the Glow Size and Spread values.
Step 5. Layer style (inner glow)
To continue creating our neon light effect, we now click on the Inner Glow option. We re-adjust the values as appropriate with the intention of generating within each letter a small color reflection that simulates the neon tube. We insist that these types of adjustments do not have to be pre-established as in the example that we show you, but rather that it is convenient to adjust until reaching what we intend to achieve. For this, Photoshop allows us to visualize at all times what we are retouching if we have activated the Preview tab to the right of our Layer Style window.
Step 6. Layer Style (drow shadow)
To finish getting the neon light effect to our text, click on the Drop Shadow option. We give a color to our shadow somewhat darker than that of our neon glow. We chose the Multiply Blending Mode, lowered the opacity to 20%, gave it a distance of 25 pixels, an extension of 45%, and a size of about 35 pixels. With this we managed to fade the shadow and achieve the effect that our neon is reflecting a shadow the color of neon on the wall.
With this we would already have created our label but not only can we create a neon from a word, we can also do it with a shape. We are going to do it and we would complete our neon sign.
Step 7 Create a shape (ellipse tool)
In a new layer, we create an ellipse with the Ellipse Tool that we find in the tool panel on the left side of our screen. Our circular shape will have a transparent fill and a 2 pixel stroke. The color will again be white.
Step 8. Layer style (outer glow)
Once our circle is created we will double click on the layer to activate the Layer Style window. To make our label more dynamic, we choose a vivid turquoise color and begin to adjust the Outer Glow options (in this case we will leave the same values as for the text, which will also have been left by default, having previously assigned them to our word).
Step 9. Layer style (inner glow)
In the Inner Glow settings we will make a small modification. We chose the turquoise color again and we also increased the size of the glow by a few pixels in order to leave the interior of our neon white, unlike the word in which we had left a small line of color.
Step 10. Layer style (drop shadow)
Our last step is the Drop Shadow. We will keep the same values that we gave to our word again but we did change the color assigning a darker turquoise tone.
As you can see, in a few simple steps we can create in a few minutes a very successful neon light effect and apply it to our photographs.


