Let’s explain how to change Outlook theme in today’s guide! One of the many outstanding benefits of using Outlook is the ability to modify the Microsoft Outlook theme; the application includes a variety of configurable choices, including your MS Outlook’s background color, layout color scheme, and overall theme. Furthermore, the Microsoft Outlook theme may be changed at any time.
Here’s how to change Outlook theme for a more personalized experience.
How to change Outlook theme on Windows?
Sign in to Microsoft Outlook first, whether you use it via the Microsoft Office 365 suite or Outlook.com. Then, proceed with the methods below to change the theme in Outlook efficiently. Click here to sign Outlook.
Step 1: Navigate to settings and select the inbox theme
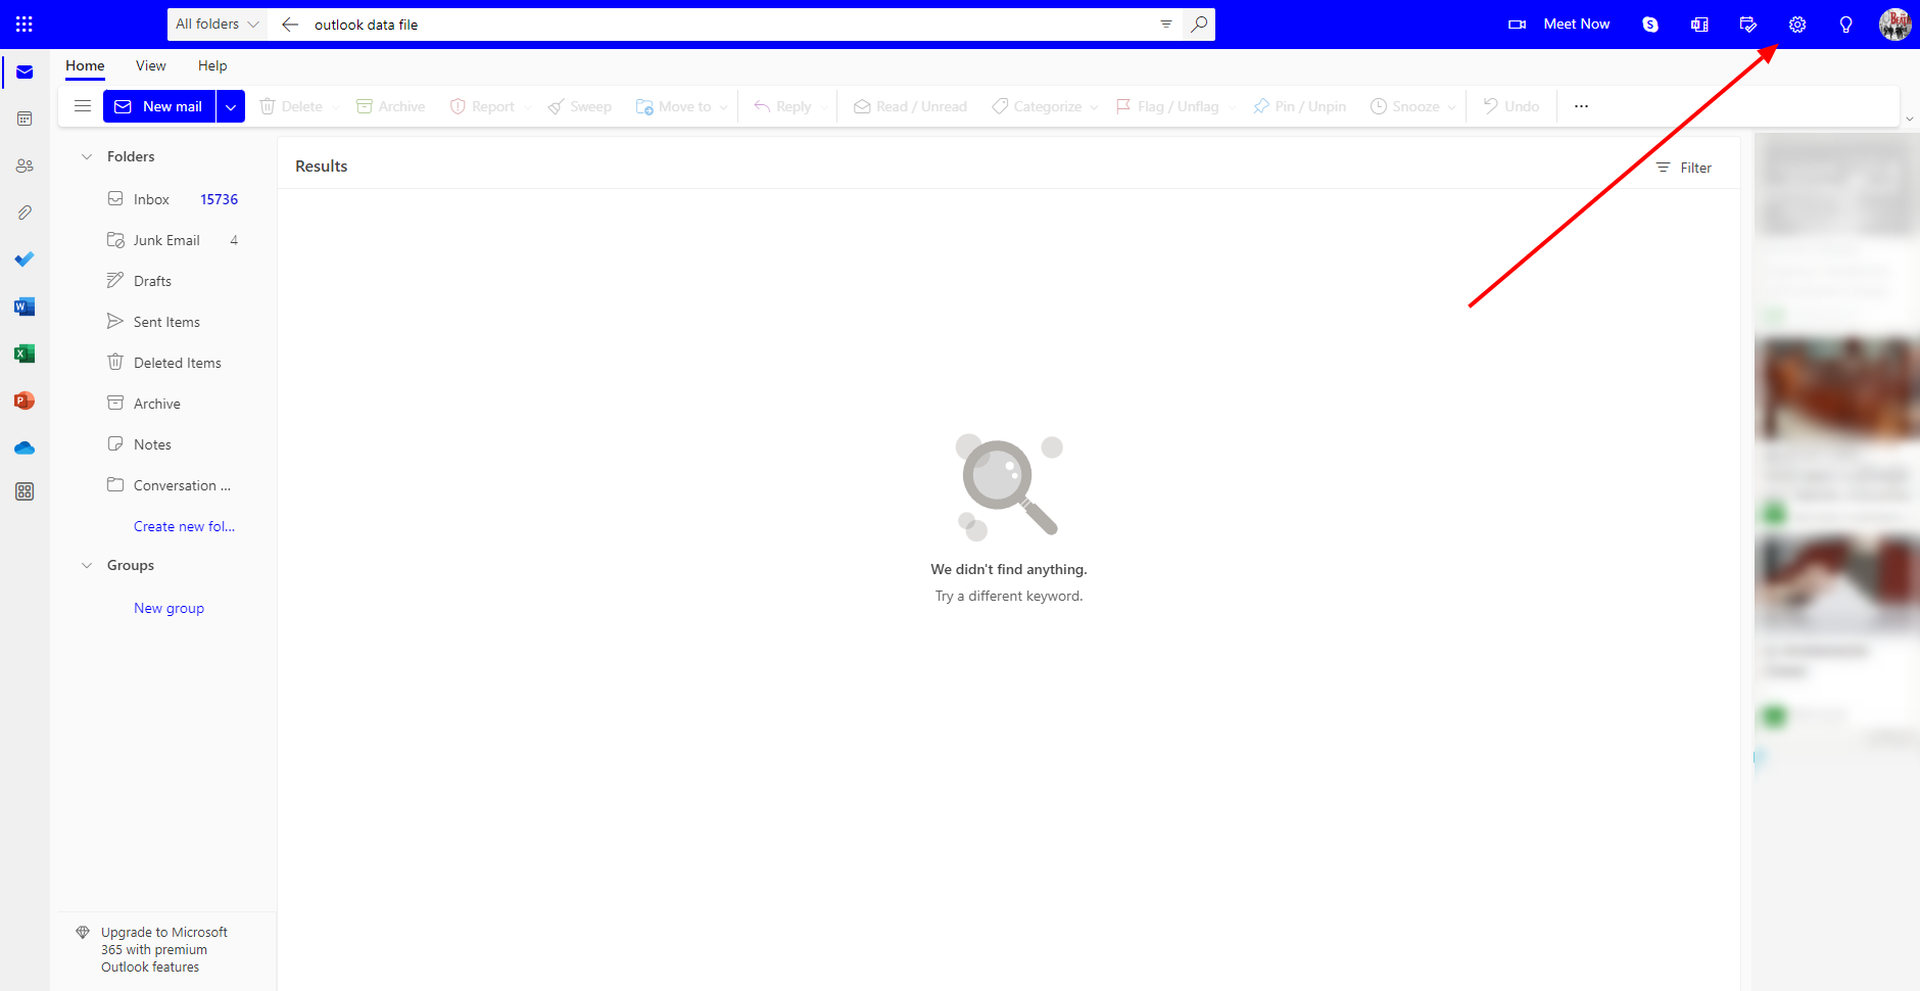
After signing in to Microsoft Outlook, select the gear icon in the upper-right corner to access settings. You’ll need it to begin modifying the Outlook account’s inbox theme. Next, select a theme from the Featured section.
Step 2: Choose an appearance and save it
You may also:
- Go to Settings.
- Select “General” and “Appearance“.
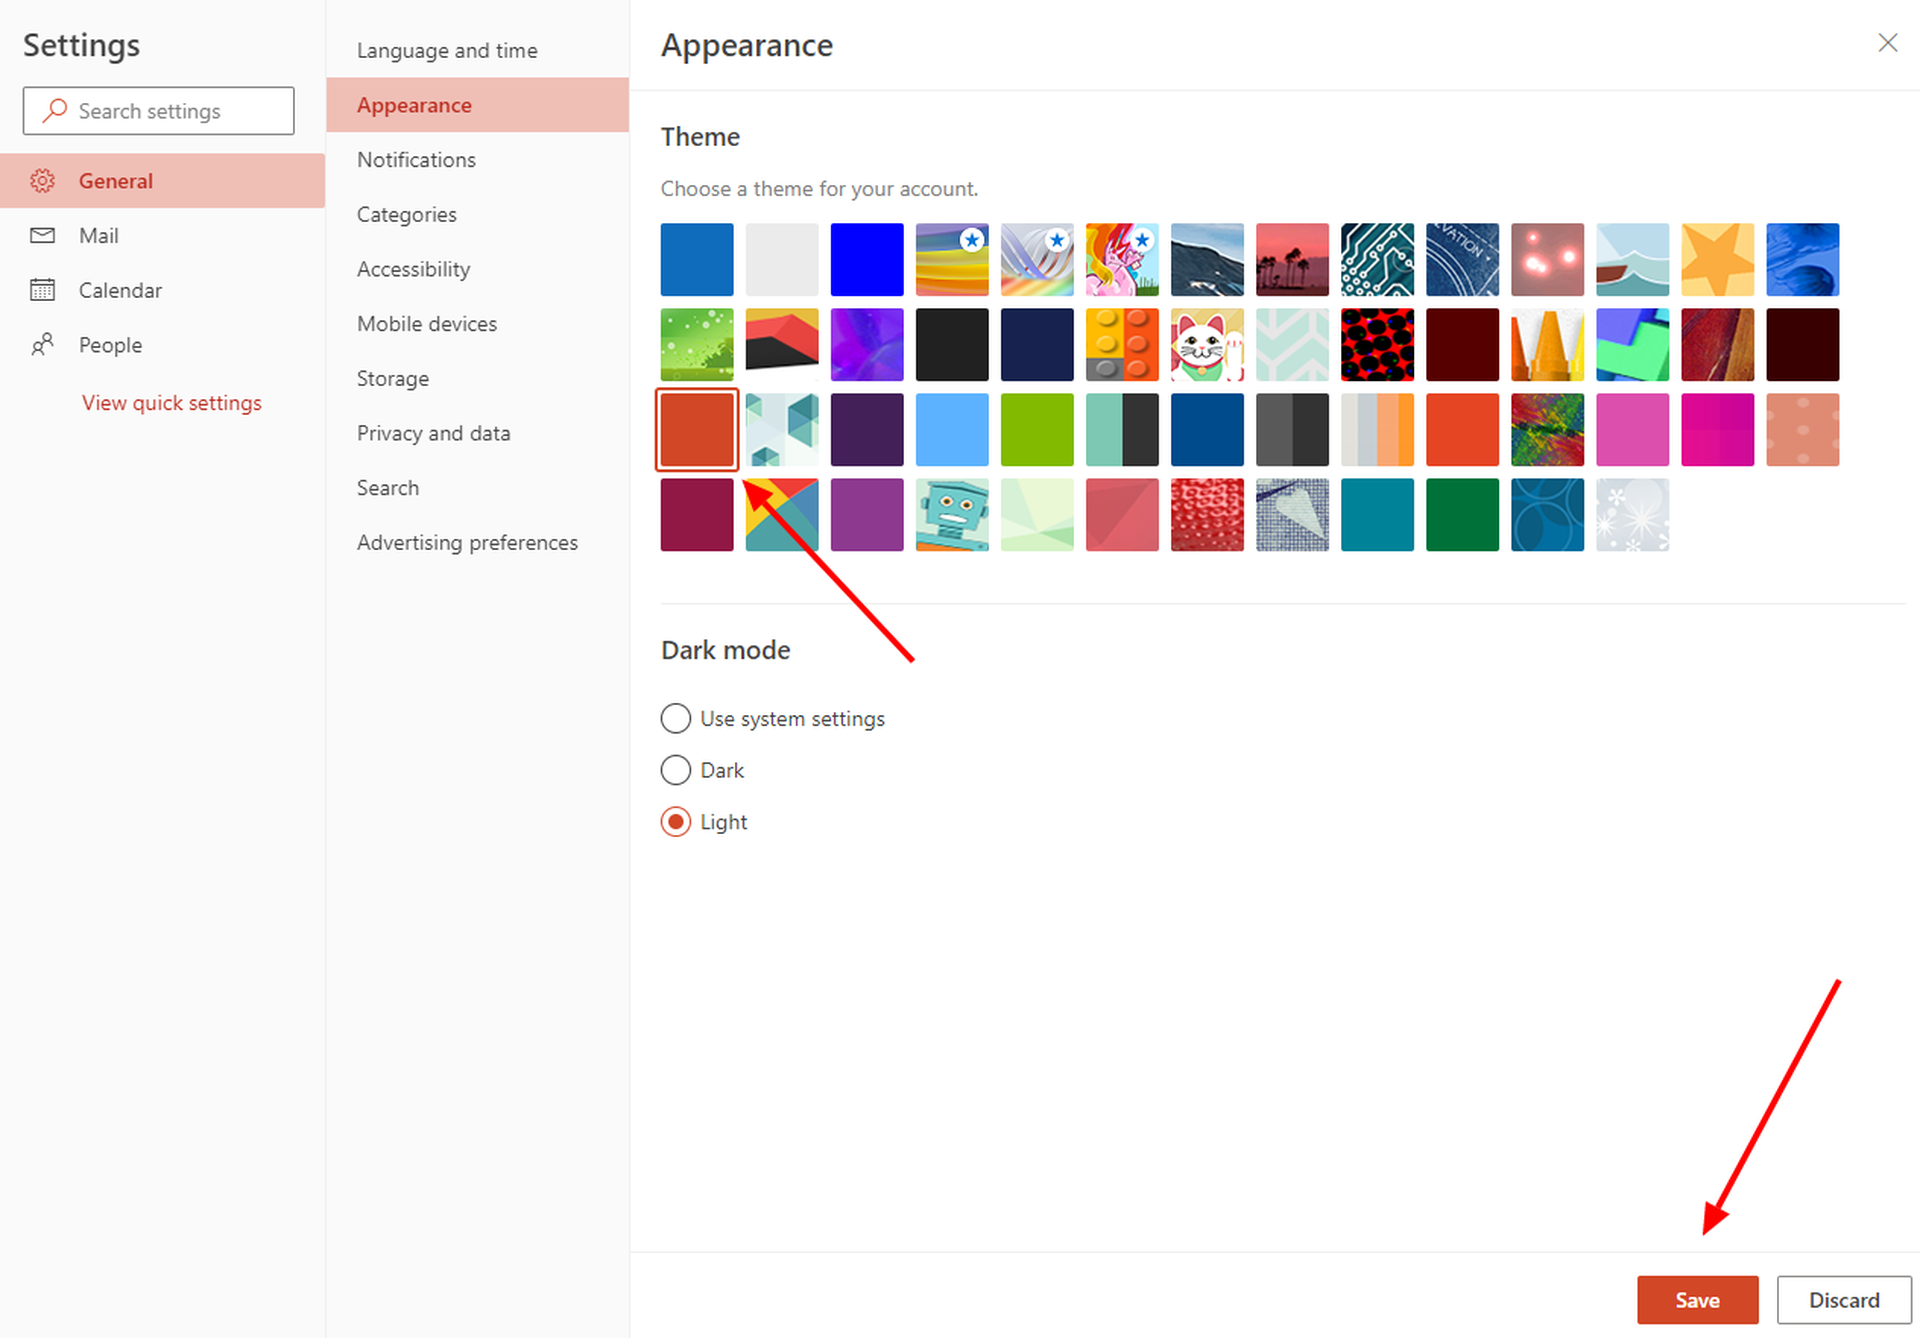
And there will be a plethora of themes with various color schemes to pick from. Click on your desired theme and then press “Save” to save the changes.
How to change Outlook theme on MACs?
Do you want to learn how to change Outlook theme on MACs? Then follow the instructions below to activate and modify the theme of your app:
- Go to Outlook > Preferences > General.
- Select Light, Dark, or System in the Appearance area (the latter will allow Outlook to match the system’s default setting).
- Click the desired theme in the Theme section.
- Select or uncheck the activate window transparency check box to activate or disable window transparency.
- Examine the effect of your changes as you make them, and when you’re satisfied with the results, dismiss the General window.
This is all you need!
This way, you’ve learned how to change Outlook theme; you can also learn how to create a Quick Poll in Outlook by visiting our guide!
FAQ
Here are some frequently asked questions about Outlook. Let’s dig into it!
How to create an e-mail signature in Outlook?
To configure an email signature in Outlook
- Options may be found in the Tools section of the main menu.
- Navigate to the Mail Format tab and choose signature.

- Click New under the signature tab.
- Enter the appropriate name for the new signature and then click OK.
- Under “Edit Signature“, type your preferred wording, then click OK and OK again.
Done!
How you can access an AOL e-mail account with Outlook?
To configure an AOL email account in Outlook:
- Select Tools from the account settings option in Outlook’s main menu.
- Navigate to the e-mail tab and then click NEW.
- Make that Microsoft Exchange, POP3, IMAP, or HTTP are chosen.
- Next should be clicked.
- Enter your entire AOL e-mail address and your name.
- After that, make sure the internet E-mail is selected by clicking next.
- Click next once more.
- Now, under account type, pick IMAP.
- Enter “imap.aol.com” as the incoming mail server.

- Enter “smtp.aol.com” as the outgoing mail server (SMTP).
- Enter your AOL screen name as the username, followed by your AOL password.
- Go to the outgoing server tab by tapping on additional options.
- Check the “My outgoing server” (SMTP) request authentication box.
- Go to the “Advanced” tab and enter “587” for the outgoing server (SMTP) under server port numbers. After that, click OK, then Next, and finally click
- Finish by clicking the close button.
It is that simple!
How can you block any email address in Outlook?
You must enter the e-mail address of the undesired sender into your system:
- To accomplish this, use the Outlook.com list.
- In the Outlook.com toolbar, click the settings button.
- More mail options may be found in the menu.
- Follow the safe and blacklisted senders link under the preventing spam e-mail option.
- Select Blocked Senders.
- Now input the undesirable e-mail address that needs to be blacklisted.
By the way, if you are annoyed with spam emails, learn how to end all spam emails in Outlook here!

