Today we are here to show you how to create and configure a child account in Windows 11? Since Windows was first released, it has been possible to set up separate accounts for numerous users, which is a terrific way to allow family members to share a computer without worrying about their data being lost. Everyone feels like they have their own PC because each user has their own place. It’s also possible to expressly create a child account in Windows 11 (as well as Windows 10), allowing you to let your children use your computer while simultaneously monitoring their safety and behavior.
A child account on Windows 11 is more than just a different user account because it integrates with Microsoft Family Safety. You can control spending, screen time restrictions, and web filters for their Microsoft account. We’ll start by demonstrating how to create a child account in Windows 11 if you wish to share your PC with your kid. Now let’s learn how to create and configure a child account in Windows 11.
How to create a child account in Windows 11?
Although it can take some time, creating a child account in Windows 11 is not a particularly challenging process. What you must do is as follows:
- On your computer, launch the Settings app.
- From the menu on the left, select the Accounts section.
- Select Family and other users.
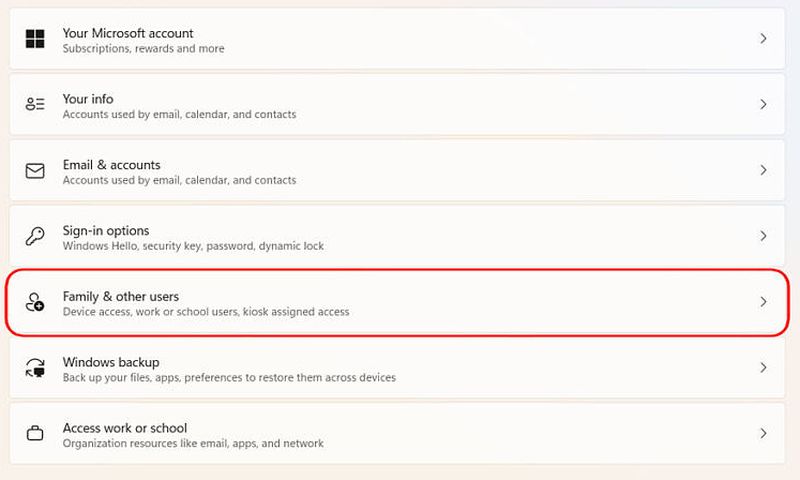
- A separate Family page is available in Windows 11’s more recent releases, and this is what you should use.
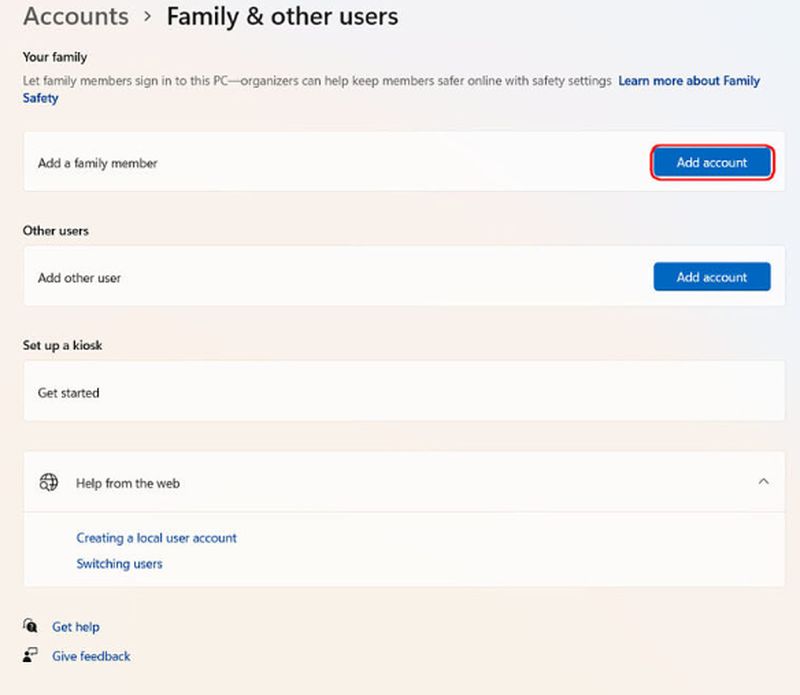
- Select Account Add (next to Add a family member).
- If your child already has an email address (it must be a Microsoft account), you will be requested to enter it; otherwise, you can create a new email address, which is what we’ll do in this instance.
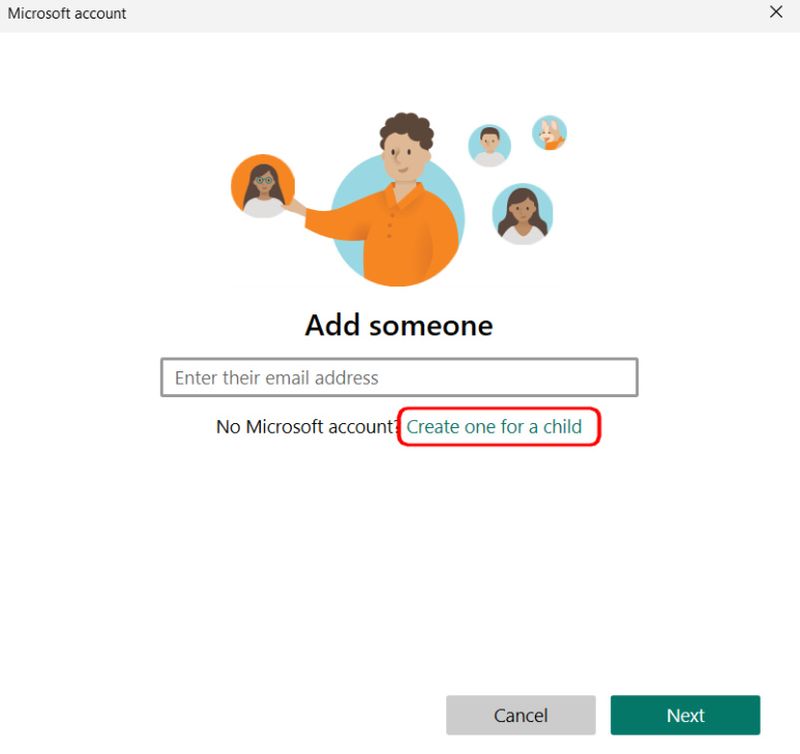
- A new email address and password must be created.
- Enter the birthdate and nationality of your child.
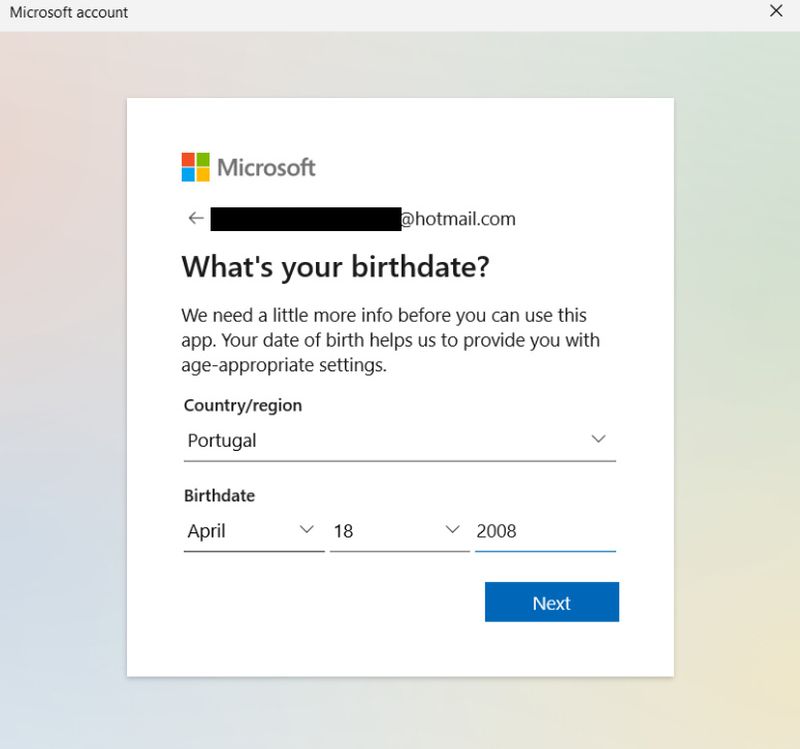
The procedure could change from here depending on the age of the child. Only smaller kids should proceed with the next steps; for older kids, the procedure ends here.
- If your child is younger, you’ll need to enter into the account you just made with their email address and password.
- Verify that you are the parent or legal guardian of the child and then click Continue.
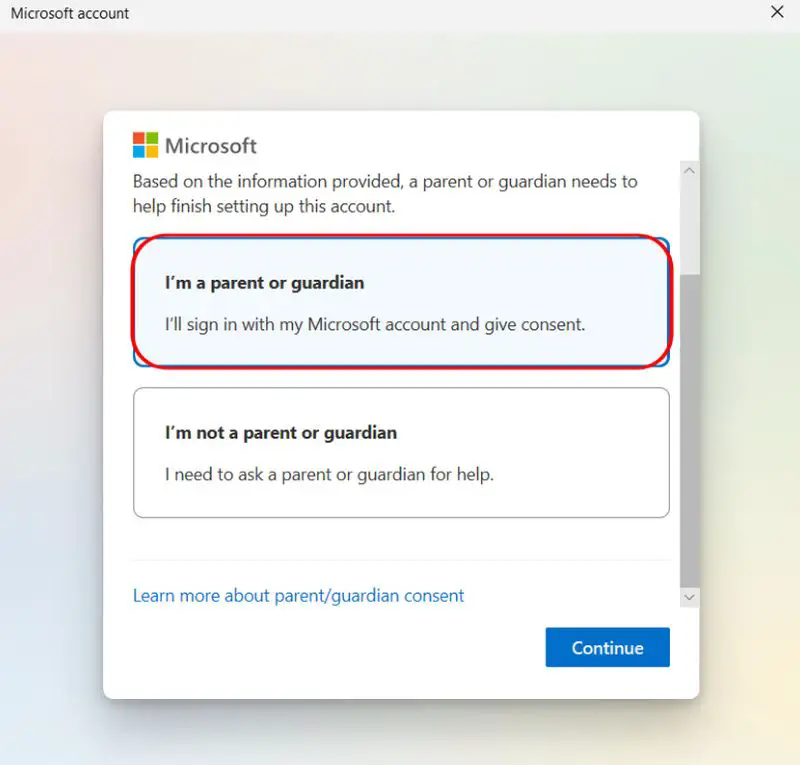
- Log into your Microsoft account, type your name to confirm that you are giving permission, and then click Yes, I agree.
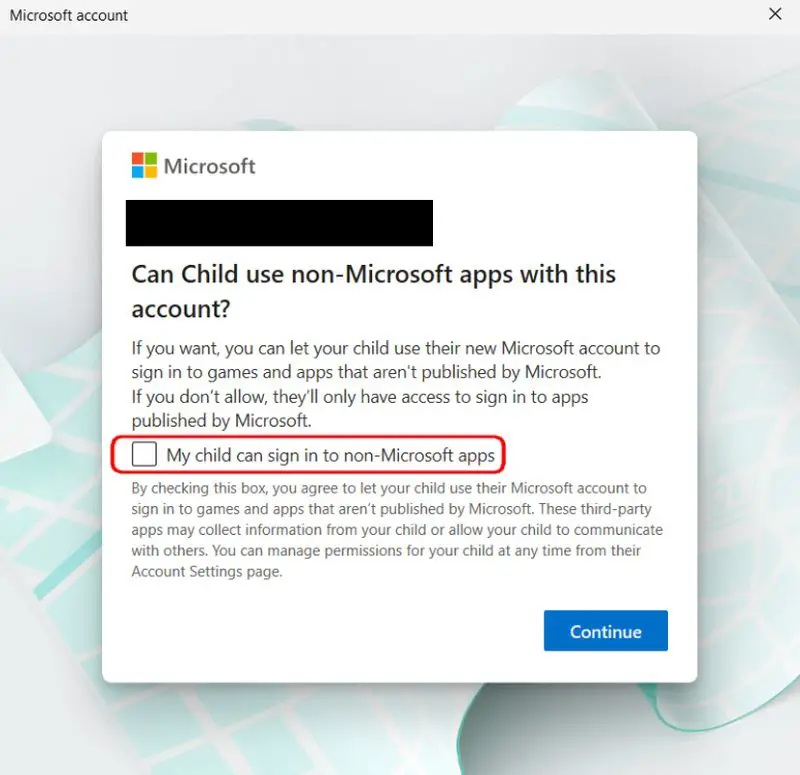
- Click Continue after confirming that you want your child to be allowed to sign into non-Microsoft apps.
- Verify the settings you want for the child’s account one last time. You may choose whether you want to get activity reports from your child, set a maximum age for the apps and games they can install, and enable browser and search filtering. You can decide whether a youngster must request permission before downloading an app or playing a game from the Microsoft Store.
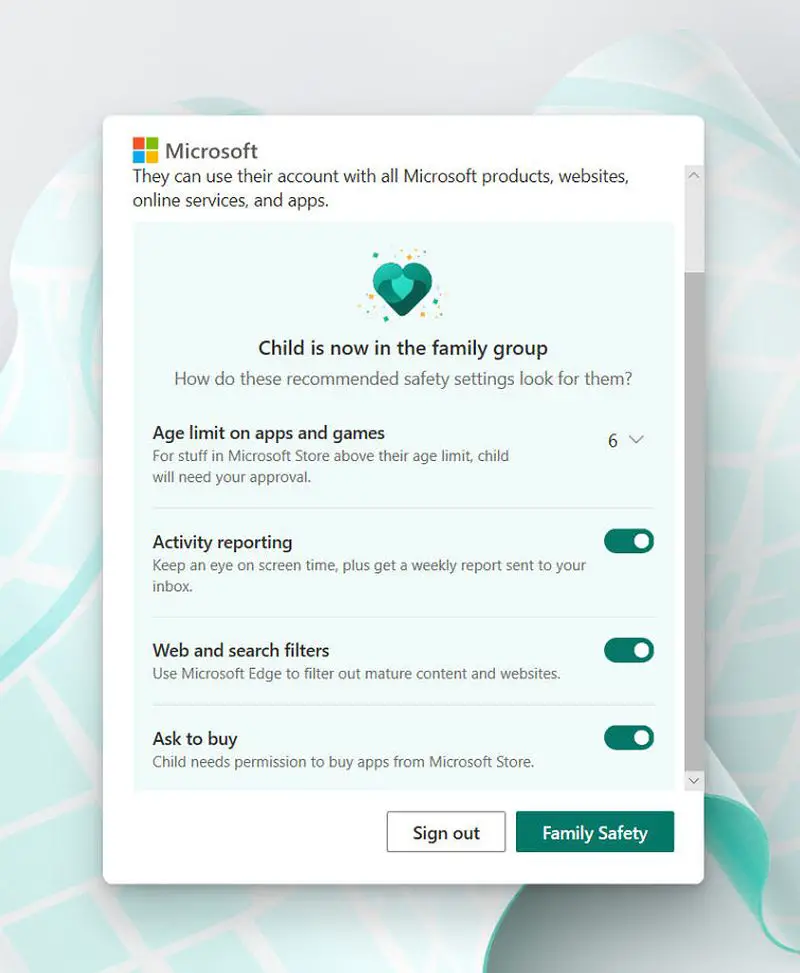
- Click Sign out to exit the window and preserve your settings after that.
Once the account has been created, you must sign into your child’s account on the computer to complete the setup. Your child’s account will be on the left side of the lock screen when you access it by pressing the Windows key + L on your keyboard. Select it to log in and configure it. This process will be similar to how you initially set up your own account, but streamlined. You can configure Windows Hello or a PIN, for instance, to sign in.
How to configure a child account in Windows 11: Use Family Safety
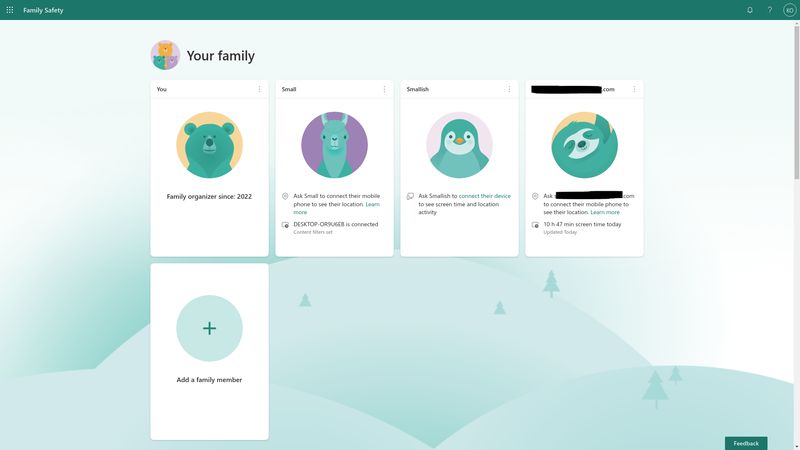
You are able to control a variety of settings for your child’s account with Microsoft Family Safety. To view your family and modify settings for each account, utilize the new Windows 11 Family app or go to Microsoft’s family group website. Additionally, you may control these settings via the Microsoft Family app for iOS or Android. The steps to administering a child’s account with Microsoft Family Safety are summarized below:
- Open the Family app on your computer (you can download it from the Microsoft Store). Alternately, you can access these options by going to the Microsoft Family Safety website.
- To view your child’s current settings, click on their profile image.
- All the settings are listed here, along with your child’s activities. To fine-tune the settings, even more, use the side menu on the left.
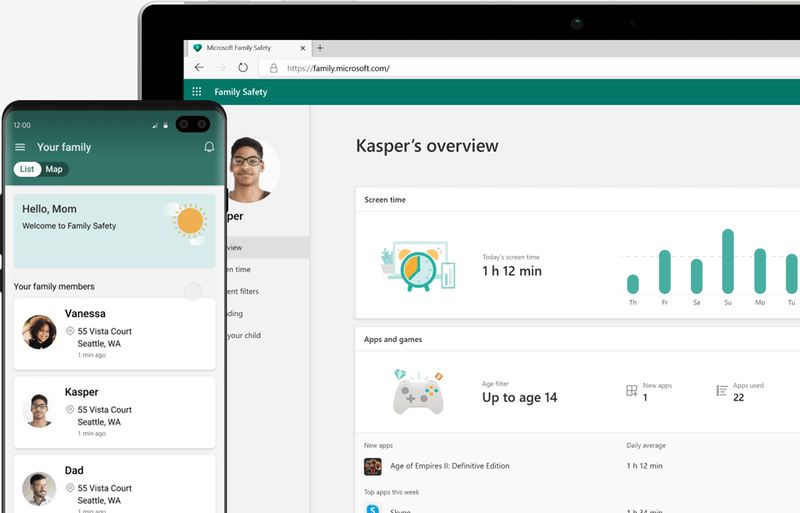
- You can check how much time your youngster has spent using electronics in the Screen Time area. If they use multiple devices, you can view a breakdown by both app and device. Along with basic screen time limits, you can also set time limits for particular apps. You can change the settings on your child’s Xbox as well.
- You can ban access to particular content in the Content filters section to protect your youngster. Web filtering necessitates the use of Microsoft Edge by the child as their browser, but you may restrict or allow access to particular websites and enable SafeSearch in Bing. Additionally, mature content might be broadly restricted. Additionally, you may establish age-based content controls for apps and games.
- The Spending tab allows you to view your child’s purchasing patterns on the Xbox and Microsoft stores. You can add a credit card or a balance to their account. You might also mandate that if they pay with a credit card, they must first secure your approval before completing a purchase.
You can use this website to see your child’s location if they have a smartphone with Microsoft Launcher or Microsoft Family Safety.
Conclusion
In this post, we’ve explained how to create and configure a child account in Windows 11. There are different procedures depending on the age of the child. In summary you’ll learn:
- How to create a child account in Windows 11? Creating a child account in Windows 11 is not a particularly challenging process, you can complete the task by following 8 steps.
- How to configure a child account in Windows 11? You are able to control a variety of settings for your child’s account with Microsoft Family Safety, learn details above!
Did you check out the latest Windows 11 features? Hacker alert, voice commands, and more are launched. Find out how to install Android apps on Windows 11 by following our simple guide.

