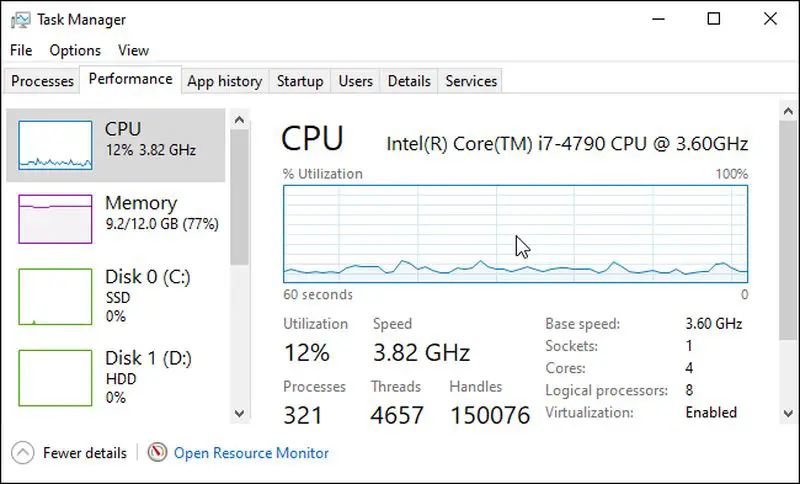
Today we’ll tell you how to show or hidden performance panels in Windows 10. If you work daily with Windows PCs and you have found the need to check the available RAM, the CPU consumption, or simply the Internet connection speed we show you two methods with which you can quickly take a look.
Sometimes the computer starts to run slow and it can be for various reasons. Being able to see these usage statistics and metrics in real-time helps to find out why.
How to show or hidden performance panels in Windows 10?
Now that the heat is coming it is interesting to check if the computer temperature is within a reasonable range to avoid the dreaded Thermal Throttling.
The first method we are going to show you is to activate the hidden performance panels and for that, we have to follow a few simple steps. We will guide you through the whole process so that you don’t get lost:
- Open the Task Manager either by right-clicking on the Windows bar and choosing the option or by pressing the key combination Ctrl + Shift + Esc.
- Once opened click on More details, this is because Windows by default shows little information.
- Click on the options menu at the top and activate Always visible.
- Click on the Performance tab.

- Click on what you want to monitor and double-click on the graph on the right, so that you have the graph individually above all windows.
- You can change its position and size to your liking.
To view the Task Manager again you just need to right-click on the chart and a drop-down menu will open. Here you have to deactivate the summary view of the chart.
If you would like to monitor more than one chart, you can simply double-click on the left part of the charts and resize the panel to show what you want.
The second method is the Xbox Game Bar performance panel, which can be opened quickly with the Win + G key combination.
You will be able to pin the panel you want and configure what values you want it to display at all times:
If that keyboard shortcut doesn’t work we will have to open it manually the first time. For that we go to System Settings -> Games -> Screenshot within the Windows 10 settings. We look for the Xbox Game Bar and we can activate the key combination that we mentioned above Win + G.
Following these steps, you will be able to take a look directly and without third-party software at the metrics of use of our PC, check that there are no services in the background or hung consuming CPU and RAM, and much more.


